What kinds of content do you interact with on a daily basis?
Let's say you're an e-commerce business looking for a new CRM tool. You may visit different software sites and come across standard, one-size-fits-all marketing messaging that applies to you but doesn't go deep enough into your specific industry or pain points.
This is where website personalization comes in.
When running a website, it's important to personalize the content that appears so potential customers are provided with a solution right off the bat. Personalizing your website can mean showing custom content to users from specific locations or displaying specific messaging for a period of time (E.g., showing content from an event the weeks before and after).
Website personalization allows you to showcase relevant messaging tailored to each individual who visits your site. Unfortunately, it's not automatically available on WordPress, but don't worry. We'll show you a few tools to help you show personalized content on your WordPress site.
FYI: This article is part of our WordPress 101 series that covers the basics of marketing with WordPress from start to finish. We’ll share tips and best practices as you set up your website and begin thinking big picture about how you want to market your brand.
Stay tuned for more at the end of this blog post.
What is website personalization?
Website personalization is the practice of creating customized experiences for visitors to a website based on their preferences, behaviors, demographics, and other data. It involves tailoring the content, layout, offers, recommendations, and even navigation paths to match the specific needs and interests of individual users or segments of users.
Here's how it works:
- Data collection: Websites collect various types of data about their site visitors, including browsing history, demographics, location, device type, past purchases, and more. This data can be gathered through data integration tools, cookies, user accounts, analytics tools, and other tracking mechanisms.
- Segmentation: Based on the collected data, visitors are segmented into different groups or categories. These segments can be broad (e.g., first-time visitors vs. returning visitors) or highly specific (e.g., visitors interested in a particular product category).
- Personalization rules: Website owners define rules and algorithms to customize the user experience for each segment. These rules dictate what content, products, recommendations, or promotions are displayed to visitors in real time.
- Dynamic content delivery: When a visitor accesses the website, the personalization engine dynamically assembles the page content based on the relevant rules for that visitor's segment. This may involve displaying tailored product recommendations, personalized offers, targeted messaging, or customized layouts.
- Continuous optimization: Personalization is an ongoing process that requires constant monitoring and optimization. Website owners analyze user interactions, feedback, and performance metrics to refine their personalization strategies over time and improve the effectiveness of their campaigns.
By using data like browsing behavior, demographics, and past purchases, you can employ website personalization and display content that's most likely to engage leads. In a sense, personalizing what lives on your website is a modern type of customer service, anticipating the answers people are looking for and serving up relevant messaging and answers more quickly.
You can also go further to answer these questions by setting up an RSS feed on your WordPress site and giving your customers the option to stay up-to-date with the content you make.
For example, you want to upsell products on your e-commerce site. With website personalization, you can use purchase history data to inform the messaging that appears in pop-ups or checkout screens. Think of Amazon's Frequently bought together section.

You can also use website personalization for much simpler things, like the first greeting people see as they land on your website. Depending on the time of day someone visits your site, the greeting can be customized with a logged-in customer's name ("Hello, Kelly") or simply with time indicators like "Good morning!" or "Good afternoon!"
What does personalized content mean?
Personalizing the content on your website means serving different messaging or resources to specific groups of website visitors. This is made possible by collecting customer data to identify the users who may be most interested in one type of content over another.
At its core, using personalization on your WordPress website helps you create an incredible shopping experience that will build strong, unique relationships with every single one of your customers.
Why should you show different content to users on your WordPress site?
Tailoring the customer experience for every user visiting your site is arguably the best way to build a strong relationship with them. Everyone can appreciate a customized experience. It makes their journey much more enjoyable.
So, it's no surprise that showing different content to different users on your WordPress site is one of the best methods of enhancing their overall experience with your brand. For example, you might want to show specific content to users coming from a particular landing page or offer free shipping to customers in a single geographic location.
There are multiple ways you can personalize your WordPress site. Let's talk about a few options available to you.
The benefits of using a website personalization plugin
Using a website content personalization plugin can offer several benefits for website owners and visitors alike. These include:
- Improved conversion rates: By tailoring content, offers, and recommendations to each visitor's preferences and behaviors, personalization plugins can help drive higher conversion rates, whether the goal is to encourage purchases, sign-ups, or other desired actions.
- Increased engagement: Personalized content can capture visitors' attention more effectively, encouraging them to explore further, interact with the site, and return for future visits.
- Better targeting: Personalization plugins enable website owners to target specific audience segments with relevant content, promotions, and messages, leading to more effective marketing campaigns and higher ROI.
- Reduced bounce rates: When visitors encounter content that resonates with their interests, they are less likely to leave the site immediately, resulting in lower bounce rates and improved overall website performance.
Website content personalization plugins empower website owners to deliver more relevant, engaging, and conversion-friendly experiences to their visitors, ultimately driving business success and customer satisfaction.
The top 5 tools to personalize your WordPress site
In this article, we'll discuss five WordPress plugins for website personalization as well as OptinMonster, one of the top lead generation and conversion optimization tools on the market today.
Using OptinMonster to show different content to website visitors
OptinMonster is a popular lead generation software used by website owners, marketers, and businesses to capture email addresses and other valuable information from website visitors. It offers a variety of tools, such as pop-up forms, slide-in forms, floating bars, and more, to prompt visitors to subscribe to newsletters, download resources, or take other desired actions.
OptinMonster provides features like targeting specific segments of website visitors, A/B testing different opt-in forms, and analytics to track performance. Its targeting rules allow you to display personalized campaigns to different site visitors based on a set of display rules.
To begin personalizing your WordPress content, you'll need to sign up for an OptinMonster account.
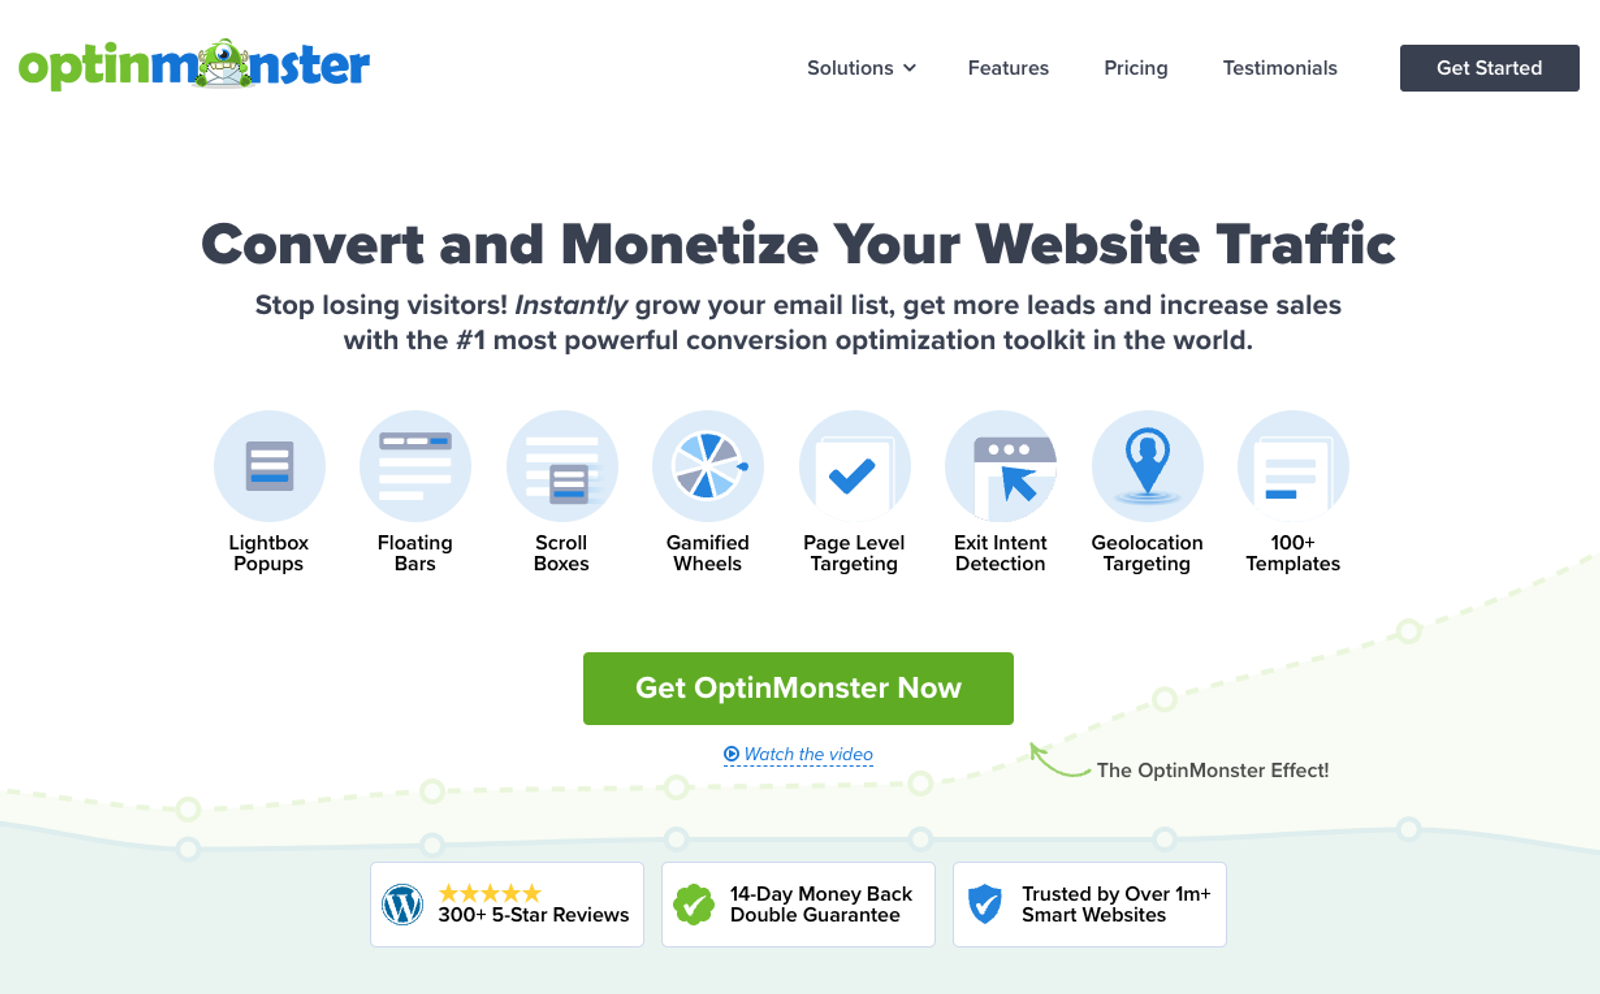
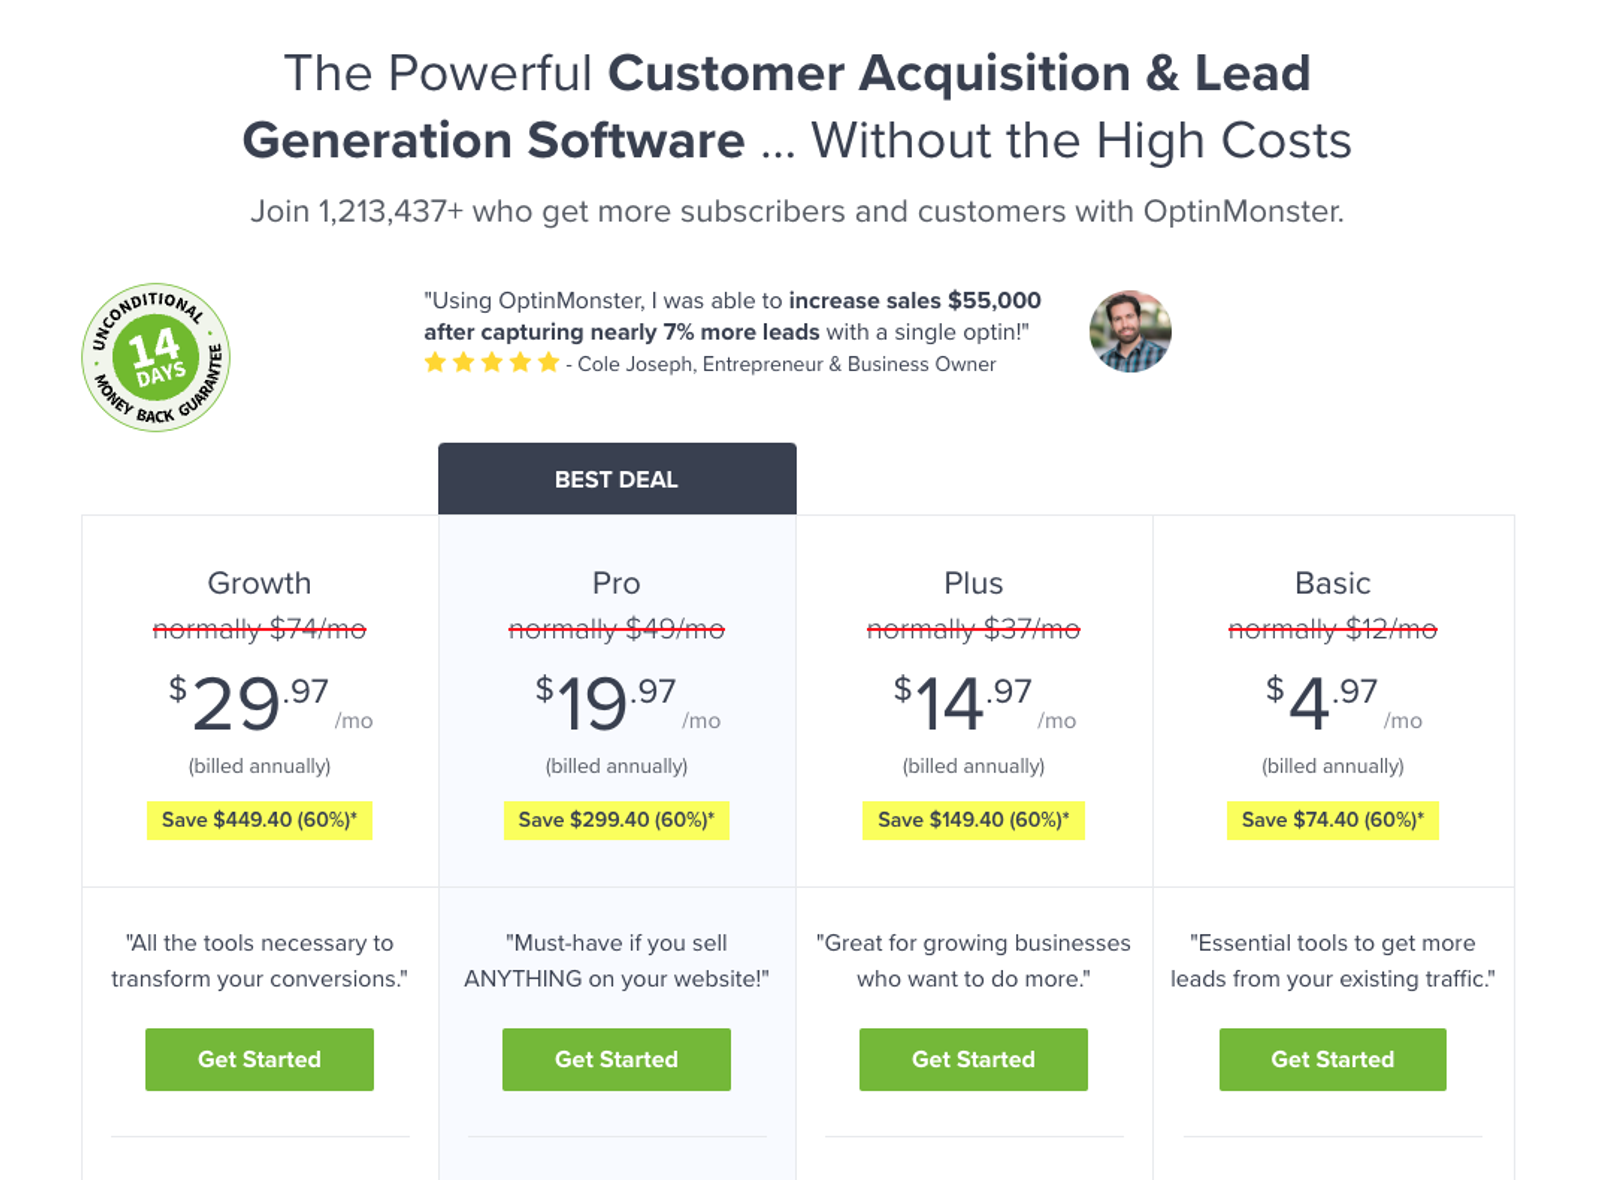
Once on their website, click the Get OptinMonster Now button to see the different plans available. OptinMonster isn't free, so you'll have to choose between the Pro or Growth plan to access all targeting features.
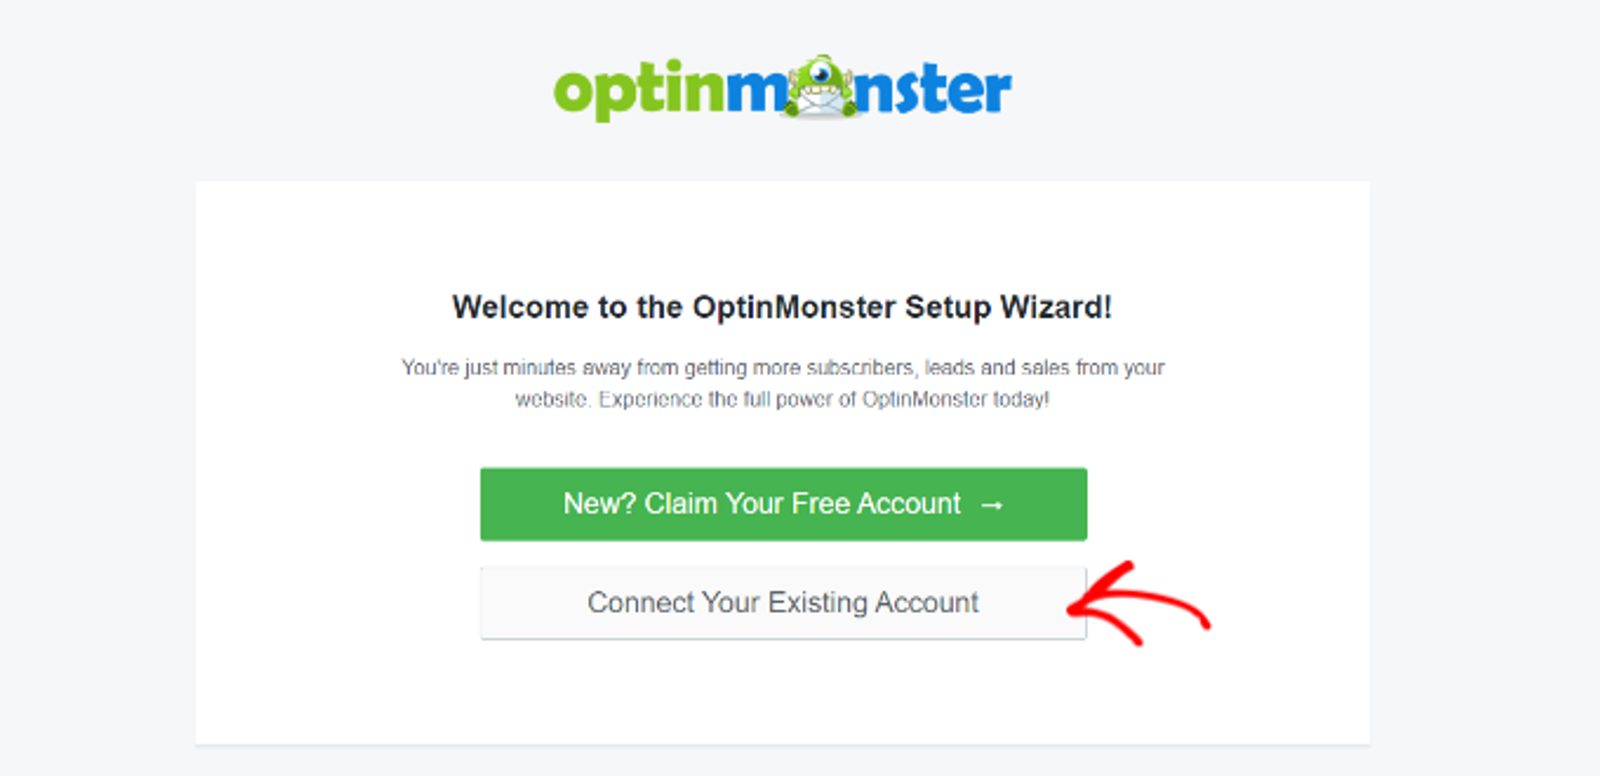
After you've chosen your plan, you need to install the OptinMonster plugin on your WordPress website. As you activate the plugin, you'll be greeted by the OptinMonster setup wizard in your WordPress admin dashboard.
Click the Connect Your Existing Account button to fully connect your site to your new OptinMonster account.
On the next screen, click the Connect to WordPress button to advance.
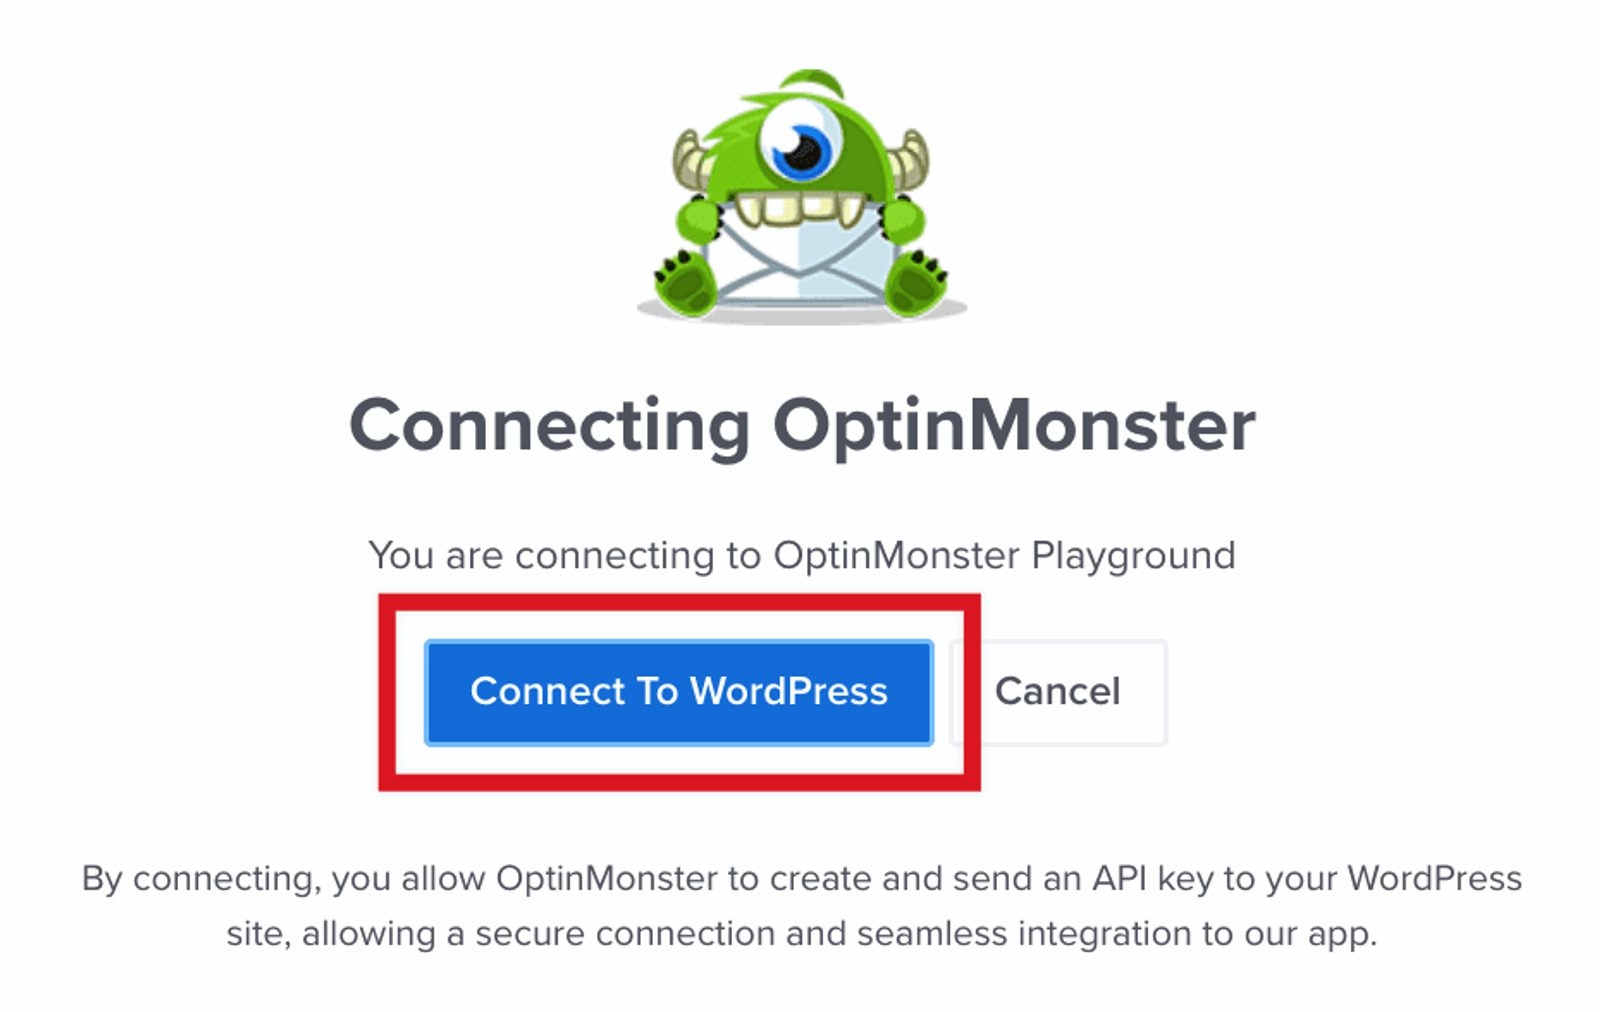
Once you're fully connected, navigate to OptinMonster then to Campaign in your WordPress dashboard. Click the Create Your First Campaign button to start designing the content you want to show your users.

You'll be taken to the OptinMonster site and asked to choose a campaign type and template. You have a variety of campaign types to choose from in order to show different content or targeted messages to your site visitors. Some options are a popup, an inline, a slide-in, a floating bar, and more.
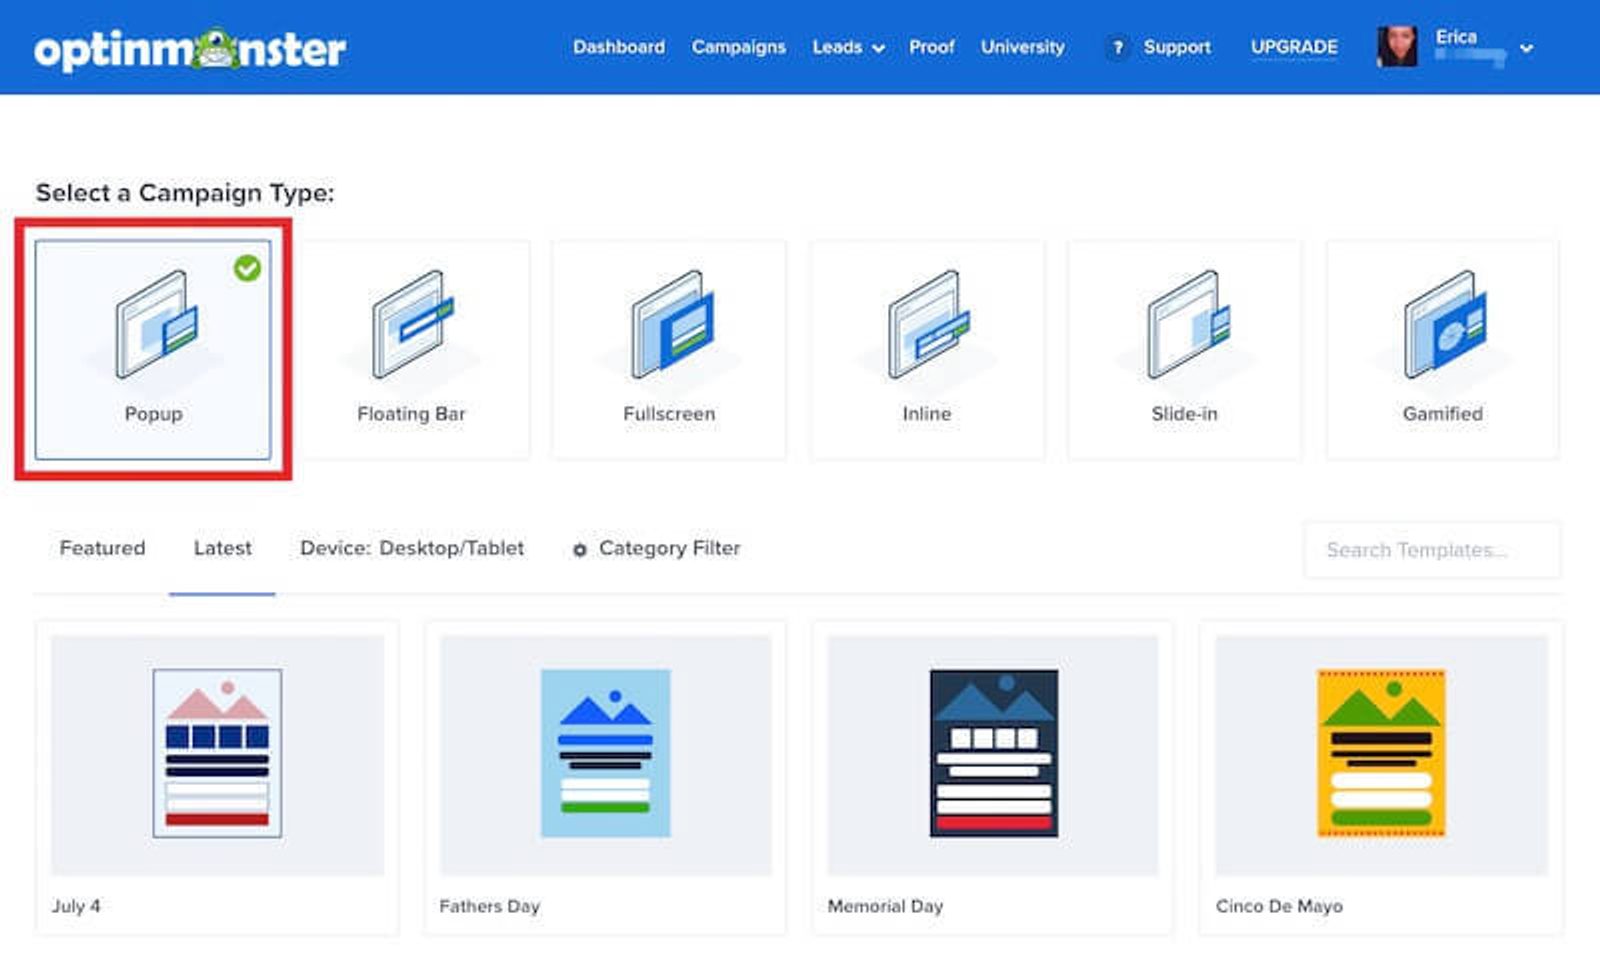
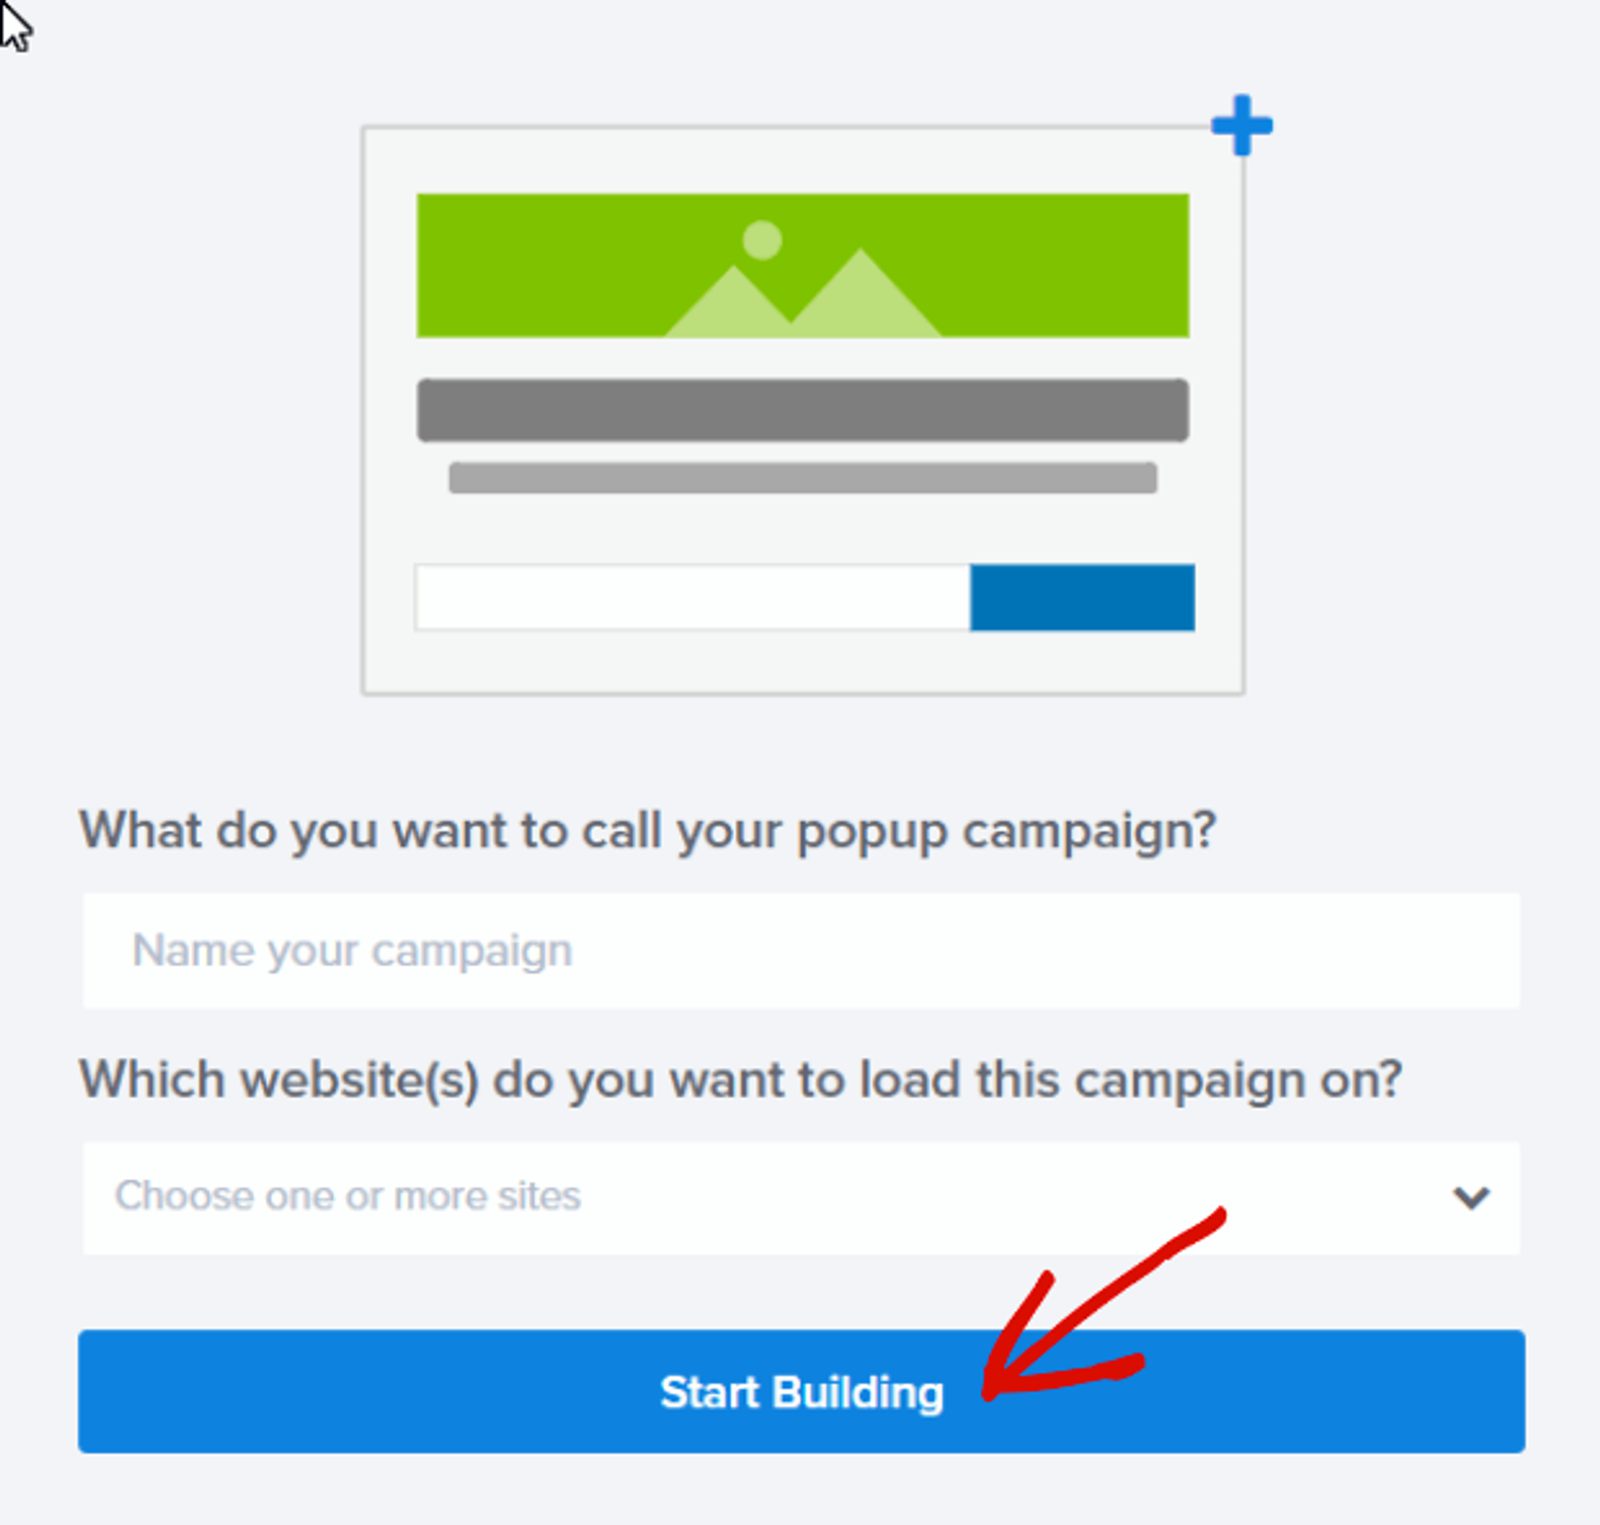
Each campaign type has dozens of templates to choose from. Select the template you prefer, and you'll be guided to a popup that asks you to enter a name for this campaign. Enter a name and click Start Building.
You'll land on OptinMonster's campaign builder interface, where you can drag-and-drop blocks to begin designing your new campaign. The live preview feature will also allow you to see what it looks like.
To start building, drag the elements from the left sidebar menu onto your chosen template.
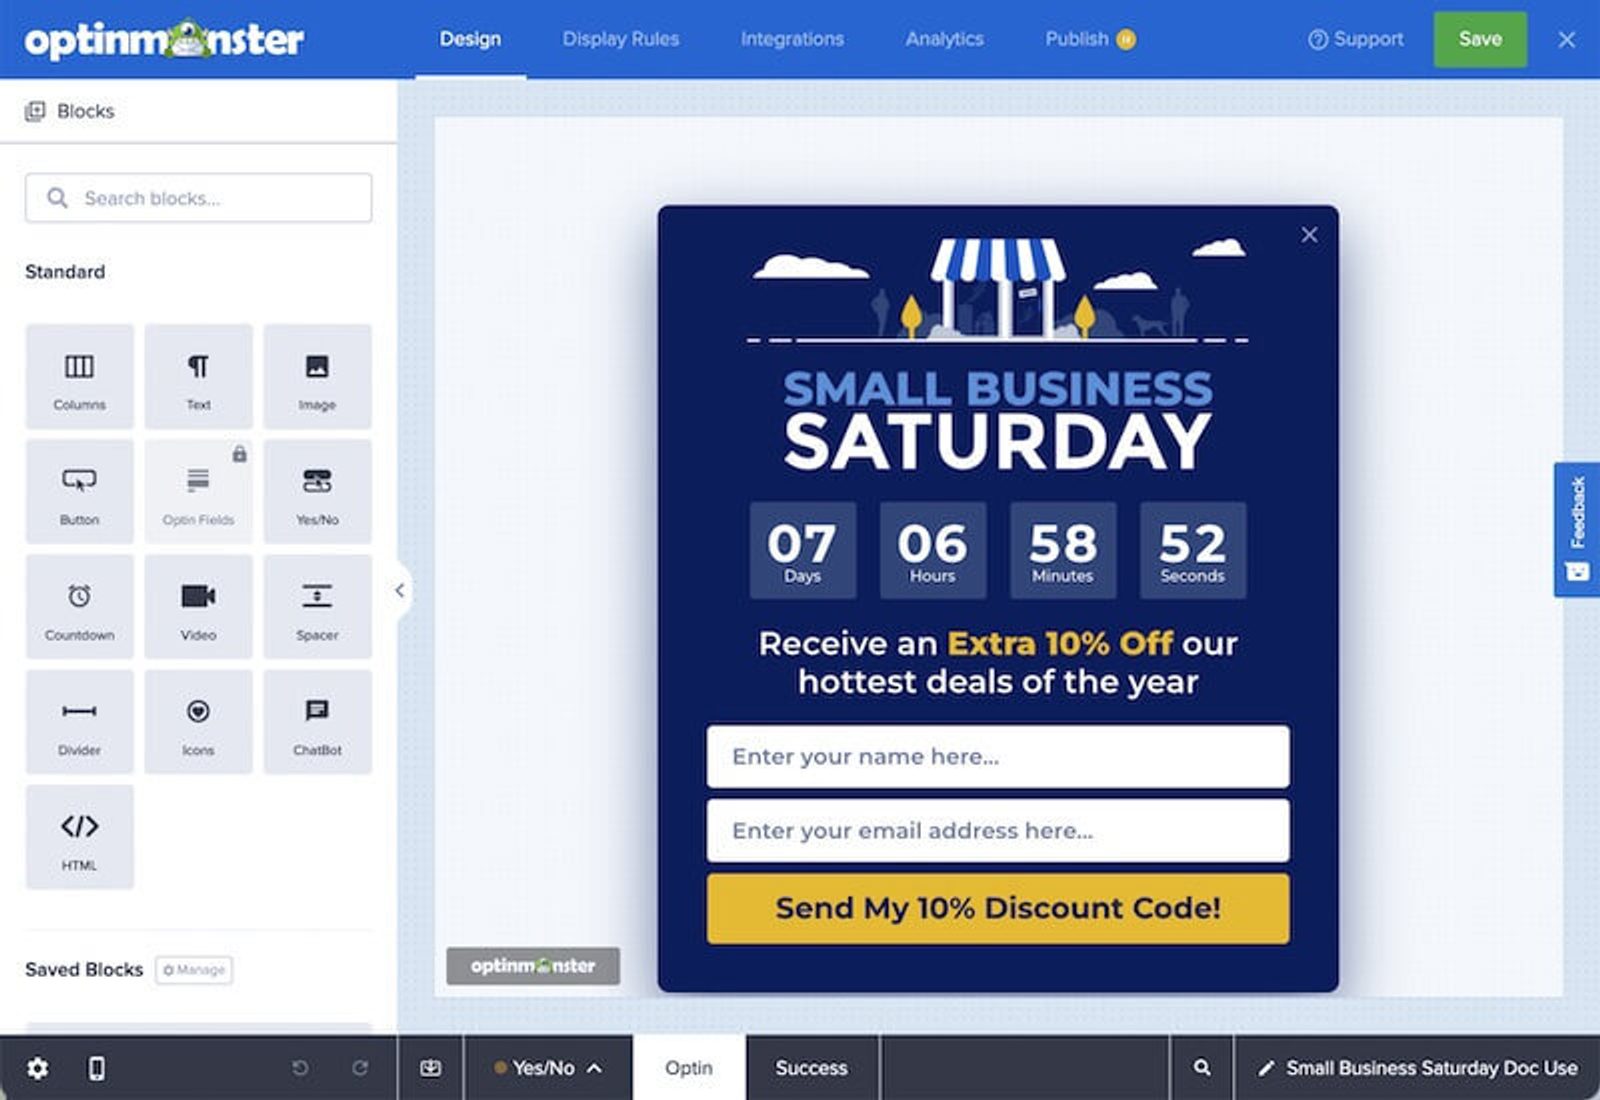
To tie your OptinMonster campaign closer to your marketing strategy, they connect with all of the leading email marketing tools so you can display an email sign-up form right on your website. As you build your campaign, think about the type of messaging and content you'd like to show specific users, like a free shipping code, smart product recommendations, or a discount coupon with their next purchase. You can get really creative here.
Once you're done customizing your campaign, click on the Save button at the top of the page.
Set up display rules for your campaign
Now that you've created a campaign, it's time to set up the display rules and decide when you'd like to show your campaign.
In the OptinMonster builder interface, choose the Display Rules tab to begin creating smart rule sets and selecting your targeting options.
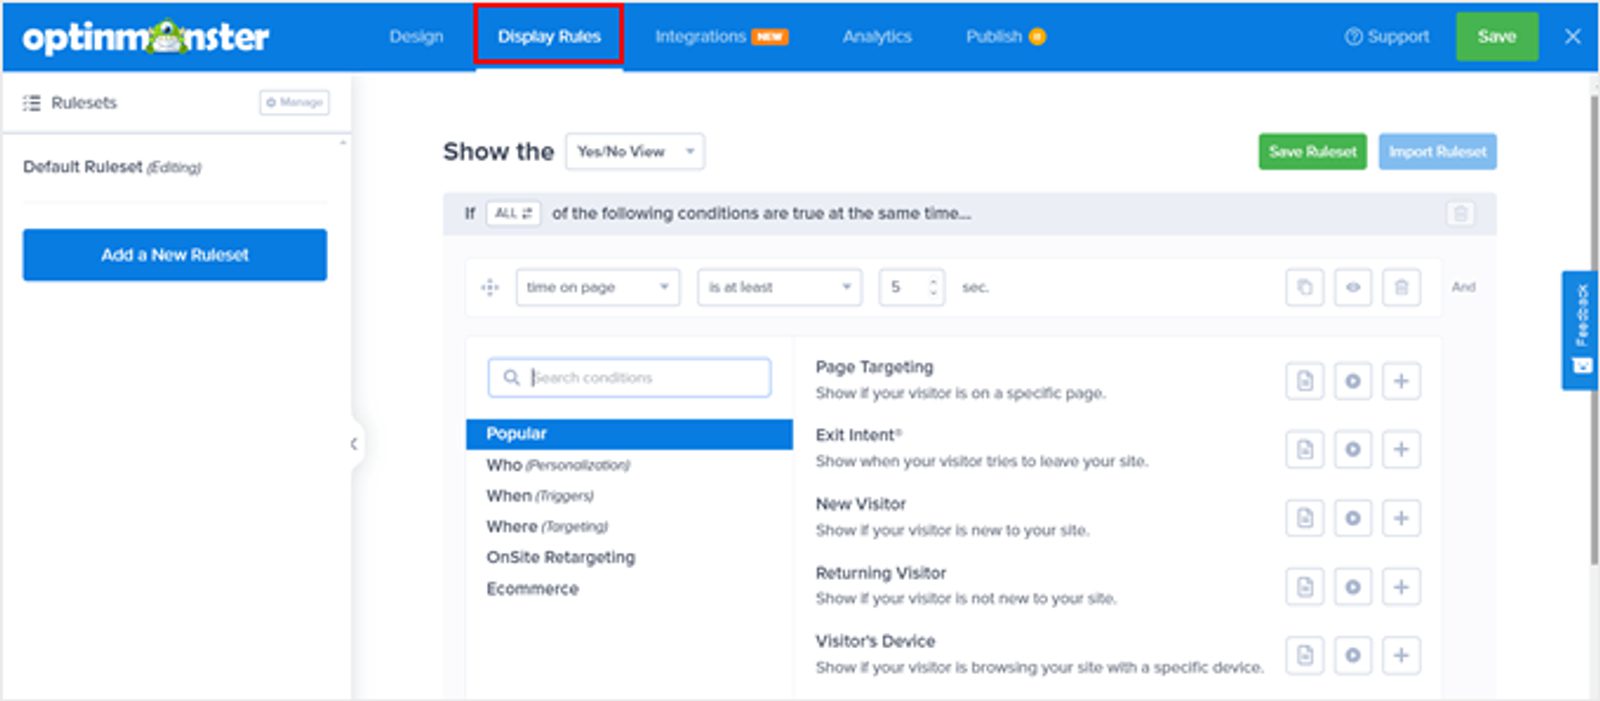
There are a bunch of options here, so let's take a look at each one.
Time-based triggers
Time-based triggers let you set display rules according to the time or date someone lands on your website. Put simply, you can show your personalized content on a specific date, on a particular day of the week, or at a specific time of day.
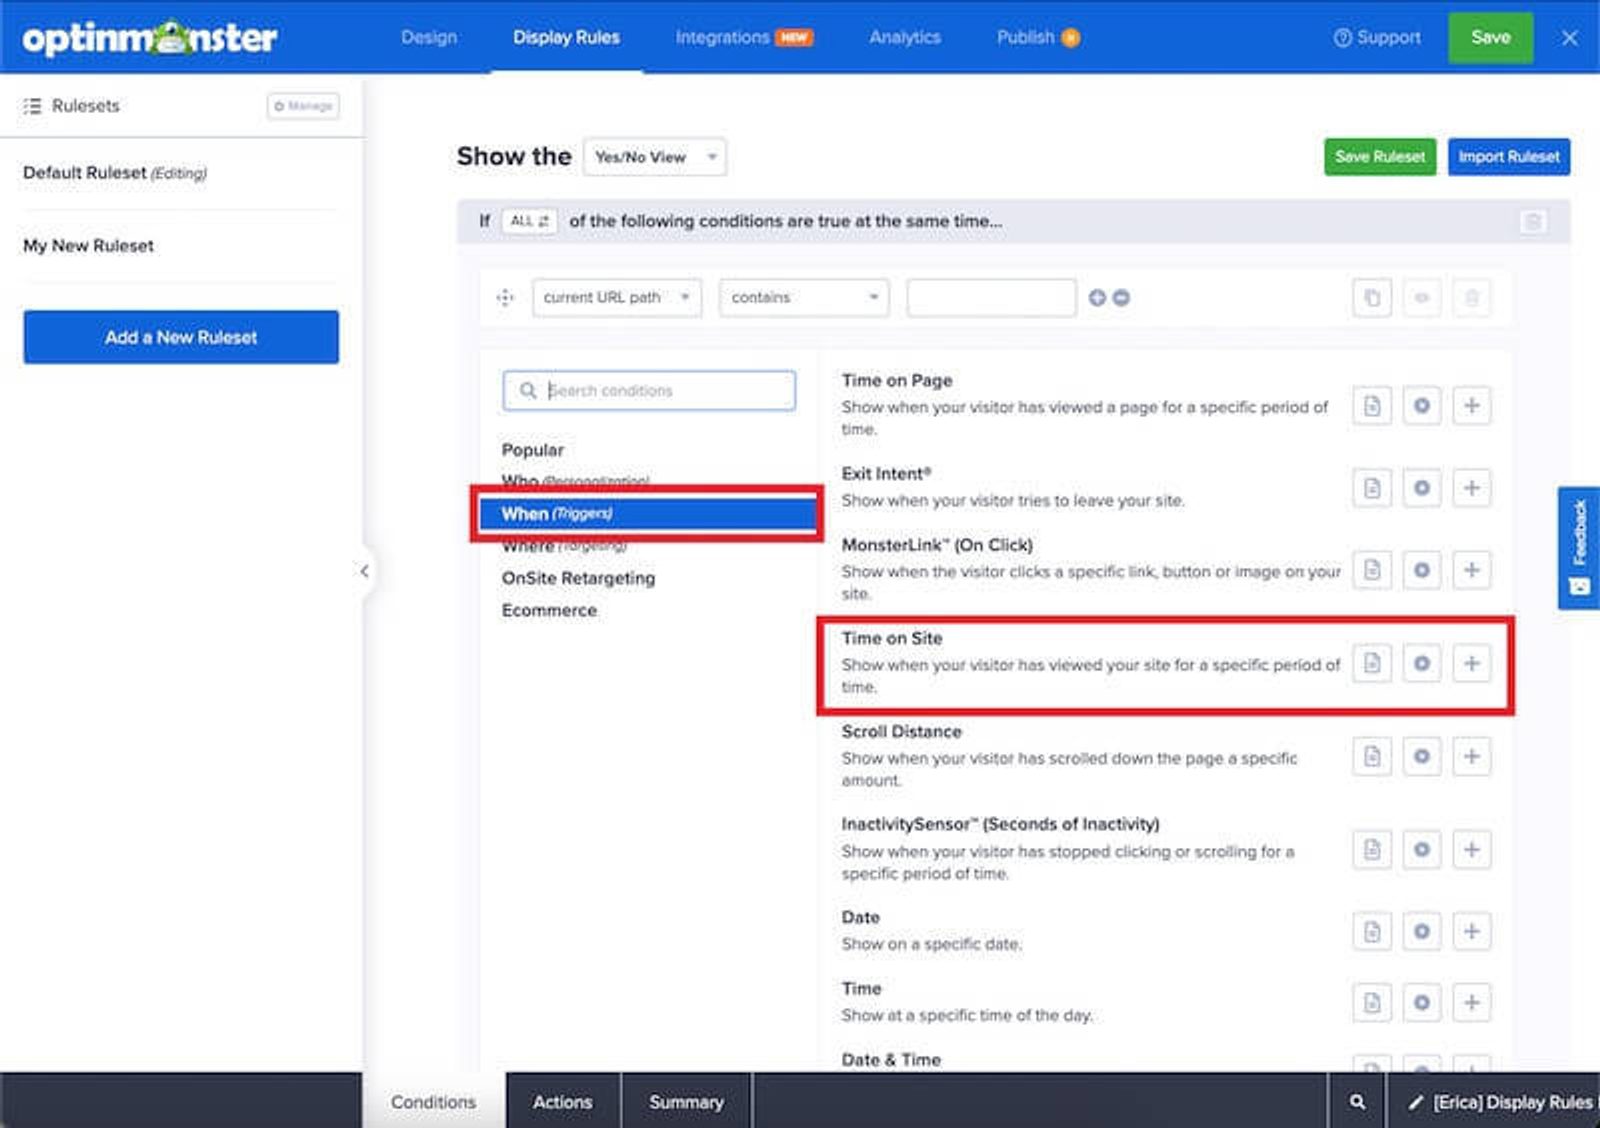
For example, you can show a specific popup or coupon on the screen when a visitor has been on your site for a specific period of time. This is helpful for keeping visitors on your site and incentivizing them to take action.
Targeting based on the criteria users match
The targeting section allows you to set display rules based on smart recognition. This means you can show a campaign to anyone coming from a particular channel (another website, a referral, another landing page, etc.). You're also free to target based on ad blockers, JavaScript variables, and cookies.
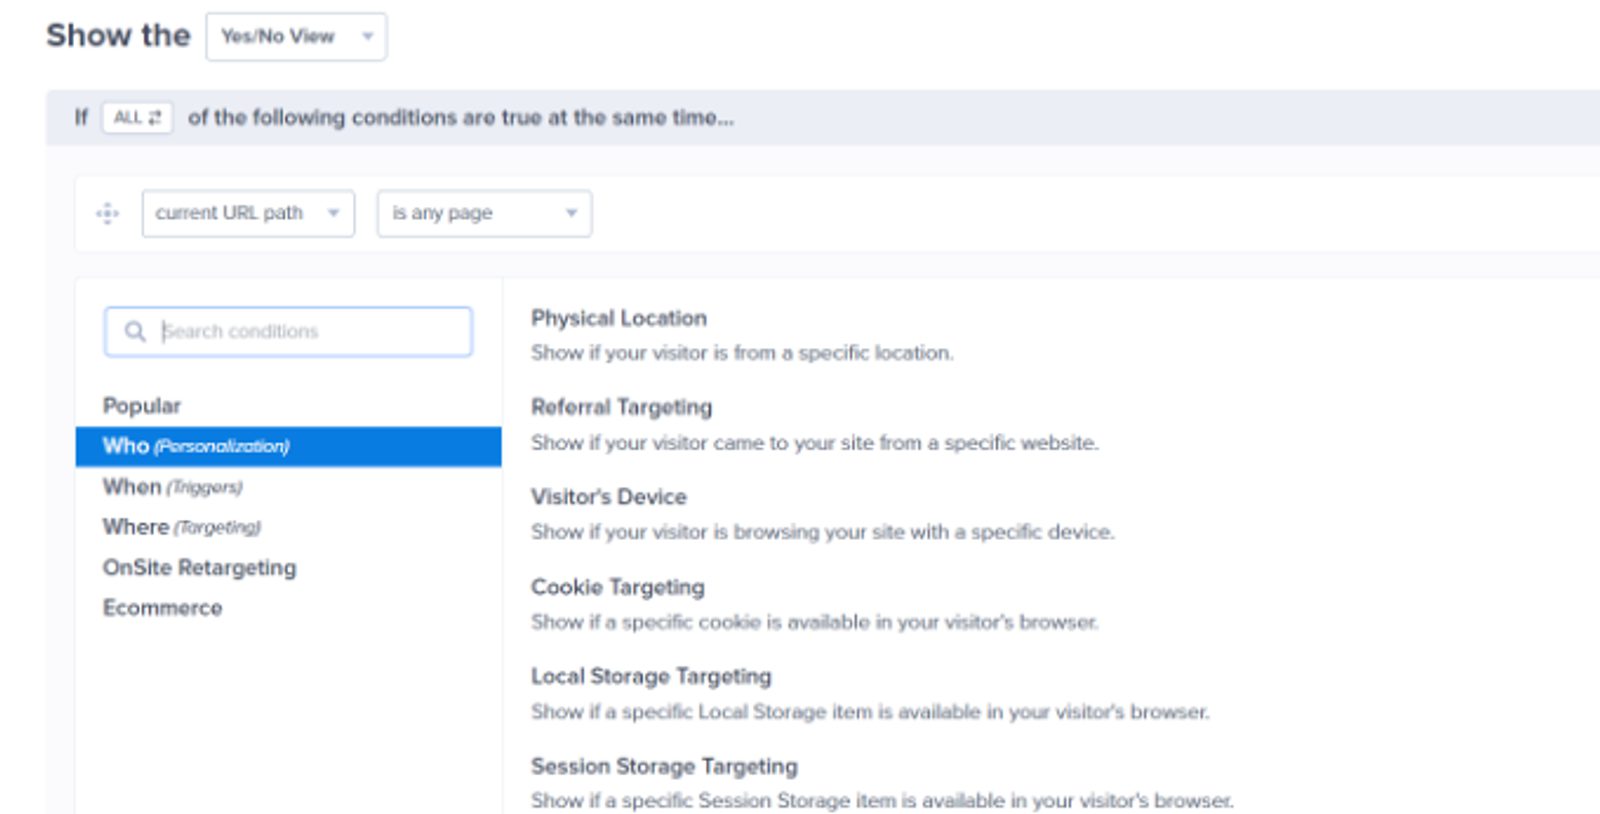
Another clever way to personalize your content based on particular visitors is to offer them something when they come from a specific URL. This can be anyone coming from an affiliate partner website that you'd like to offer an exclusive discount to.
Onsite targeting
You can also set onsite display rules based on the user's behavior. This means you can show personalized content or custom campaigns to returning visitors, new ones, those who have converted, those who haven't, those who are using specific devices, and other variables.
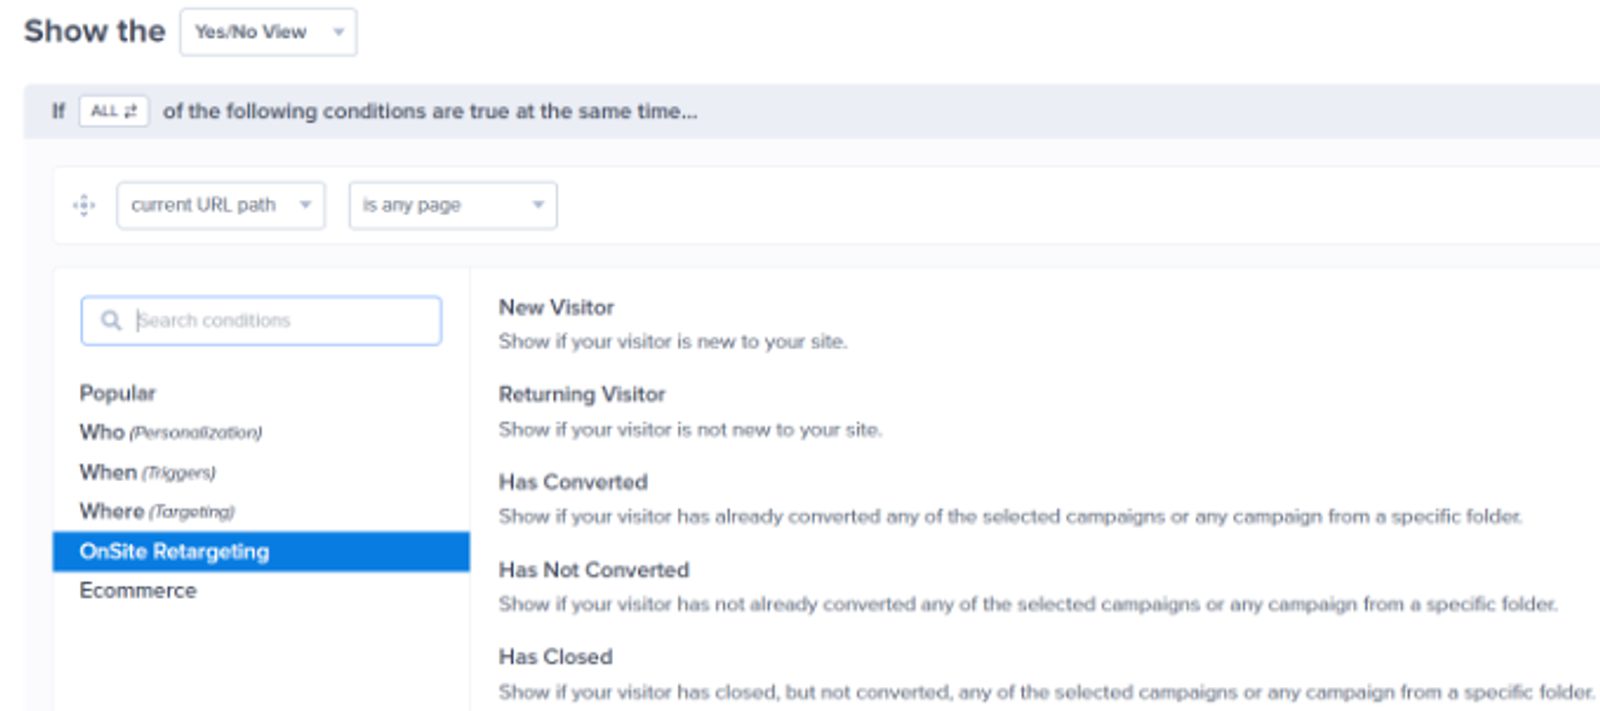
Plus, OptinMonster's smart tags can be used to show a user's name or location to personalize the content and overall experience even more.
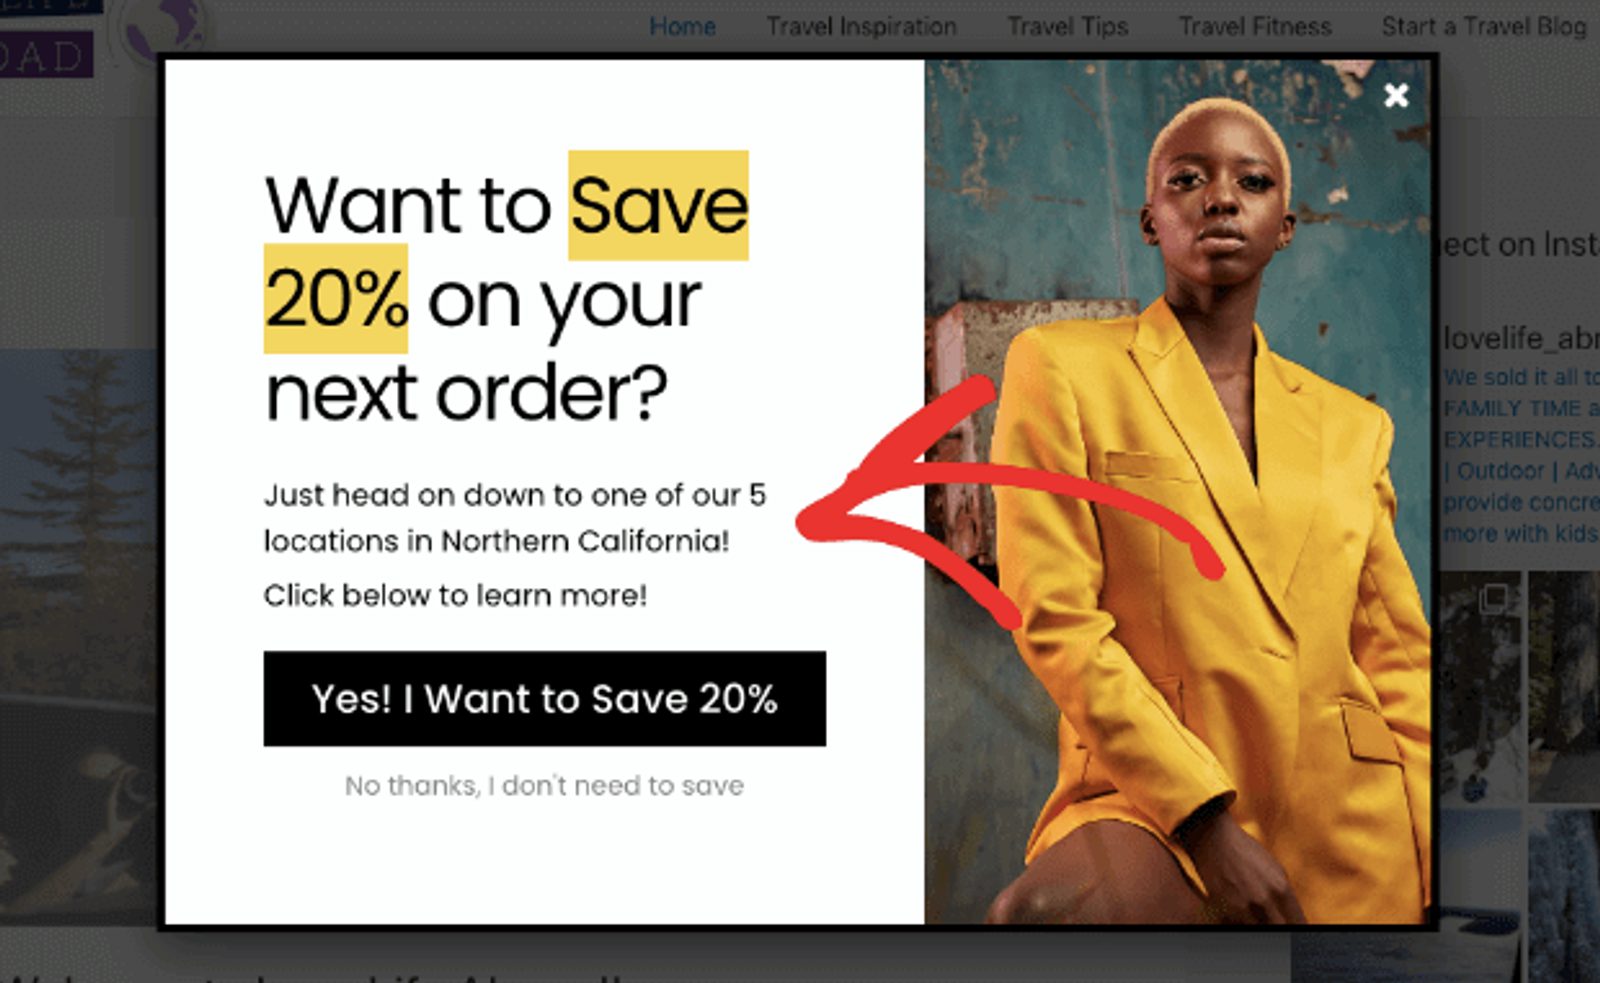
E-commerce display rules
If you run an e-commerce store, listen up. With OptinMonster, you can show specific content to users based on their past shopping behavior (purchase history, product pages they visited, etc.). OptinMonster integrates with Shopify, WooCommerce, and BigCommerce e-commerce platforms.
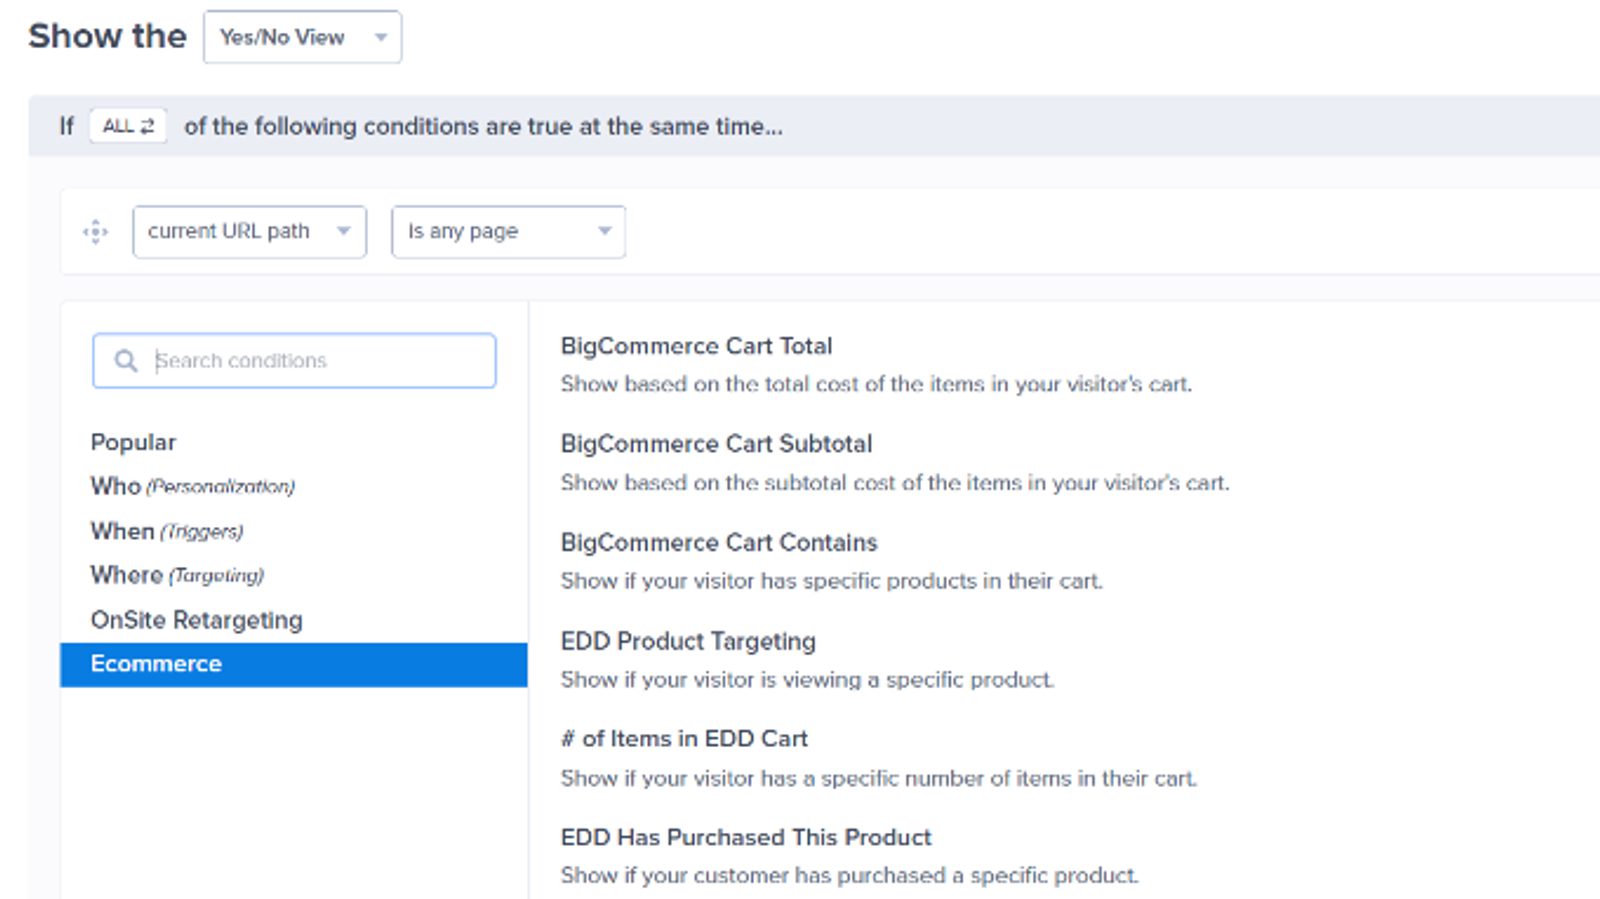
This kind of on-page targeting allows you to display messaging and content based on the products your users are viewing, the total cost of the cart, similar items, and the number of products currently in their cart. This level of targeting is a great way to upsell or cross-sell!
Time to publish your content and add it to your WordPress site
It's very easy to display OptinMonster campaigns on your WordPress site. Just switch to the Publish tab inside the builder interface and change the publish status to Publish.
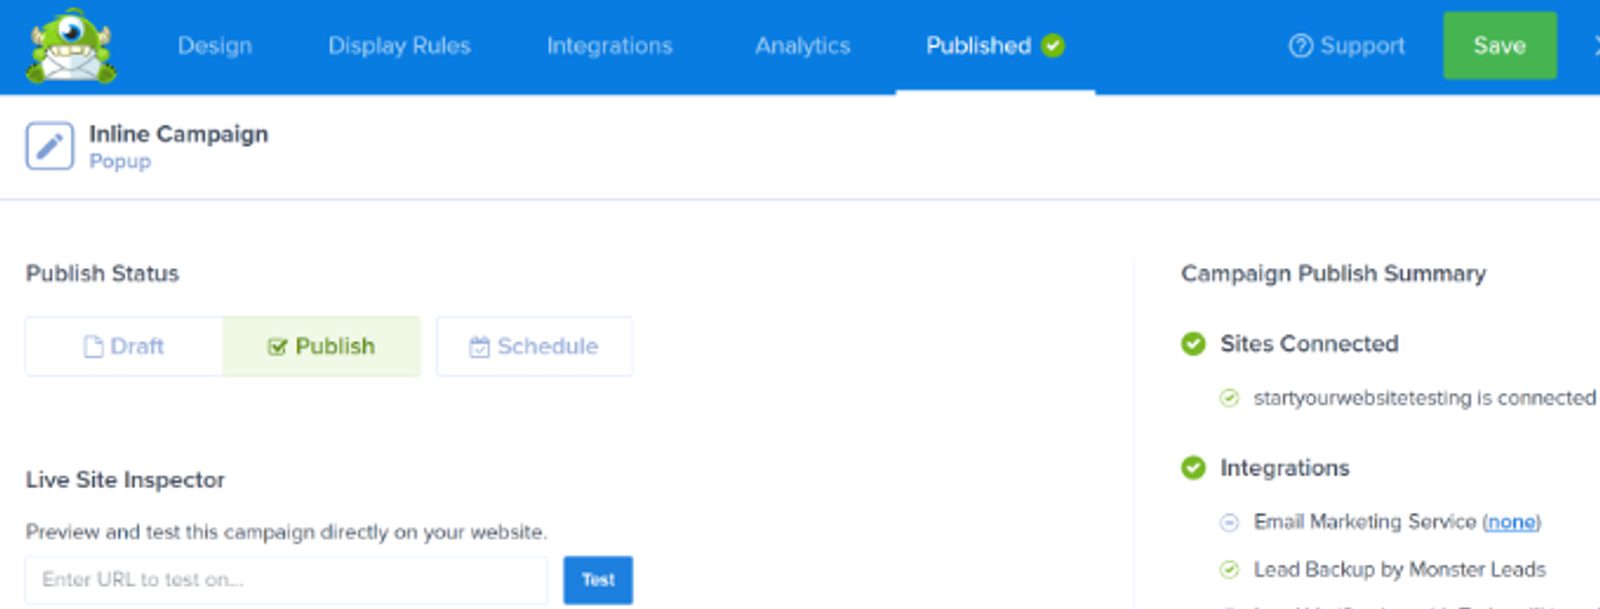
Click Save in the top right corner to save your progress. Now, navigate back to your WordPress admin dashboard and click OptinMonster and then Campaigns. Your brand new campaign will appear in the campaigns list.
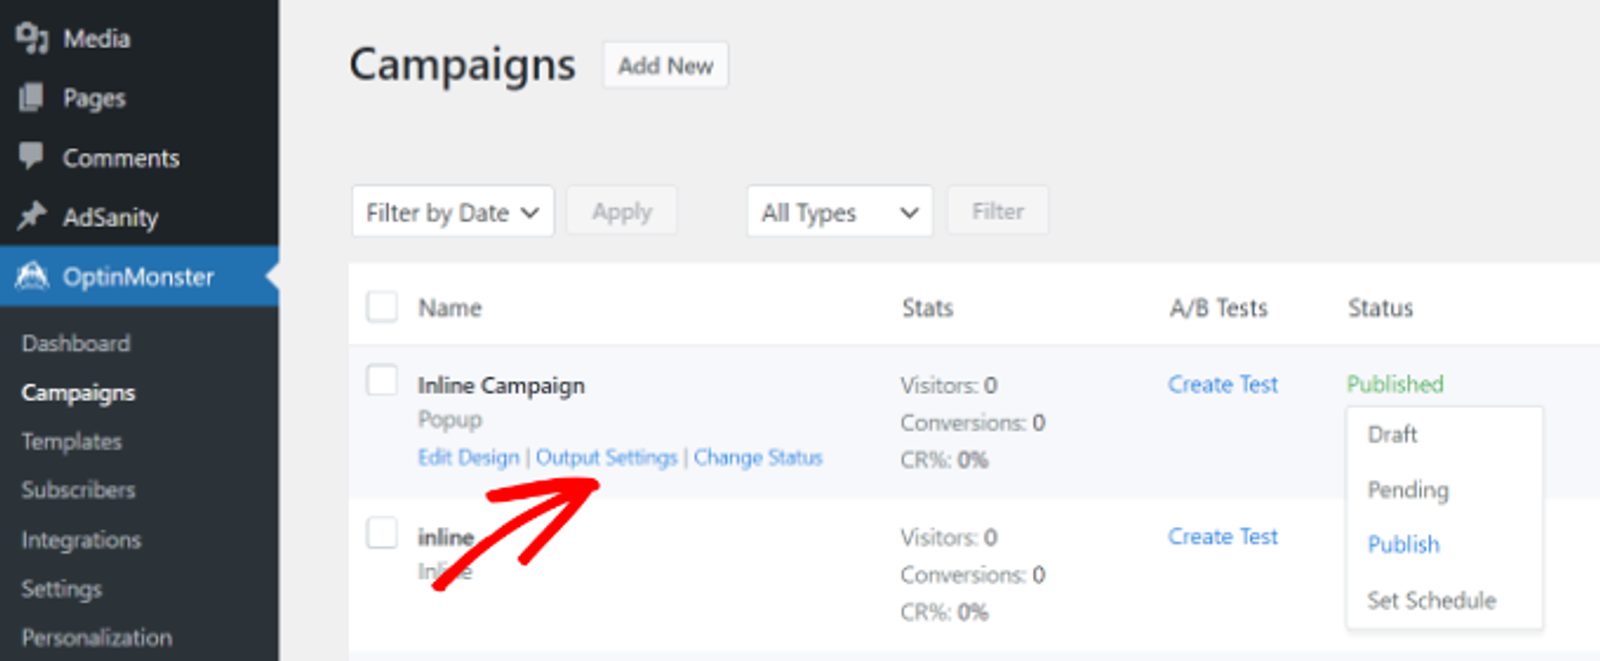
Make sure the status of your campaign is set to Publish from the dropdown menu under Status. And voila! Test your campaign by visiting your website and meeting the conditions you set in the display rules (Ex: staying on a specific page for more than one minute).
While not free, OptinMonster's personalization and display rules are well worth the money to show your website visitors different content without modifying your site code or the templates you already have in place. By using OptinMonster, you tap into the dead spots of your site and take every opportunity to engage your users and ultimately increase conversions.
As you continue to deploy more campaigns, A/B test different messages and offers to see what resonates with your site users and make adjustments to drive better outcomes.
Plugin 1: If-So
Now that we've walked through OptinMonster, let's talk about a few WordPress plugins you can use to personalize the content on your WordPress website.
One of the most popular is If-So, a plugin that allows you to add or swap out content on your site based on a specific user's interaction with different site elements.
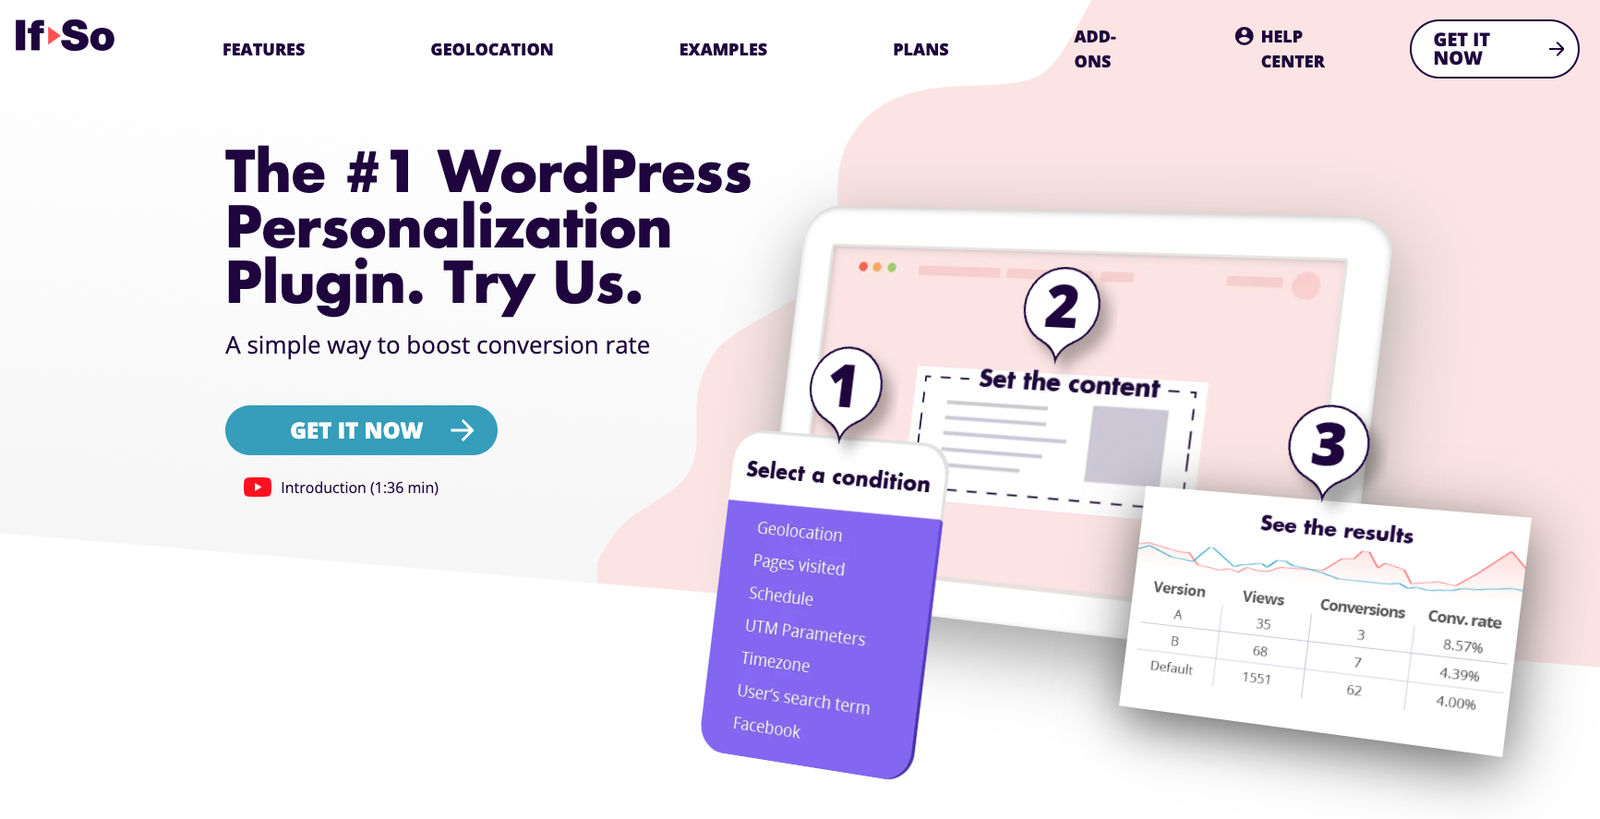
Offering dynamic content personalization, If-So gives you the power to tailor the content a particular user sees and create segments for groups of similar users. You can personalize content based on location, time, date, and if a user is returning or completely new.
Prices currently start at $89/year, but there is also a free trial available if you'd like to test the plugin before committing. Always check the If-So pricing page for any future pricing changes.
If-So integrates with ActiveCampaign and allows you to use the data collected in ActiveCampaign for personalization. See more information here.
Plugin 2: Logic Hop
The next WordPress plugin is Logic Hop, which lets you create personalized experiences on your WordPress website.
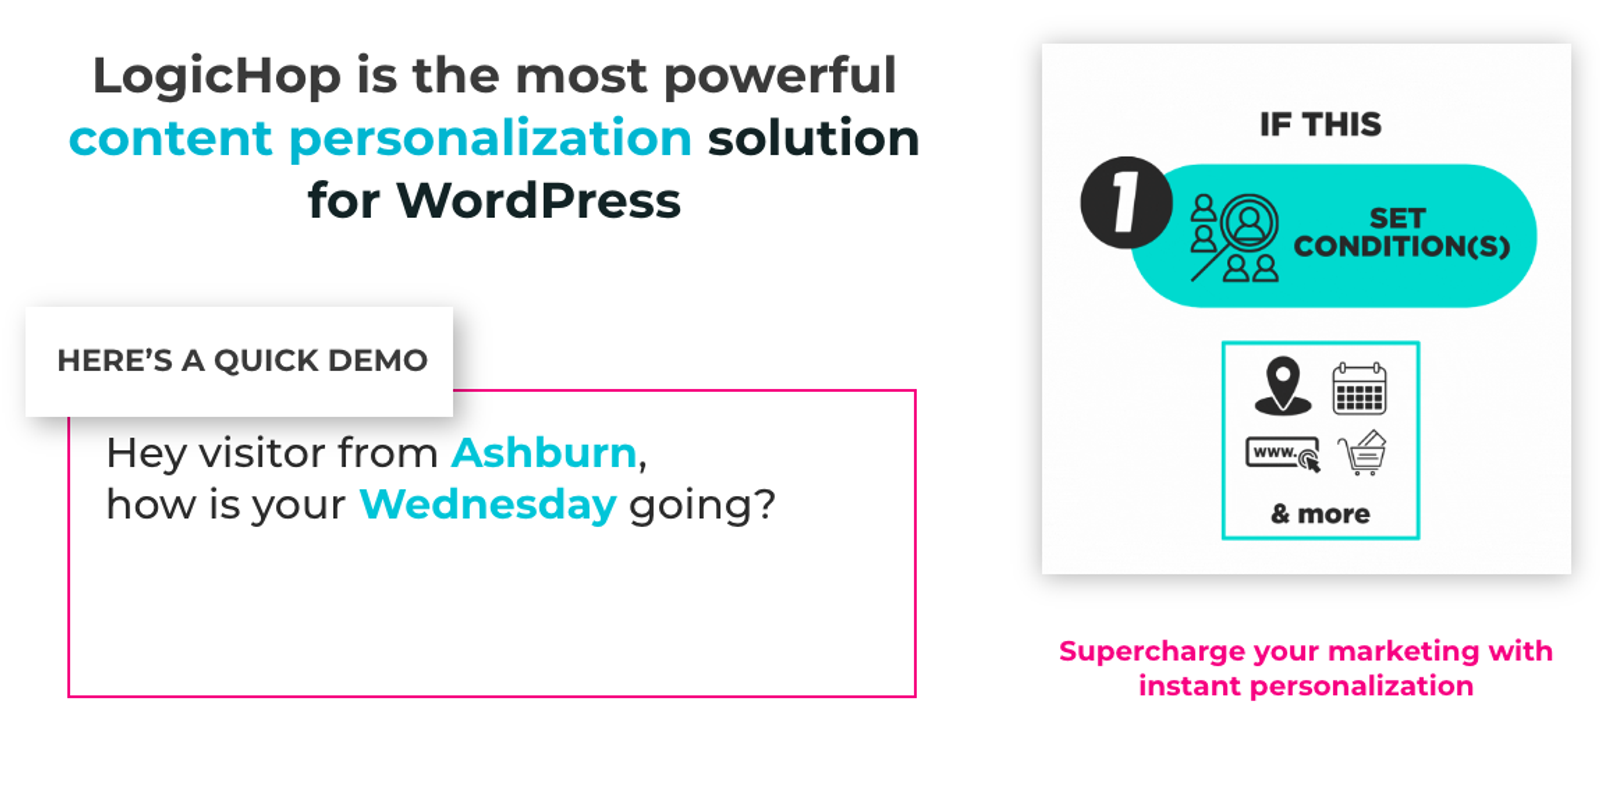
Tailor-made for WordPress, Logic Hop gives you familiar tools to easily personalize any site. This plugin supports personalization across dozens of criteria so you can identify and tailor your content to your unique audiences. It's a bit more complex than If-So, allowing you to show relevant content to specific visitors. It's also compatible with more CRM systems, offering interconnectivity between your site and sales process.
Pricing currently starts at $199/year, but a free trial is also available. Always check the Logic Hop pricing page for any future pricing changes.
Plugin 3: Jetpack
Jetpack is a security plugin on WordPress that also offers some personalization features.
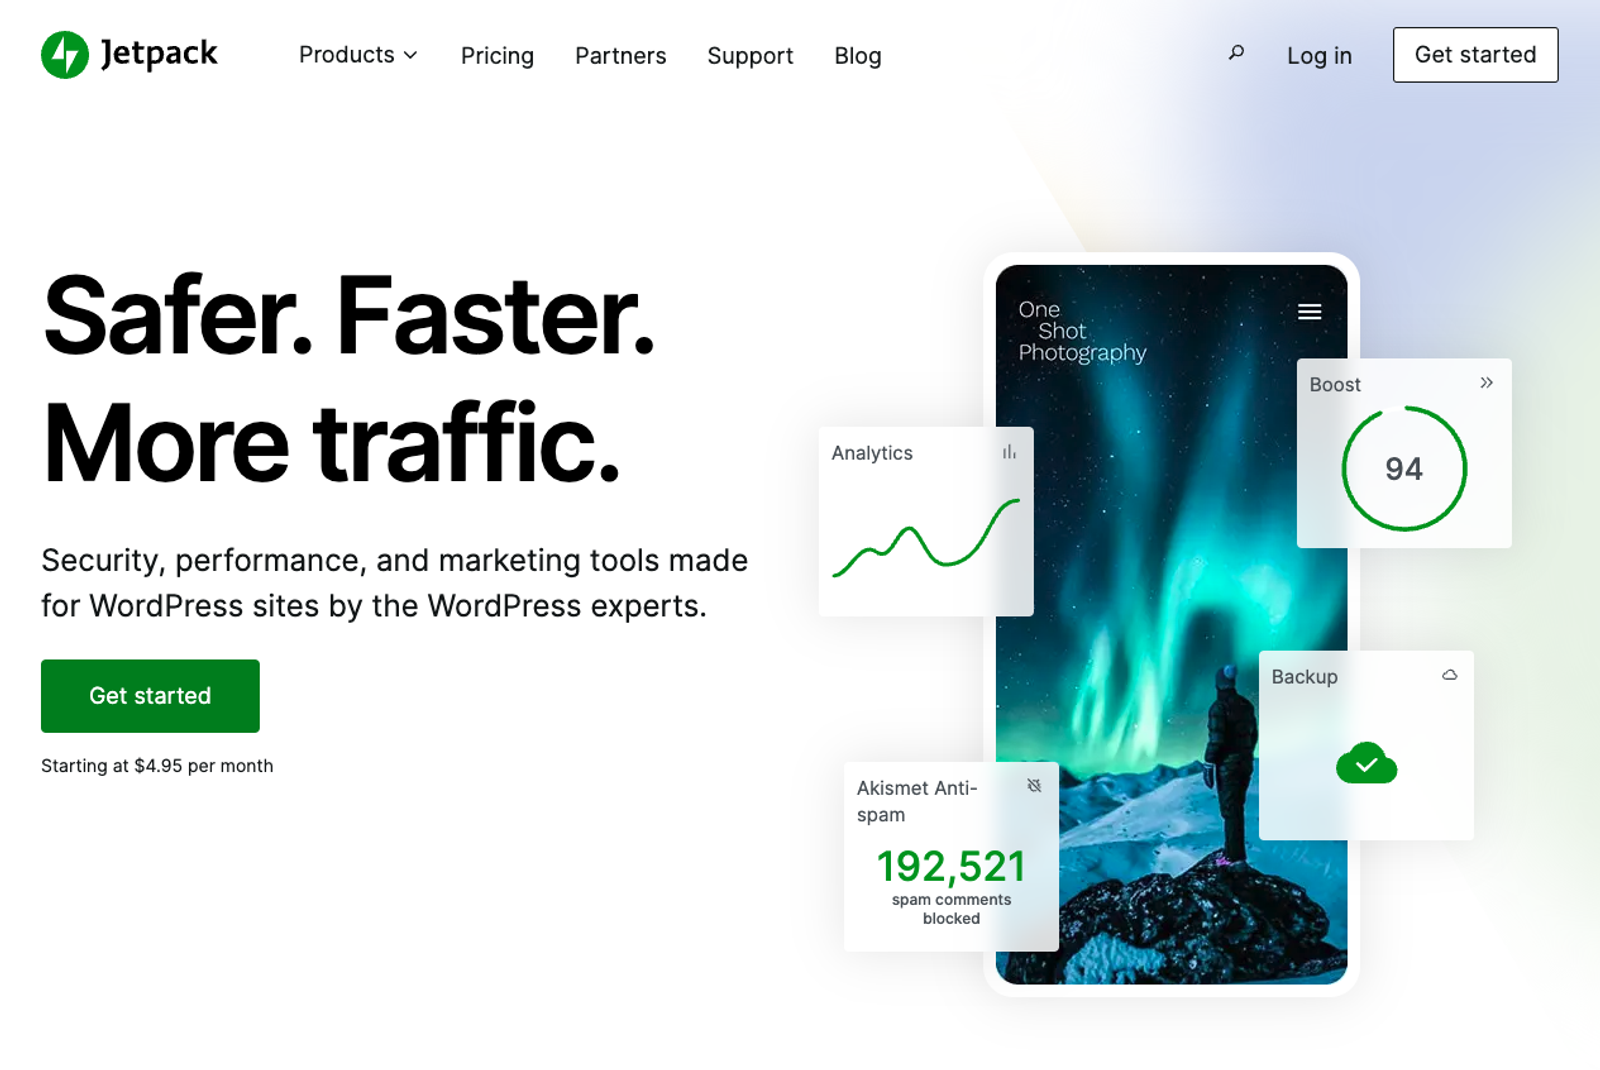
In addition to their security, performance, and design features, Jetpack offers two features for content personalization: displaying targeted ads on your site and showing relevant content after a visitor reads your post.
Jetpack also offers additional add-on products you can purchase, including AI functionality, an SEO tool, a video tool specifically for WordPress, and much more. Depending on your needs, you can add these to your package.
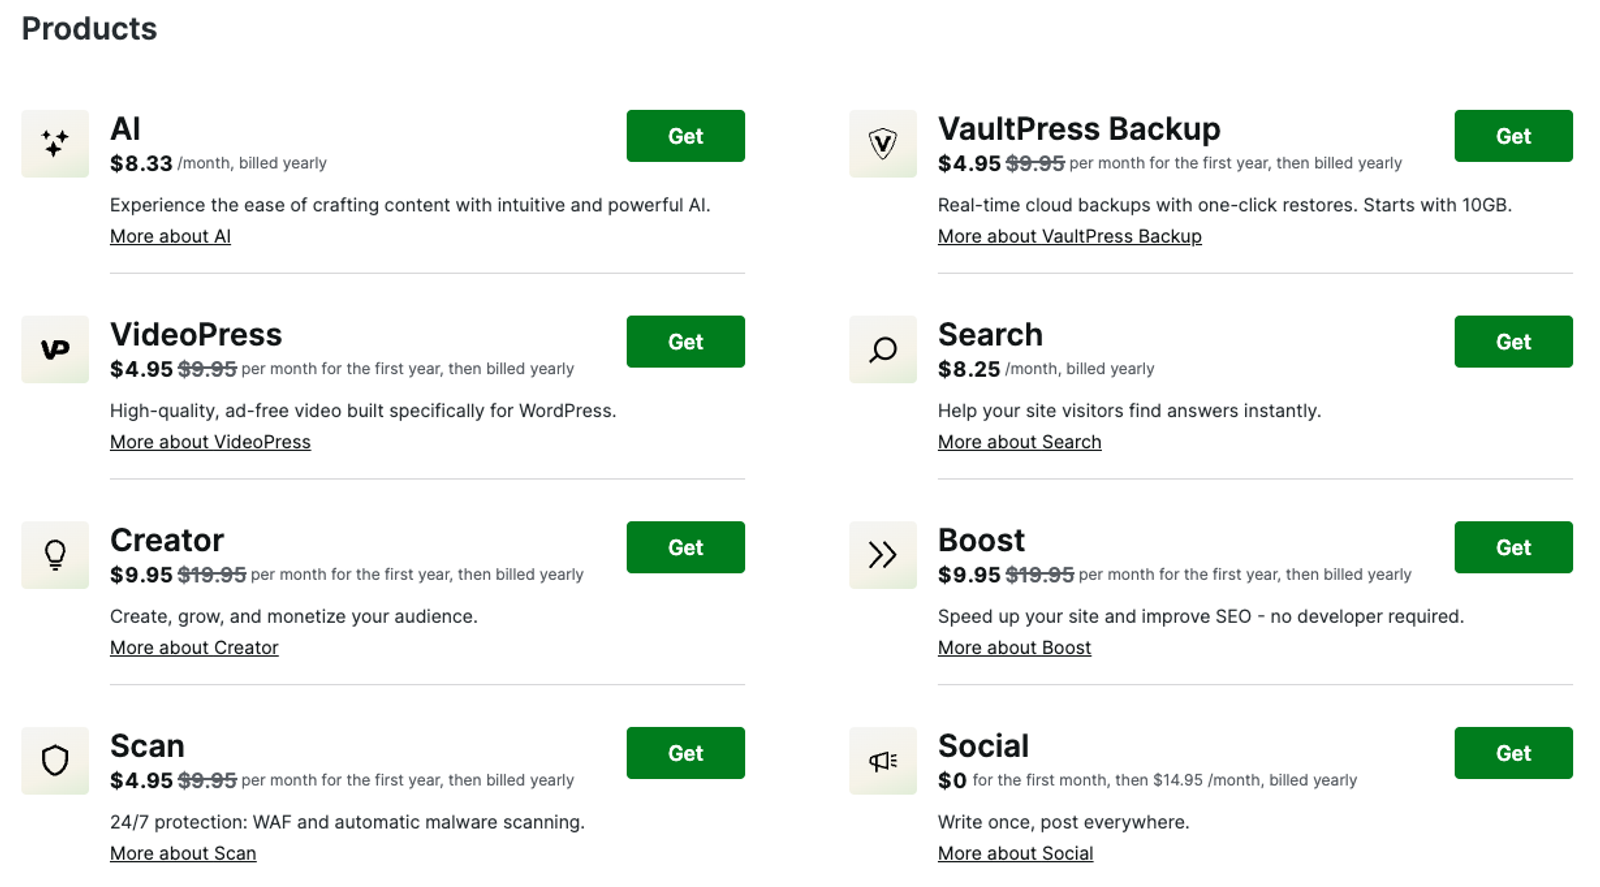
Pricing currently starts at $9.95/month, but there is also a free version to test it out for 14 days and decide if you'd like to buy their premium products later. Always check the Jetpack pricing page for any future pricing changes.
Plugin 4: OptiMonk
The last plugin we'll highlight is OptiMonk, a website personalization tool that allows you to display customized, relevant content to users based on their interests and past behaviors.
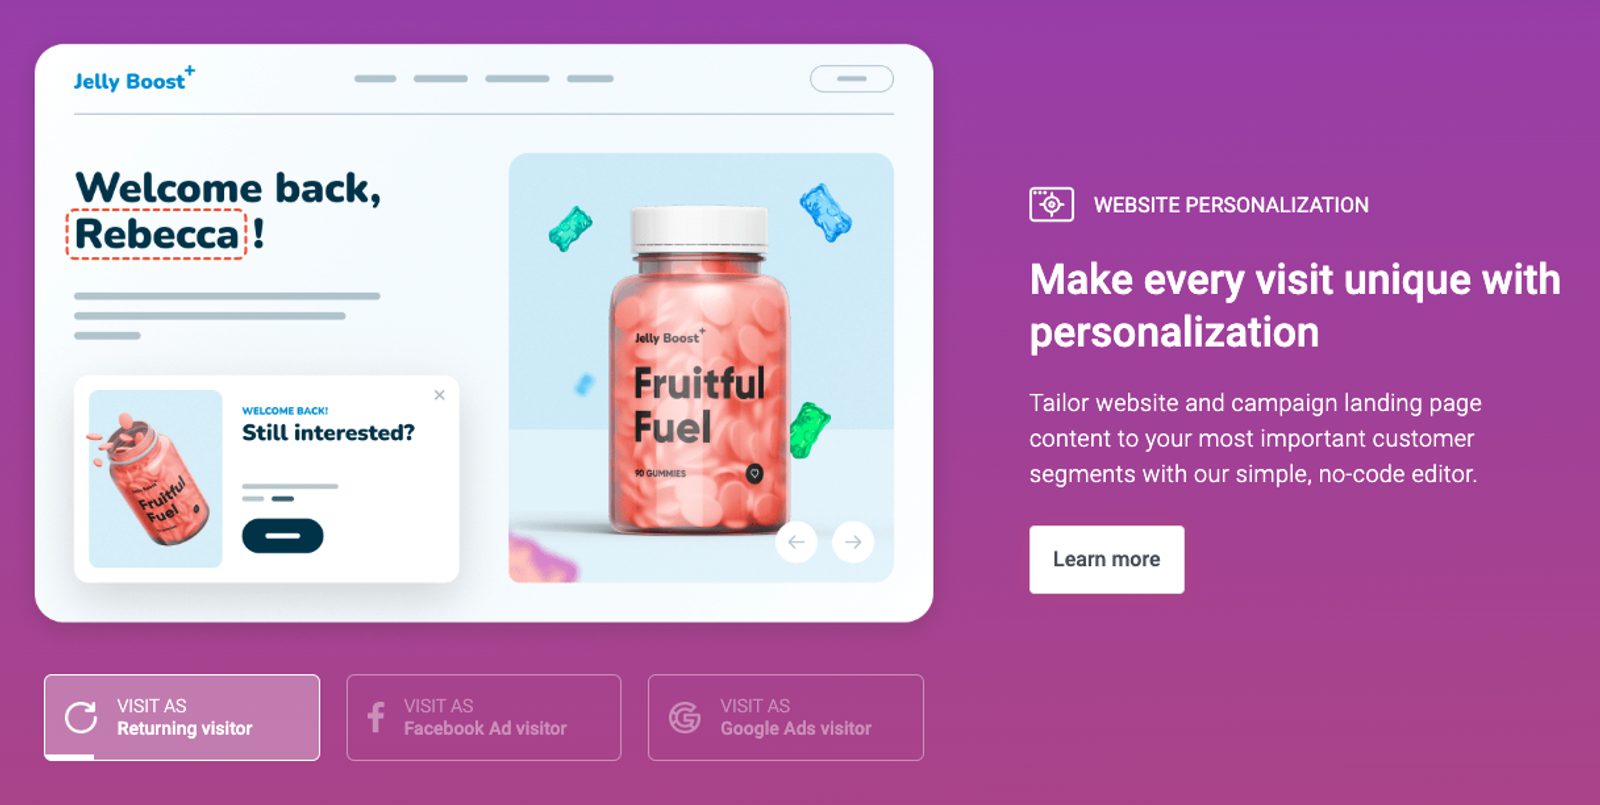
OptiMonk is a site personalization platform that's also available as a plugin on WordPress. Their all-in-one campaign builder helps you identify the right customers for your campaigns, create topical custom content, and optimize each campaign over time. It also integrates with popular CMS platforms and nearly every email marketing platform.
Pricing currently starts at $39/month, but they offer a free trial with no credit card required. Always check the OptiMonk pricing page for any future pricing changes.
Personalization is everything
Everyone likes a bit of personalization. Personalizing the content and messaging on your WordPress site is a key lever for truly winning over your customers and creating an enjoyable and customized on-site experience. The more you can personalize their experience, the more likely they are to come back as repeat customers.
Studies show that 56% of consumers say they will become repeat buyers after a personalized experience, a 7% increase year-over-year.
From targeted ads to landing pages to unique coupon popups, there are no shortage of ways to provide a more individualized experience for your customers. This includes email personalization.
ActiveCampaign is a powerful marketing automation platform that allows you to set up email automations that trigger personalized content based on user behavior, ensuring that each audience segment sees content tailored specifically to them. Email personalization is just as important as website personalization, doubling down on a truly targeted marketing motion from start to finish.
Sign up for a free trial to see the benefits of investing in email marketing automation.


