So… what’s the difference between using a Go to vs. a Goal action when building an automation?
Both actions will “jump” contacts to another step in your automation based on specific criteria. But they work a bit differently, and it may not always be clear when to use one over the other.
This guide will explain the difference between the two and provide example use cases for each action.
When to Use the Goal Action
A Goal action will jump a contact to another action in your automation once that contact meets certain conditions. With goals, it doesn’t matter how many steps come before it in the automation. As soon as a contact meets a Goal’s condition, that contact is pulled from wherever it is in the automation to the Goal.
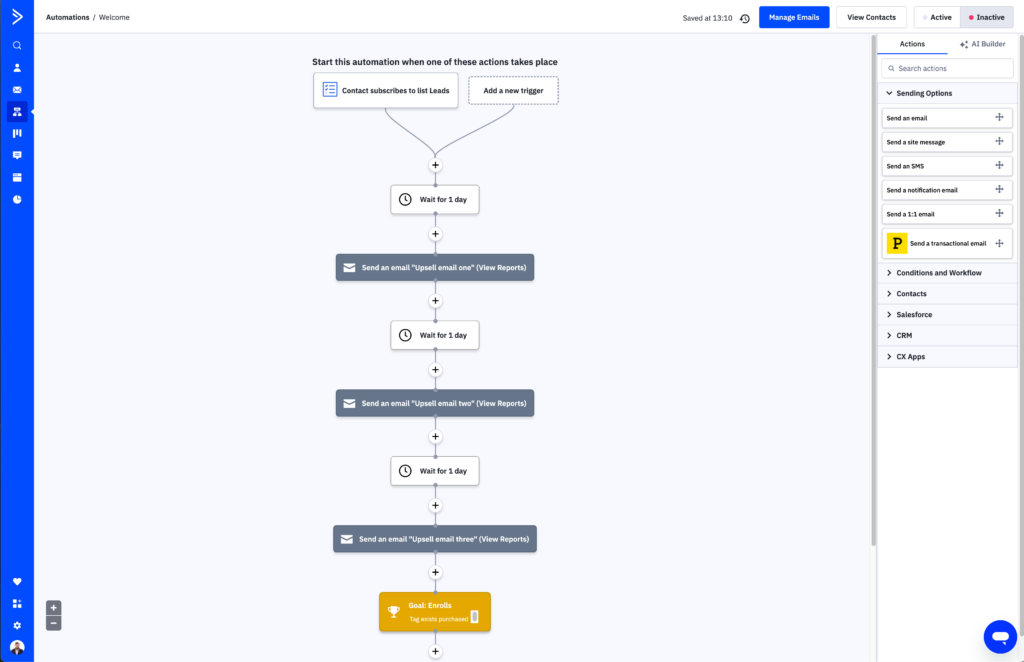
For example, let’s say you have an email campaign series targeting contacts you hope to get enrolled in a new course you’re offering. You plan to send four emails promoting the course, but once a contact enrolls, you do not want them to receive the rest of the emails in the series.
This is where a Goal action comes in handy!

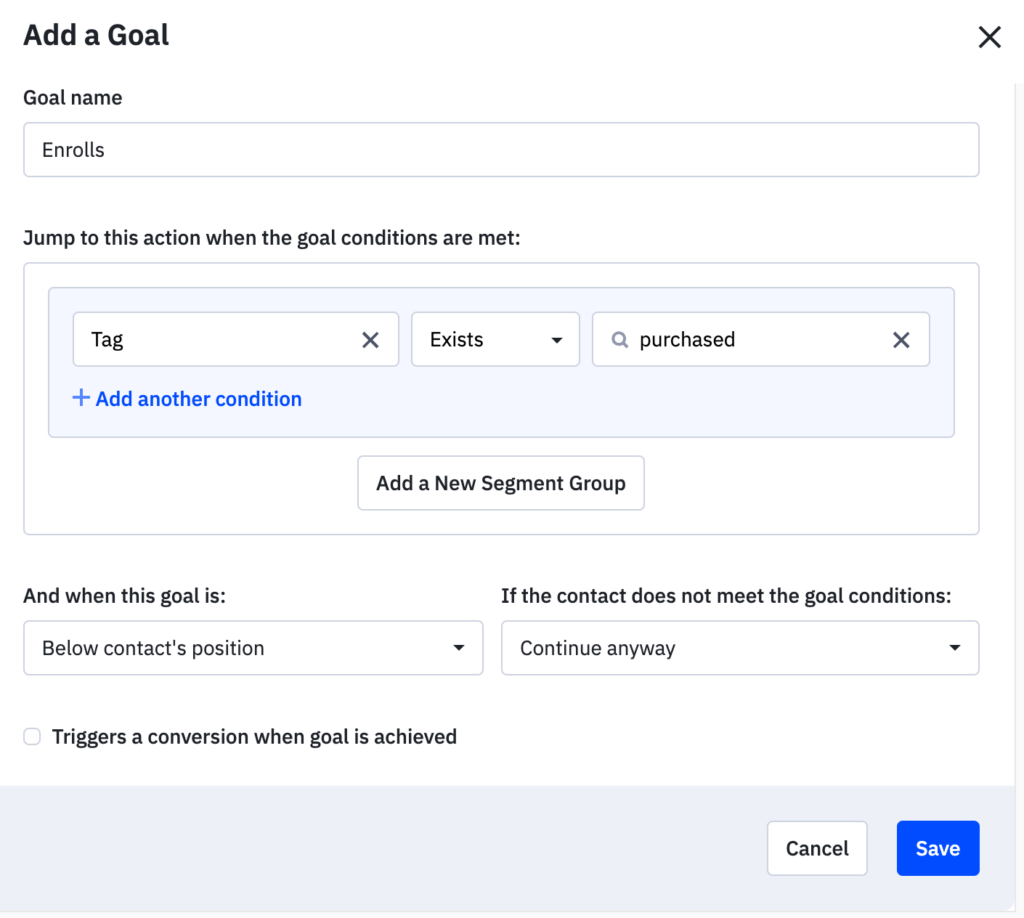
In this instance, you’ll want to configure the Goal action to cause a contact to jump from anywhere in the automation once they have the tag “purchased” (you can use a separate automation to handle the application of this tag).

Now, when a contact enrolls in your course, they’ll skip the rest of the email steps and jump right to the Goal action in the automation.
Goal actions are more dynamic because they allow contacts to jump from anywhere in an automation. Contacts can be several steps before a Goal action, after a Goal action (if it makes sense for your promotion), or in a different branch—it doesn’t matter. Once they meet the goal conditions, they’ll jump to that action.
A GoTo action, on the other hand, is more sequential. A GoTo action requires a contact to complete the preceding step before it moves a contact.
When to Use the Go To Action
A Go to action will jump a contact from one specific point in an automation to another.
Go to actions are often valuable for automations that have multiple paths or branches. With multiple branches, a contact can only move down one path—whichever is true.
The Go to action can help you combine paths in an automation or help you move contacts through more than one branch and prioritize one over the other.
Going back to the course enrollment example we used above, imagine you’ve been pre-selling your course for the past couple of months while building it. Now that it’s complete, you’re ready to provide login credentials to those who have already enrolled and want to let the rest of your contacts know they can now enroll and get started on their coursework today.
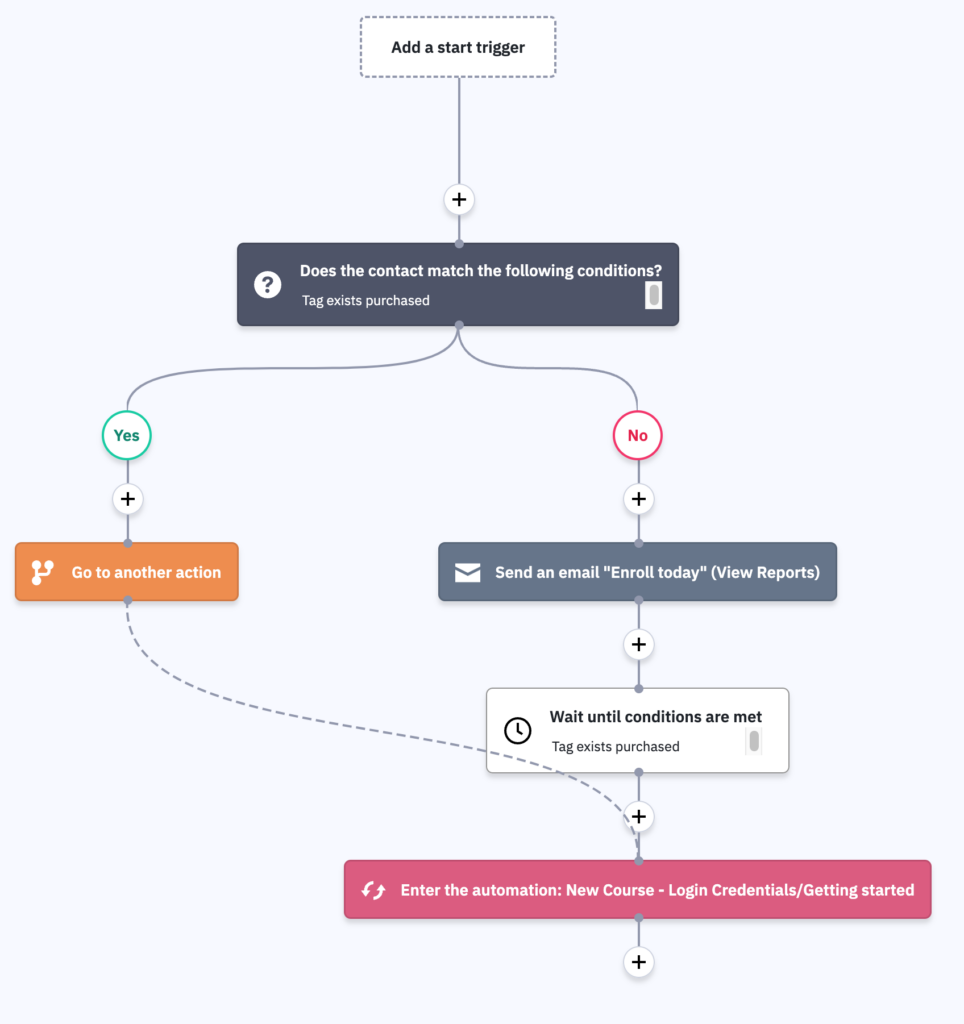
To do this, you can create a simple automation that checks to see whether or not contacts have the “purchased” tag and advances them down one of two paths:
If the contact does not have this tag, they advance down the path on the right, which sends an email promotion, then waits until they have the “purchase” tag before adding them to the next automation to get their login credentials.

If the contact does have the tag, they advance down the path on the left to the Go to action, which reroutes them around the “Enroll today” email to the step that adds them to the next automation.
Learn More
In sum, ActiveCampaign provides you with two powerful actions to progress your contacts through automations based on their behavior. While goals are more dynamic and Go to actions are more sequential, we recommend combining the use of both to create the best experience for your contacts.
To learn more about building automations, read our best practices guide.
You can read more about using the Goals action in this article.


