When you start an automation from scratch in ActiveCampaign, you will see a list of all the ways a contact can enter your automation. These are called start triggers.
ActiveCampaign uniquely offers more than 20 start triggers that you can use to determine how contacts will enter your automation. You can also add multiple start triggers to the same automation so that contacts meeting different criteria are pulled into a single automation.
Understanding how each trigger works will help you see a more complete picture of how targeted your automations can get in ActiveCampaign.This guide will walk you through all the start trigger options in ActiveCampaign, explain how each one works and provide an example of how you might use it in your marketing processes.
We’ve got a lot of trigger options to go through, so this is quite the long guide! Feel free to browse and skip around to any specific triggers you’d like to read about. You can use the menu on the left to navigate. You might also want to read our Help article on automation triggers for quick “how-to’s” on using specific triggers.
Types of Start Triggers
In addition to the traditional “Subscribes to list,” “Tag is added,” and “Fills out form” start trigger options offered by most platforms, ActiveCampaign offers several options that you may be seeing for the first time.
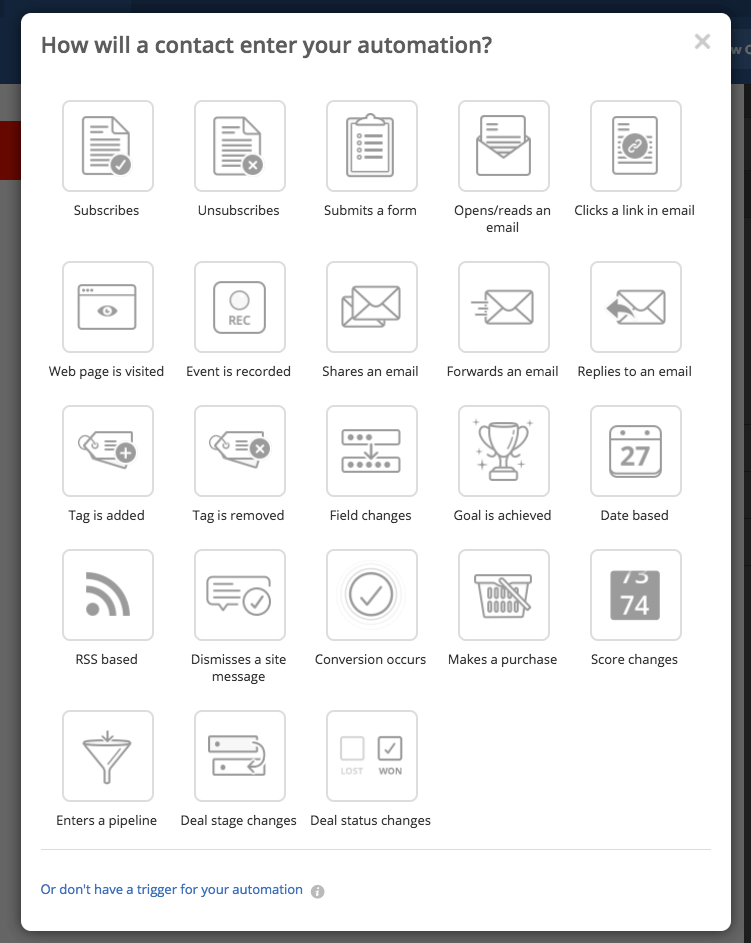
A number of our unique start triggers can be leveraged in eCommerce integrations, so our users can create automations that are triggered by data from their eCommerce platform. Other start triggers work with our attribution, as well as site message, and event tracking features to provide even more automation possibilities.
As a result, ActiveCampaign users have an array of flexible options to choose from when creating an automation, making it incredibly easy to target the right contacts with the right messaging and engagement tactics—no matter the size of your contact database.
Let’s take a closer look at those options.
Subscribes
This trigger begins an automation when a contacts is added to a list.
In the “Action Options” window that follows your trigger selection, you can set the trigger for any list, or select a specific list from the drop-down menu that appears. If you want the automation to run whenever a contact is added to two or more specific lists, you would add multiple “Subscribes” start triggers to the automation (one for each list). Read this help article to learn more about using multiple start triggers in an automation.
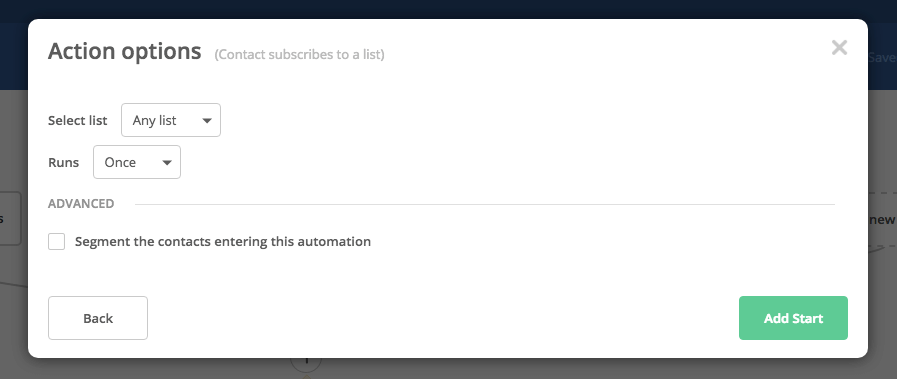
You’ll also see a drop-down menu next to “Runs” in the “Action Options” window, where you can select “Once” or “Multiple Times.” This option determines how many times a contact can enter the automation. If you only want contacts to enter the automation once, select “Once.” This means that after contacts go through the automation, they will never enter it again, even if they were to unsubscribe from your email list and re-subscribe at a later date. If you want contacts to enter the automation every time they subscribe to your list, even if they already have in the past, you would select the “Multiple Times” option.
You might use this start trigger to send a “Welcome” email to contacts who subscribe to any of your lists, no matter how many times. To do this, you would select “Any list” and “Multiple Times” in the “Action Options” window. Every time a new contact opts in to your email list, this triggers the sending of an email that thanks the contact for subscribing and provides additional information around what they can expect from your communications.
Or, you might use it when creating an automation for an onboarding sequence. Say you have a “New Users” list you would like to send a sequence of emails containing tips and advice to help those contacts get started in your platform. To do this, you would select the specific list you want to use and “Once” in the “Action Options” window.
Unsubscribes
This start trigger is just like “Subscribes,” except it triggers an automation whenever a contact is removed from a list. Unsubscribes can be initiated by the contact (for example, the contact clicked the “Unsubscribe” link in an automated email), or by you (you can use the “Unsubscribe” automation action or manually remove a contact from a list).
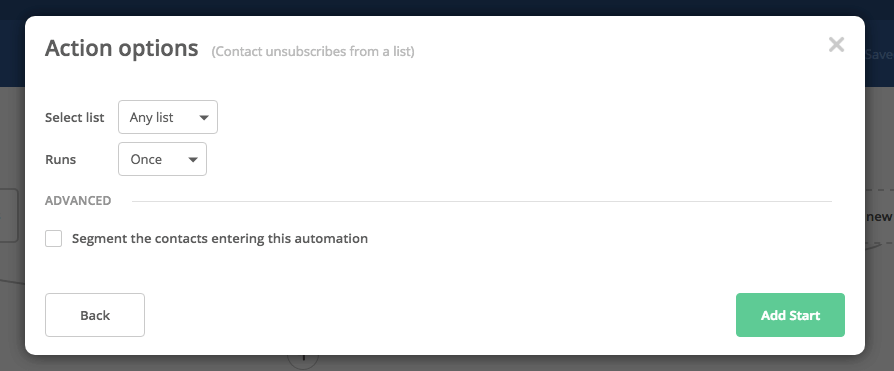
Just like “Subscribes,” your options in the “Action Options” window include “Any list” or a specific list, and “Once”/”Multiple Times”.
You might use this trigger to notify someone internally that a contact has unsubscribed. For example, perhaps you’d like to notify your sales team to call that contact moving forward, instead of using email.
Sometimes, when a contact is unsubscribed from a specific list, it also makes sense to remove that contact from other lists. So you might use this start trigger in an automation that removes that contact from every other list as well.
Submits a form
You can use this start trigger to begin an automation every time a contact submits a form. Like the “Subscribes” and “Unsubscribes” triggers, you can select to have it begin when “Any form” or a specific form is submitted, and set it so that contacts either enter the automation “Once” or “Multiple Times.” (Again, if you would like an automation to run when two or more specific forms are submitted, you would add multiple start triggers—one for each form.)
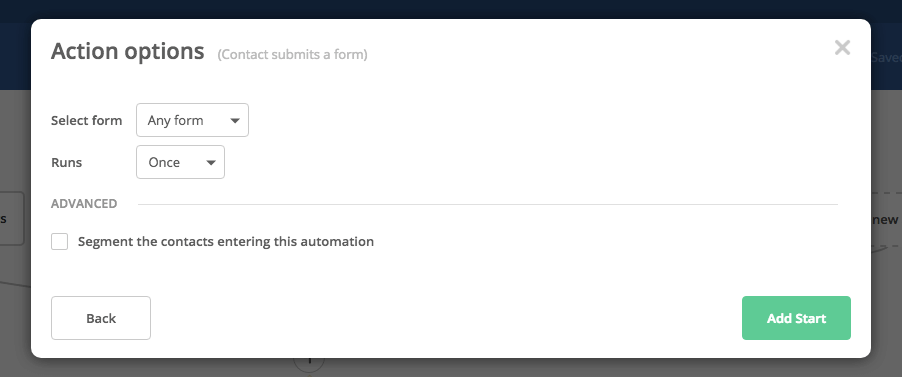
You might use a form to gather additional information about your contacts. You could then use this trigger in an automation that sends a very tailored initial email to contacts based on the information they provided in the form. Or you could use this trigger to begin an automation that applies tags based on the information provided on the form, so you can further segment these contacts.
Opens/reads an email
You can apply this trigger to “When a contact opens a campaign” or “When a contact opens a personal email:”
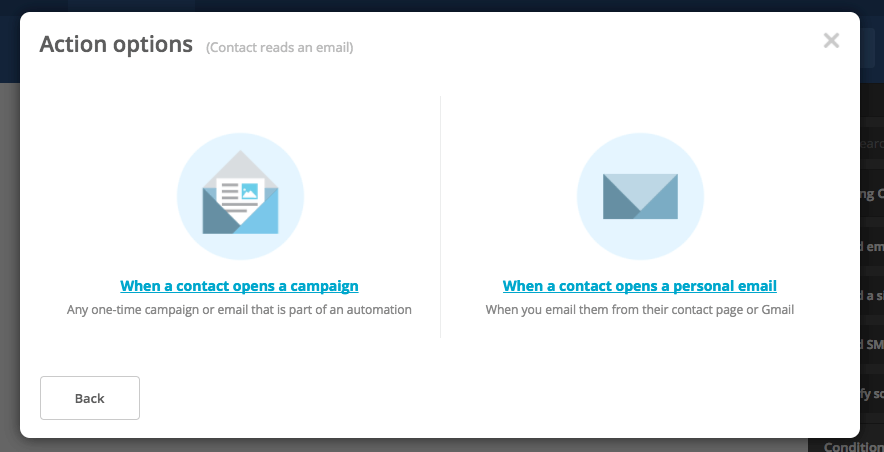
If you want to trigger an automation when a contact opens a campaign, you have a further option to set this condition either for a specific campaign email, or for any campaign email.
You might use the specific campaign option if you want to send a reply after that email is opened. You might use the any campaign option if you want to add points to contacts’ lead scores whenever they open one of your campaigns.
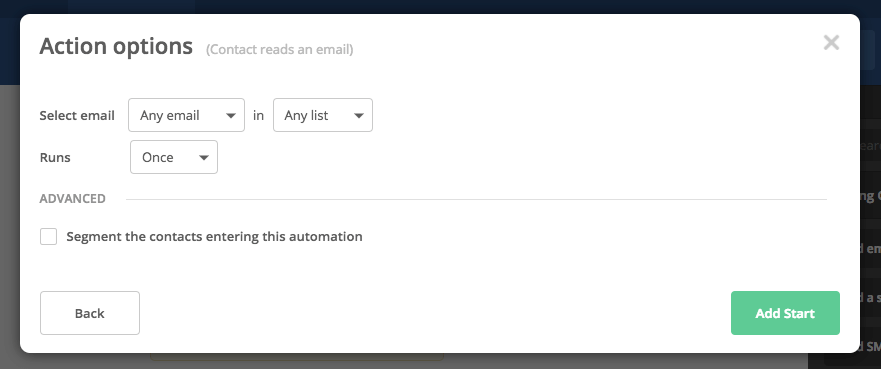
This trigger is useful in starting a drip campaign for people who have already engaged with a piece of content. You might use it to trigger an automation that sends well-timed, additional information about a specific topic to the contacts who opened an email that you sent previously about that topic.
Clicks a link in email
This trigger will begin an automation when a contact clicks a link within one of your email campaigns (including emails sent within automations).
This is an extremely flexible trigger because you can specify the exact email and apply the trigger to any link within that email, or select a specific link within that email. Or, you can elect to run the automation when any link in any email is clicked, but only for a specific list of contacts.
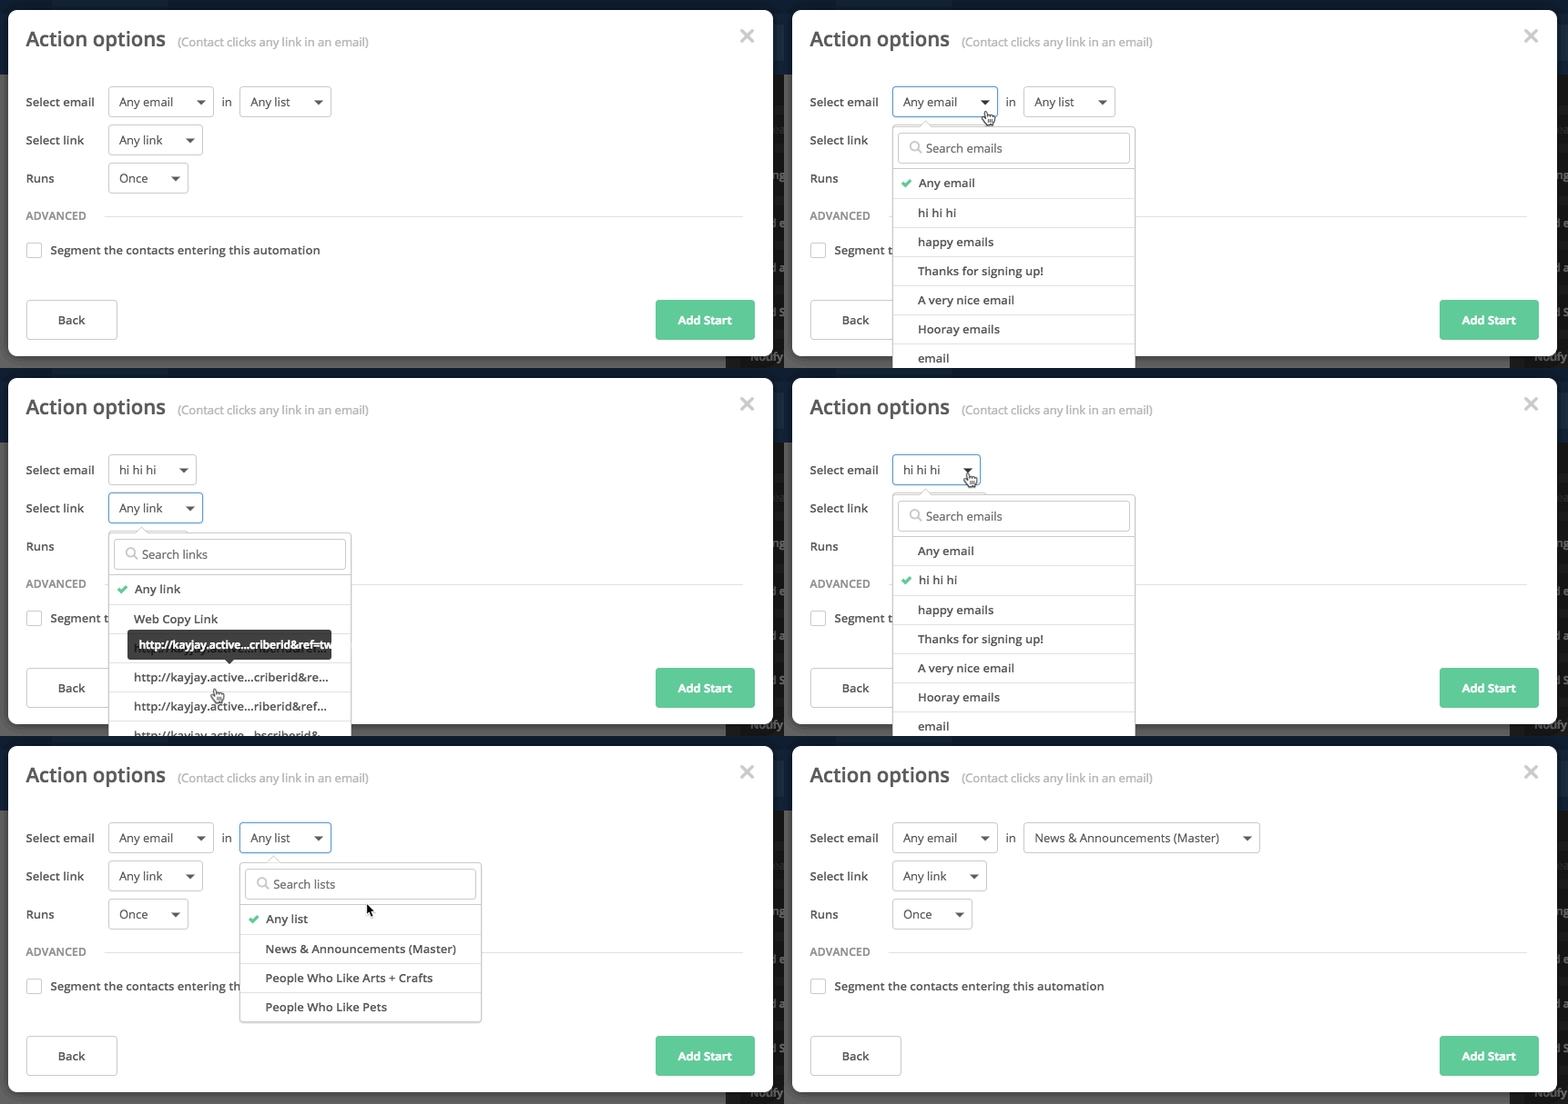
You might use this trigger if you’re trying to identify strong leads by increasing contacts’ lead scores whenever they engage with your content. In this instance, you would use this start trigger in an automation that adds to contacts’ lead scores (learn about lead scores here and here) every time they click on a link.
Web page is visited
This trigger uses site tracking data to begin an automation when a contact visits a page of your website. Our site tracking feature collects page view data from your website. You will first need to enable site tracking with a snippet of code on your website in order to use this trigger.
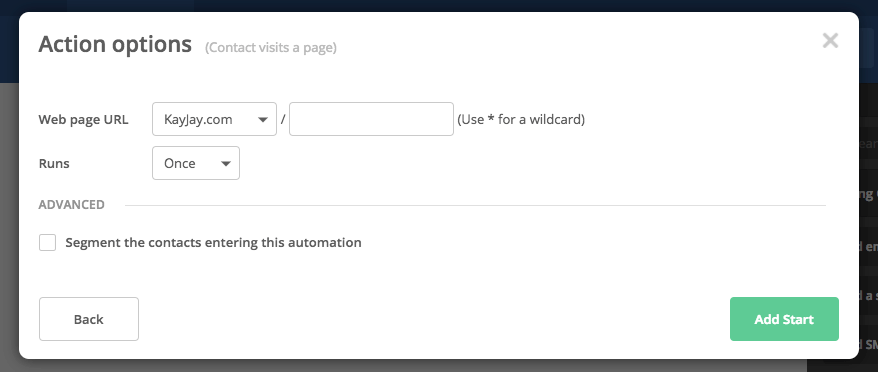
You can specify the exact URL you want to begin the automation. For example, you could set an automation to begin every time a contact visits http://yourdomain.com/pricing.
Or, you can use a wildcard URL to begin an automation when a contact visits any page within a group of web pages. A wildcard URL uses an asterisk (*) to represent “any page in this path.”
For example, “http://yourdomain.com/products/category-1/*” would begin an automation when a contact visits any product page in “category-1.” “http://yourdomain.com/*” would begin an automation when a contact visits any page of your website.
This start trigger is great for responding to an abandoned shopping cart in an online store. The automation will begin with a trigger of a contact reaching your unique shopping cart URL.
Use this trigger to start an automation when a contact reaches your unique shopping cart URL. After waiting for a pre-determined amount of time (35 minutes, for example), the automation will check to see if a contact has earned the tag “Customer,” which would mean the contact completed the purchase.
If a contact does not have this tag after the wait time has passed, the cart will be assumed abandoned. From here, you can have the automation send a campaign containing the item the contact was considering for purchase.
Event is recorded
This trigger uses event tracking data to begin an automation when a defined event is recorded. Our event tracking feature collects data on “events” based on contact behavior, such as video views, button clicks, orders, log-ins, and in-app behavior.
Similar to site tracking, you will first need to enable event tracking with customized code in order to use this trigger (it requires a bit more coding knowledge to set up than site tracking does).
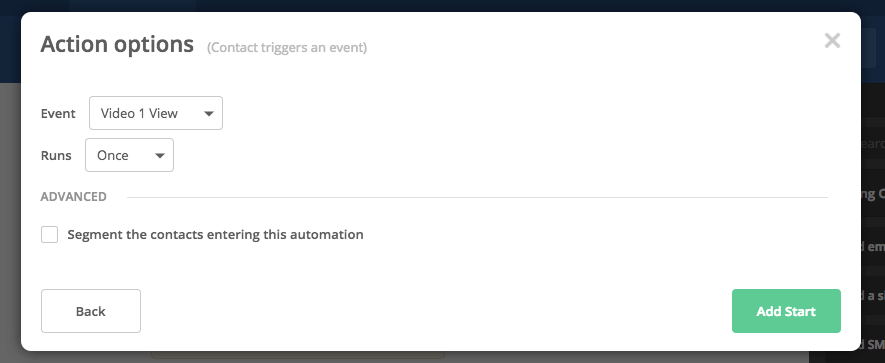
Since an event can represent many different contact behaviors, there are a lot of ways you could use this trigger. Particularly, it is useful if you have a membership component to your website and want to send a message to contacts who haven’t logged in recently—say, within the last six months.
In this instance, the “event” would occur when it’s been six months since a contact’s last login. So you would configure the “Event is recorded” trigger to begin an automation that sends a follow-up email once that event takes place.
Shares an email
This trigger begins an automation when a contact clicks on a social share link within a campaign email (including emails sent within automations).
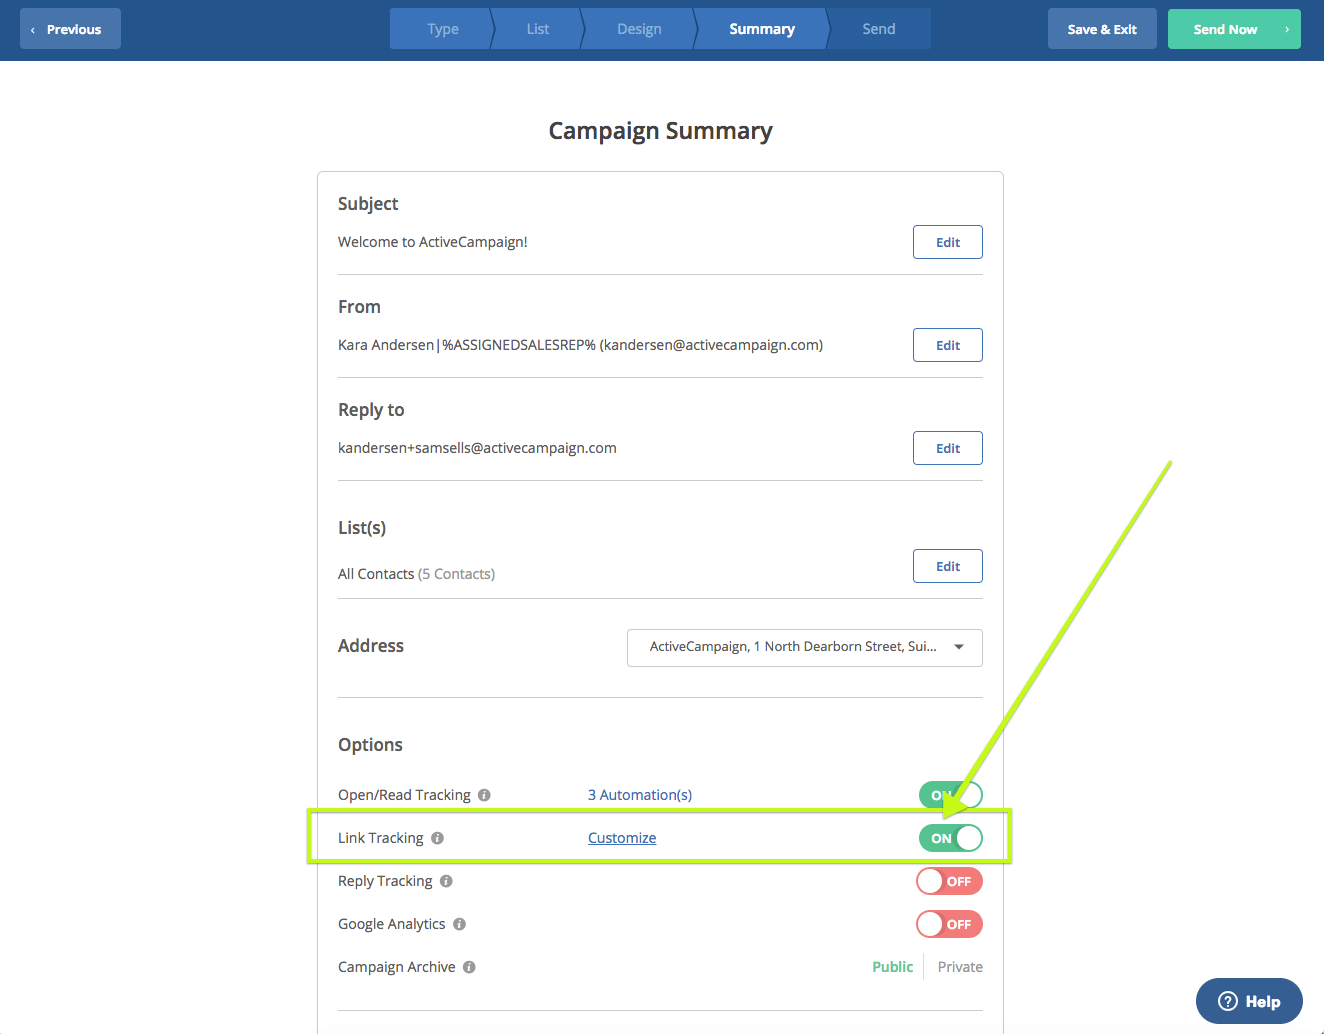
Note: For this trigger to work, you must have link tracking enabled for the particular campaign(s) you want this trigger to apply to:
You can configure the trigger to check for a social sharing link to be clicked in a specific email, or in “Any email.” Or, you can set the trigger to run the automation when a social sharing link in any email is clicked, but only by a specific group of contacts.
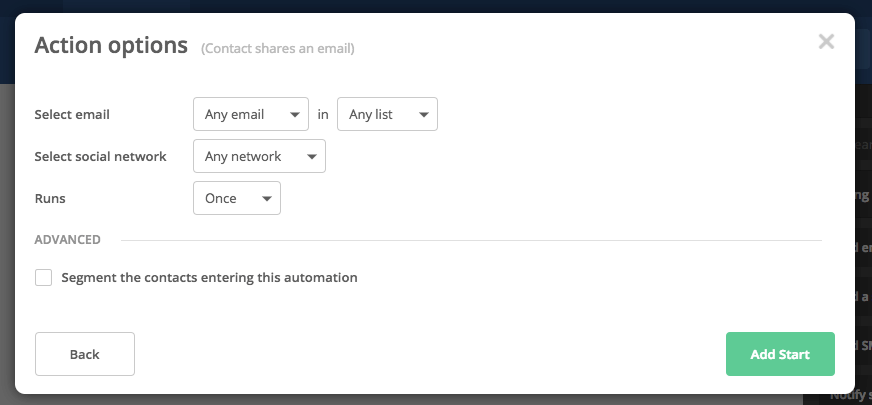
You can also configure the trigger to check for when the social sharing link to “Any network” is clicked, or to check for a clicked link to a specific network, including:
- Digg
- del.icio.us
- StumbleUpon
Note: For this trigger to work, contacts must click a social sharing link in the web version of the email. If they share a PDF version of the email, ActiveCampaign wouldn’t be able to track that. Furthermore, a contact may click the social sharing link, then choose not to share. This would still trigger the automation because ActiveCampaign can’t track whether the email was actually shared.
You might use this trigger to create an incentive around sharing your campaign emails. For instance, maybe you send a campaign about a specific topic that prompts contacts to share that email with friends or colleagues to be entered into a special VIP offering. You could then set up an automation that creates a deal and puts those contacts who shared the initial campaign email into a pipeline, or follows up with additional information about their new VIP status.
You could also use it to trigger an automation that adds to a contact’s lead score or creates a task for your sales team to follow up with that contact.
Forwards an email
This trigger begins an automation when a contact forwards an email campaign (including emails sent within automations).
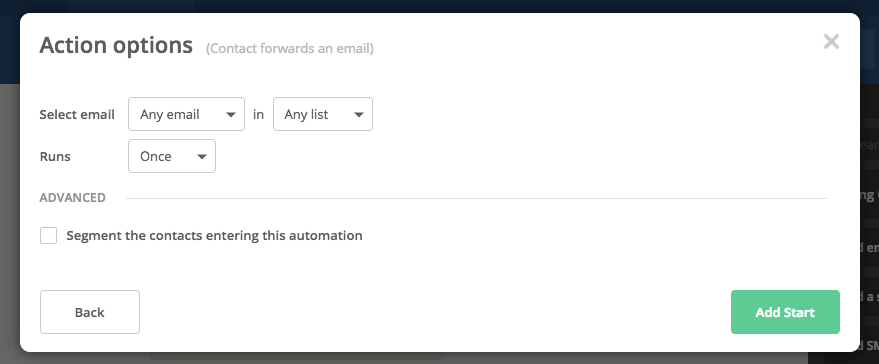
Like the “Shares an email” trigger, you can set this trigger to apply only to a specific email, or “Any email.” Or, you can set the trigger to run the automation when any email is forwarded, but only for a specific list of contacts.
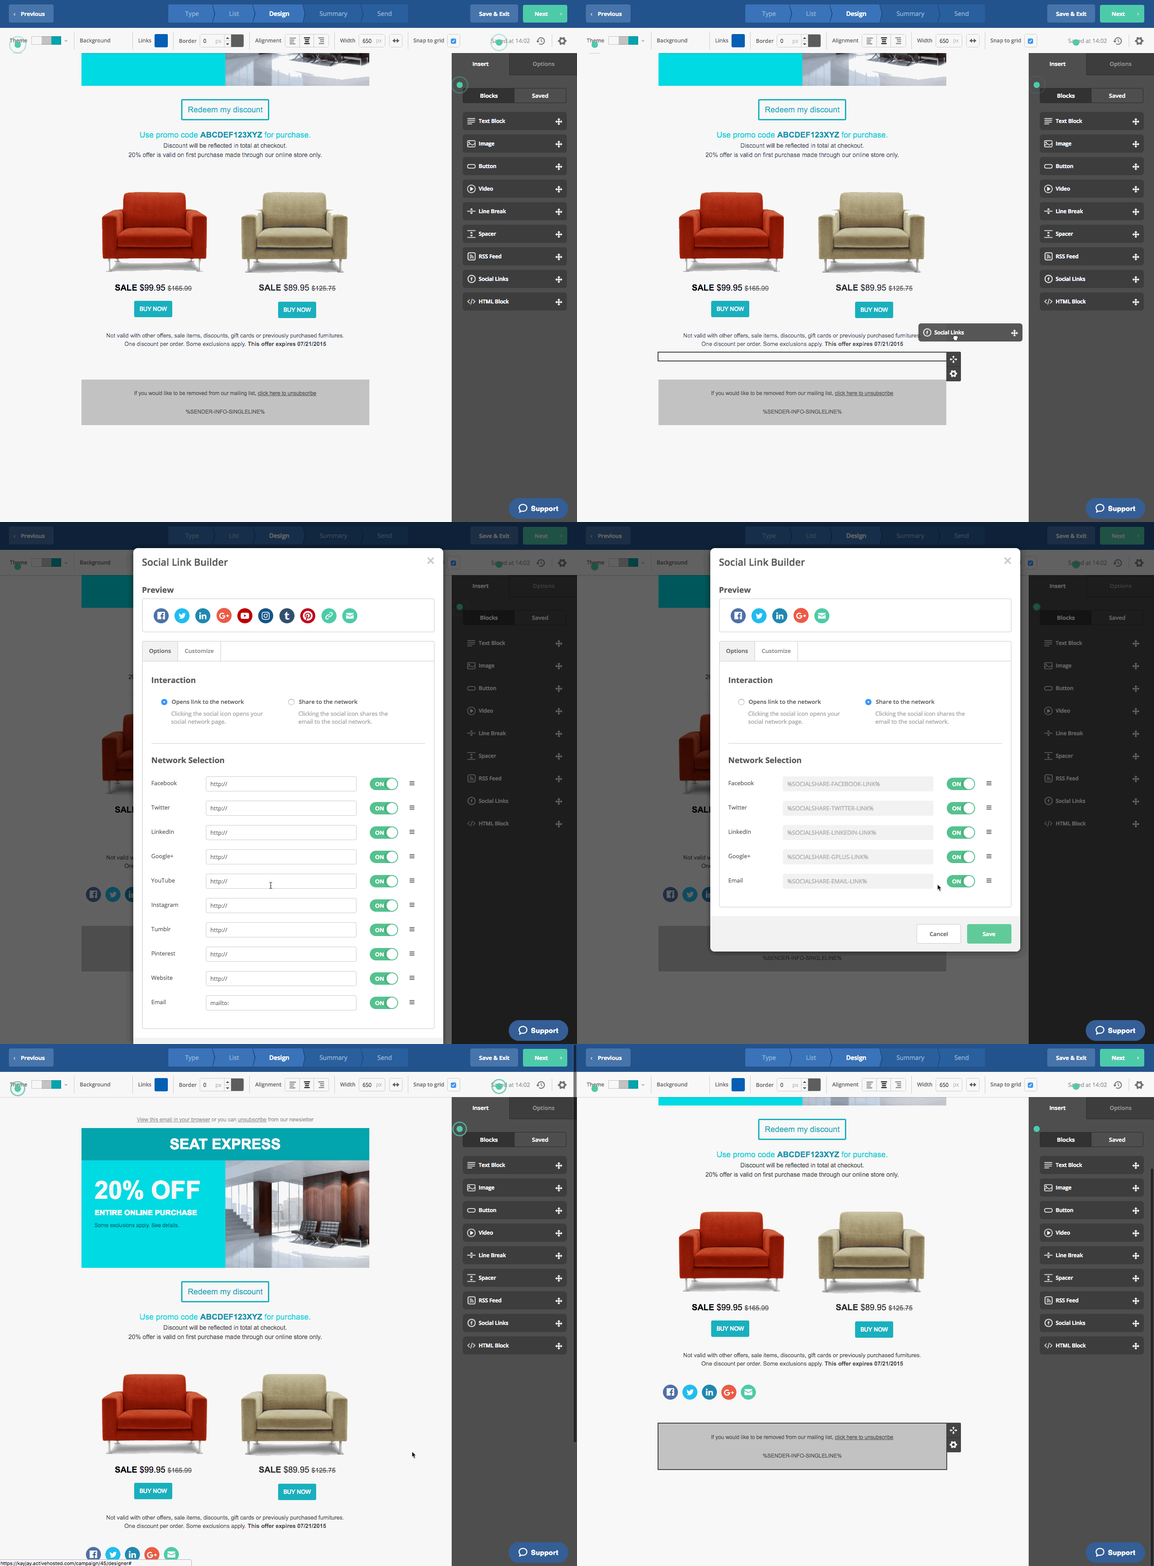
Note: For this trigger to work, the “forward to a friend” link must be included in your email. You can add this while you are building the email. In the email designer, drag “Social Links” into your email. You will then be directed to the Social Link Builder. Select the “Share to a network” option in the “Interaction” section, and make sure the Email social share link is activated.
Just like the “Shares an email” trigger, you might use this to send a “thank you” message, or enter contacts into a VIP offering or contest, or send a special offer or discount to contacts who promote your business.
You could also use this trigger to begin an automation that assigns contacts a “Promoter” tag.
Replies to an email
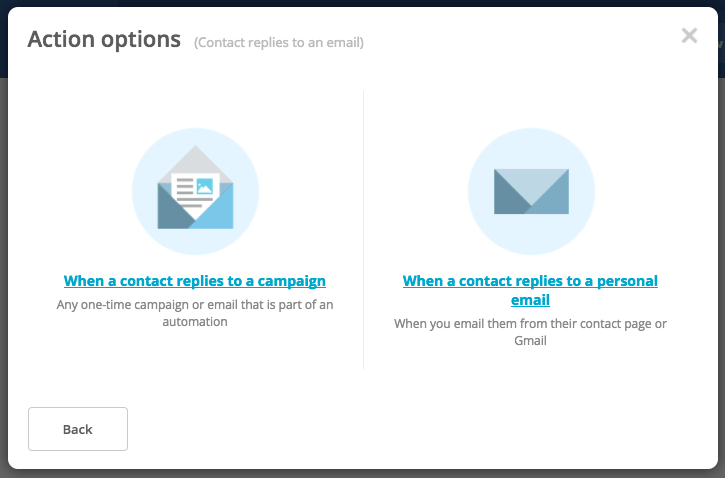
This trigger begins an automation when a contact replies either to a campaign (including any one-time campaign or an email that is part of an automation) or to a personal email (the one-on-one emails you send through your email account associated with ActiveCampaign):
If you are configuring this start trigger for a campaign email, make sure the “Reply Tracking” option is turned on at the Campaign Summary step before you send the email:
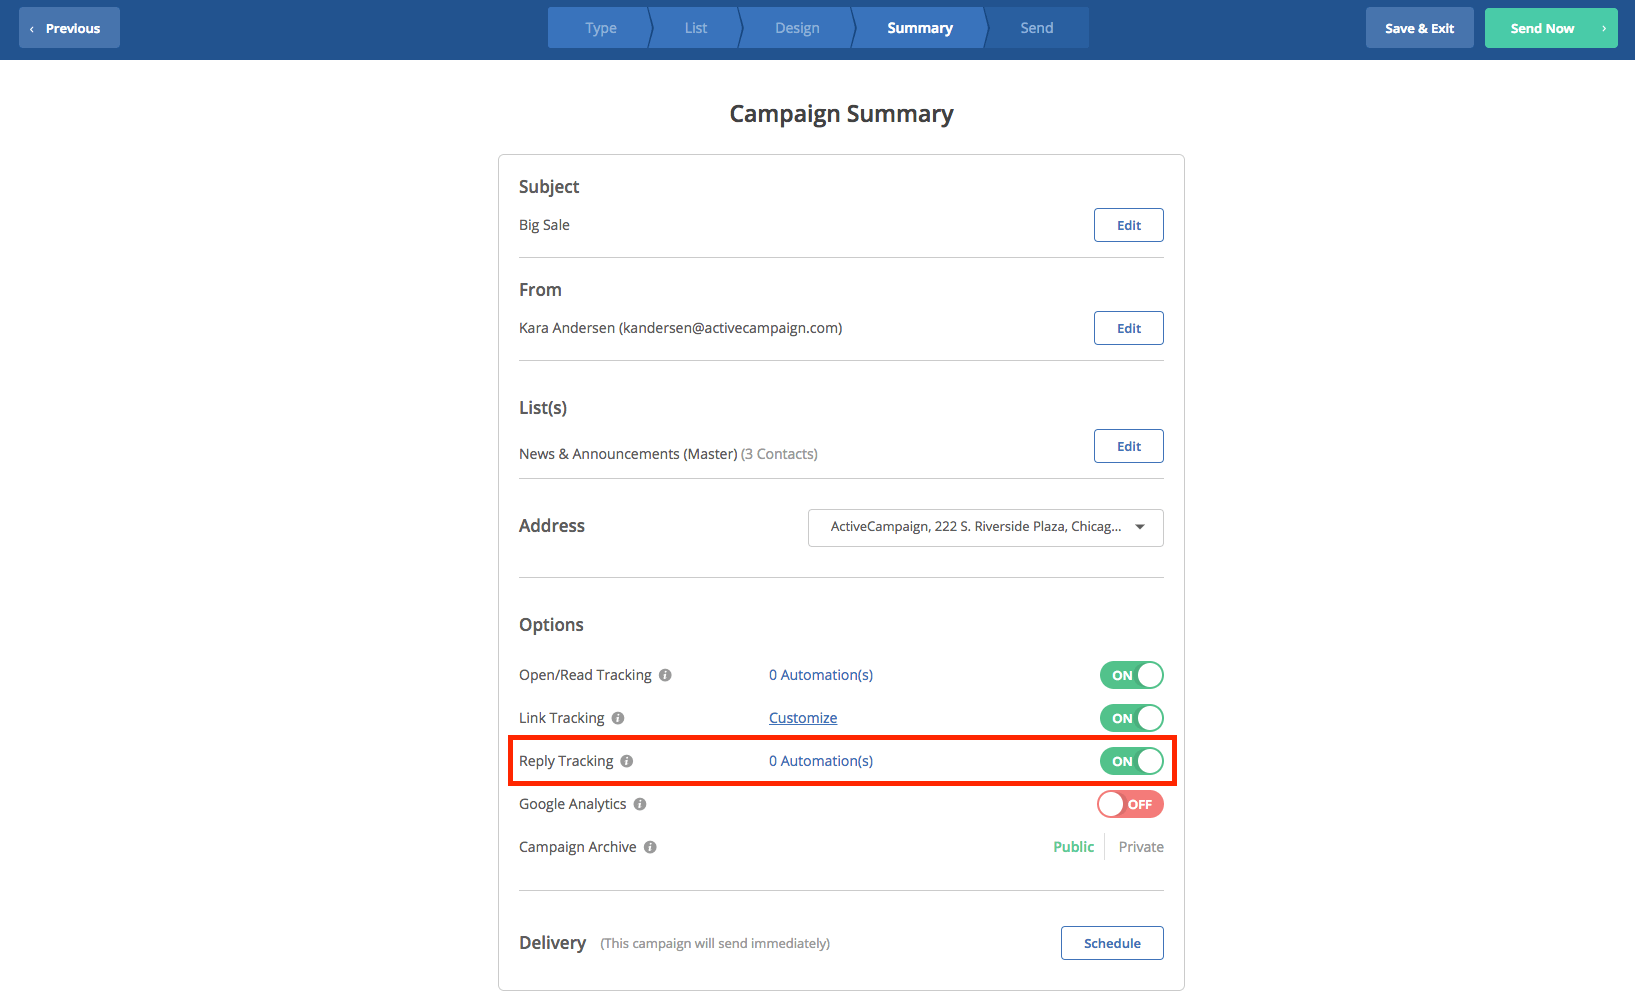
Note: When you enable reply tracking for a campaign, this will change the “Reply Address” of the campaign. So the “From Address” and the “Reply Address” will not be the same, but deliverability will not be affected.
If you are configuring this start trigger for a personal email, a contact will simply be added to the automation after responding to the personal email you sent.
You can then set this trigger to apply only to a specific email, or “Any email.” Or, you can set the trigger to run the automation when a contact replies to any email, but only for a specific list of contacts.
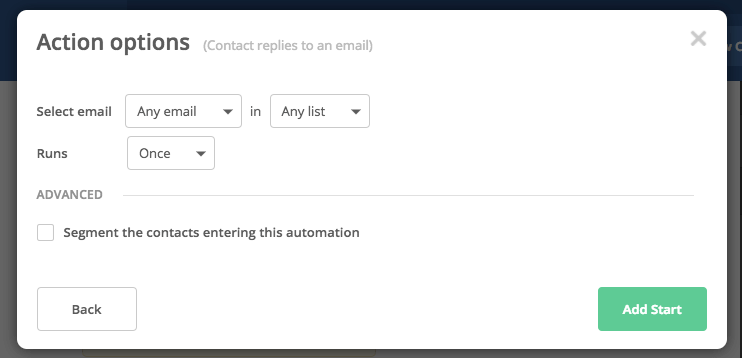
This start trigger is useful for follow-up and updates related to deals. You might use it to begin an automation that creates a task to reply to the contact’s email to help you stay on top of your deal-related follow-up. Or you might use it to trigger the move of a deal from one stage of your pipeline to another.
Tag is added
This trigger begins an automation when a specific tag is attached to a contact. In ActiveCampaign, this can happen in a few different ways—either in a bulk tag add to a group of contacts, to a single contact via the Contacts section of the platform, or by an automation.
To set up this start trigger, simply type in the name of the tag you would like to trigger the automation:
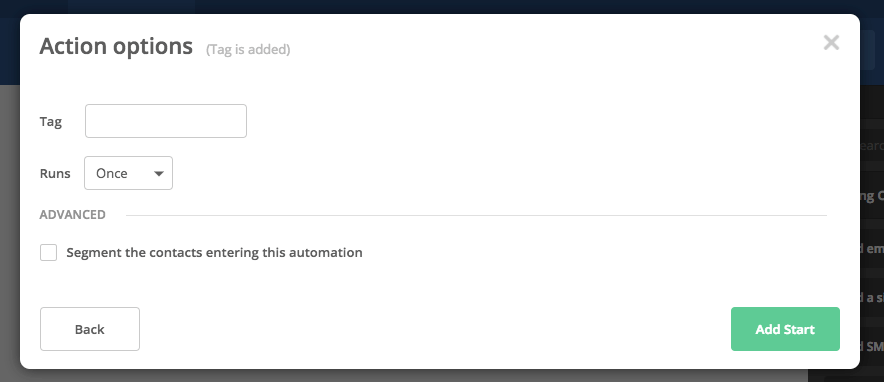
Note: If you elect to have this trigger run “Multiple Times,” this will not retroactively enter contacts who have already been assigned the tag into the automation. The tag status must first go from not present to present, in order for the automation to be triggered. So, for a contact to run through it multiple times, the tag will have to be added so they can enter the automation for the first time. After they complete the automation, the tag will need to be removed so it can be added again at a later date, to allow them to re-enter.
A great use of the “Tag is added” trigger is with a “Purchased product” tag. You can use it to trigger an automation that sends a “thank you” message or a request for a product review to new customers. Or, you can use the “Tag is added” trigger to cross sell by sending an email with information about Product B to customers who have the “Purchased Product A” tag.
Tag is removed
This trigger begins an automation when a specific tag is removed from a contact. Similar to the “Tag is added” trigger, it will begin an automation regardless of how the tag is removed (in a bulk tag removal to a group of contacts, from a single contact via the Contacts section of the platform, or by an automation).
To set up this start trigger, simply type in the name of the tag you would like to trigger the automation:
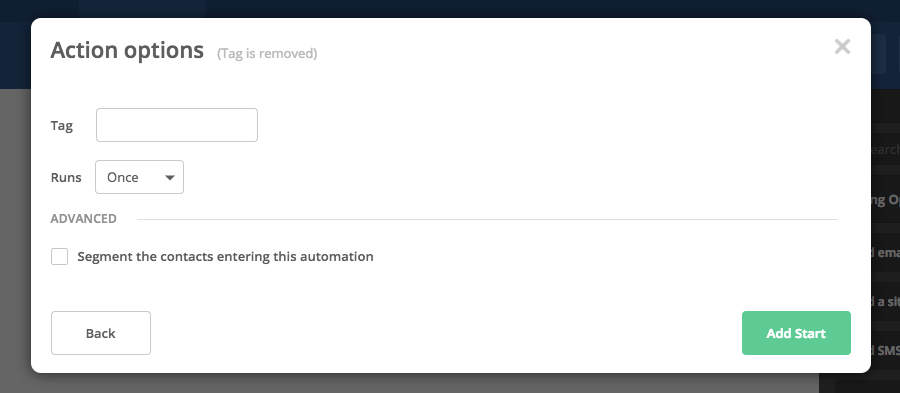
This start trigger is useful to activate a nurturing sequence or re-engagement effort with contacts. For instance, if you’re using a “Promoter” tag and that tag is removed from a contact, you may want to trigger a personalized follow-up sequence to help convert that contact back into a promoter.
Field changes
This trigger begins an automation when a specific field changes for a contact; it applies to both custom fields and the default fields included in ActiveCampaign.
You can set this trigger for when a specific field changes for a contact “ever”, or for when a specific field changes “to” a specific value.
You also have the option to specify whether it triggers the automation “every time” a contact is “added,” “updated,” or either “added or updated;” or just “the first time” a contact is “added,” “updated,” or either “added or updated.”
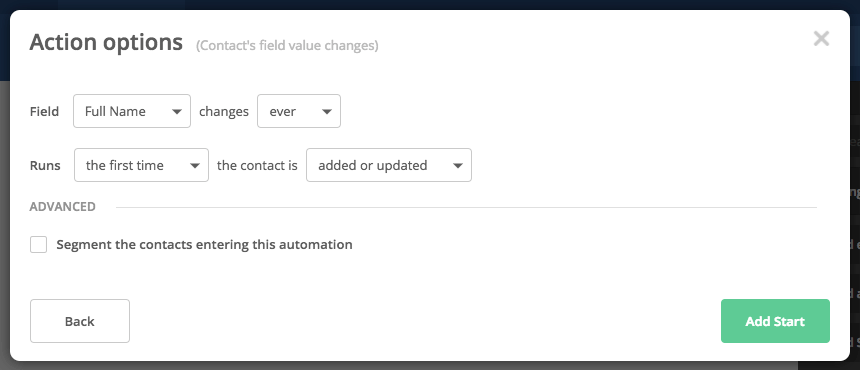
You might use this start trigger to internally assign a contact to a different salesperson if that contact’s location changes.
Goal is achieved
This trigger begins an automation when a contact either achieves or skips a goal from another automation. (When a contact skips a goal, this means the contact progressed beyond the goal in an automation, but without achieving the goal. For this to happen, the goal would have to be set to allow contacts to “Continue anyway” if they do not meet goal conditions.)
You can specify which goal should start the automation, whether the automation should be triggered when the goal you specify is “Achieved” or “Skipped” by a contact, and whether the automation should run “Once” or Multiple Times.”
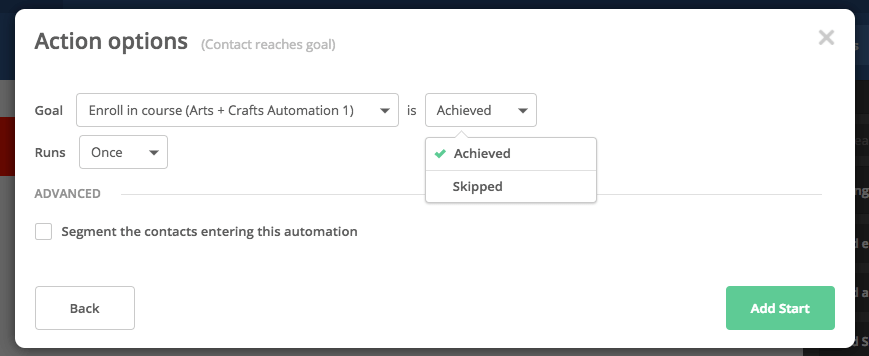
A great use of the “Goal is achieved” trigger is in a follow-up sequence after a contact becomes a customer. Let’s say you have another automation you previously set up with the intention of getting contacts to purchase a new product. Instead of ending that automation, you can add a goal of “Purchases New Product.”
Then, maybe you’d like to send a 20% off coupon to customers who achieved that goal. To do this you would create a new automation using the “Goal is achieved” start trigger. Select the “Purchases New Product” goal and “Achieved” to set up this automation properly.
Date based
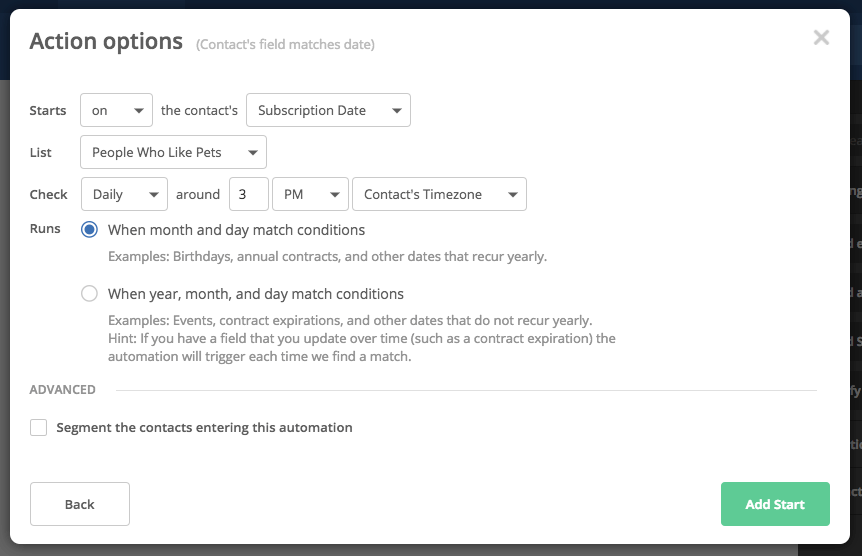
The “date based” start trigger will trigger your automation to run based on a specific date. To use this trigger, you will need to have established date-based custom fields. For example, you might have custom fields for contacts’ birthdays, subscription renewal dates or expiration dates.
You can set the automation to begin before, on or after the date you specify, and apply it to a specific contact list. Then in the “Check” section, you can set how often ActiveCampaign checks your list for contacts matching the required date conditions.
If you elect to trigger the automation before or after a specified date, you will also have the option to set how many days, weeks, months, or years before/after the date you’d like the automation to begin:
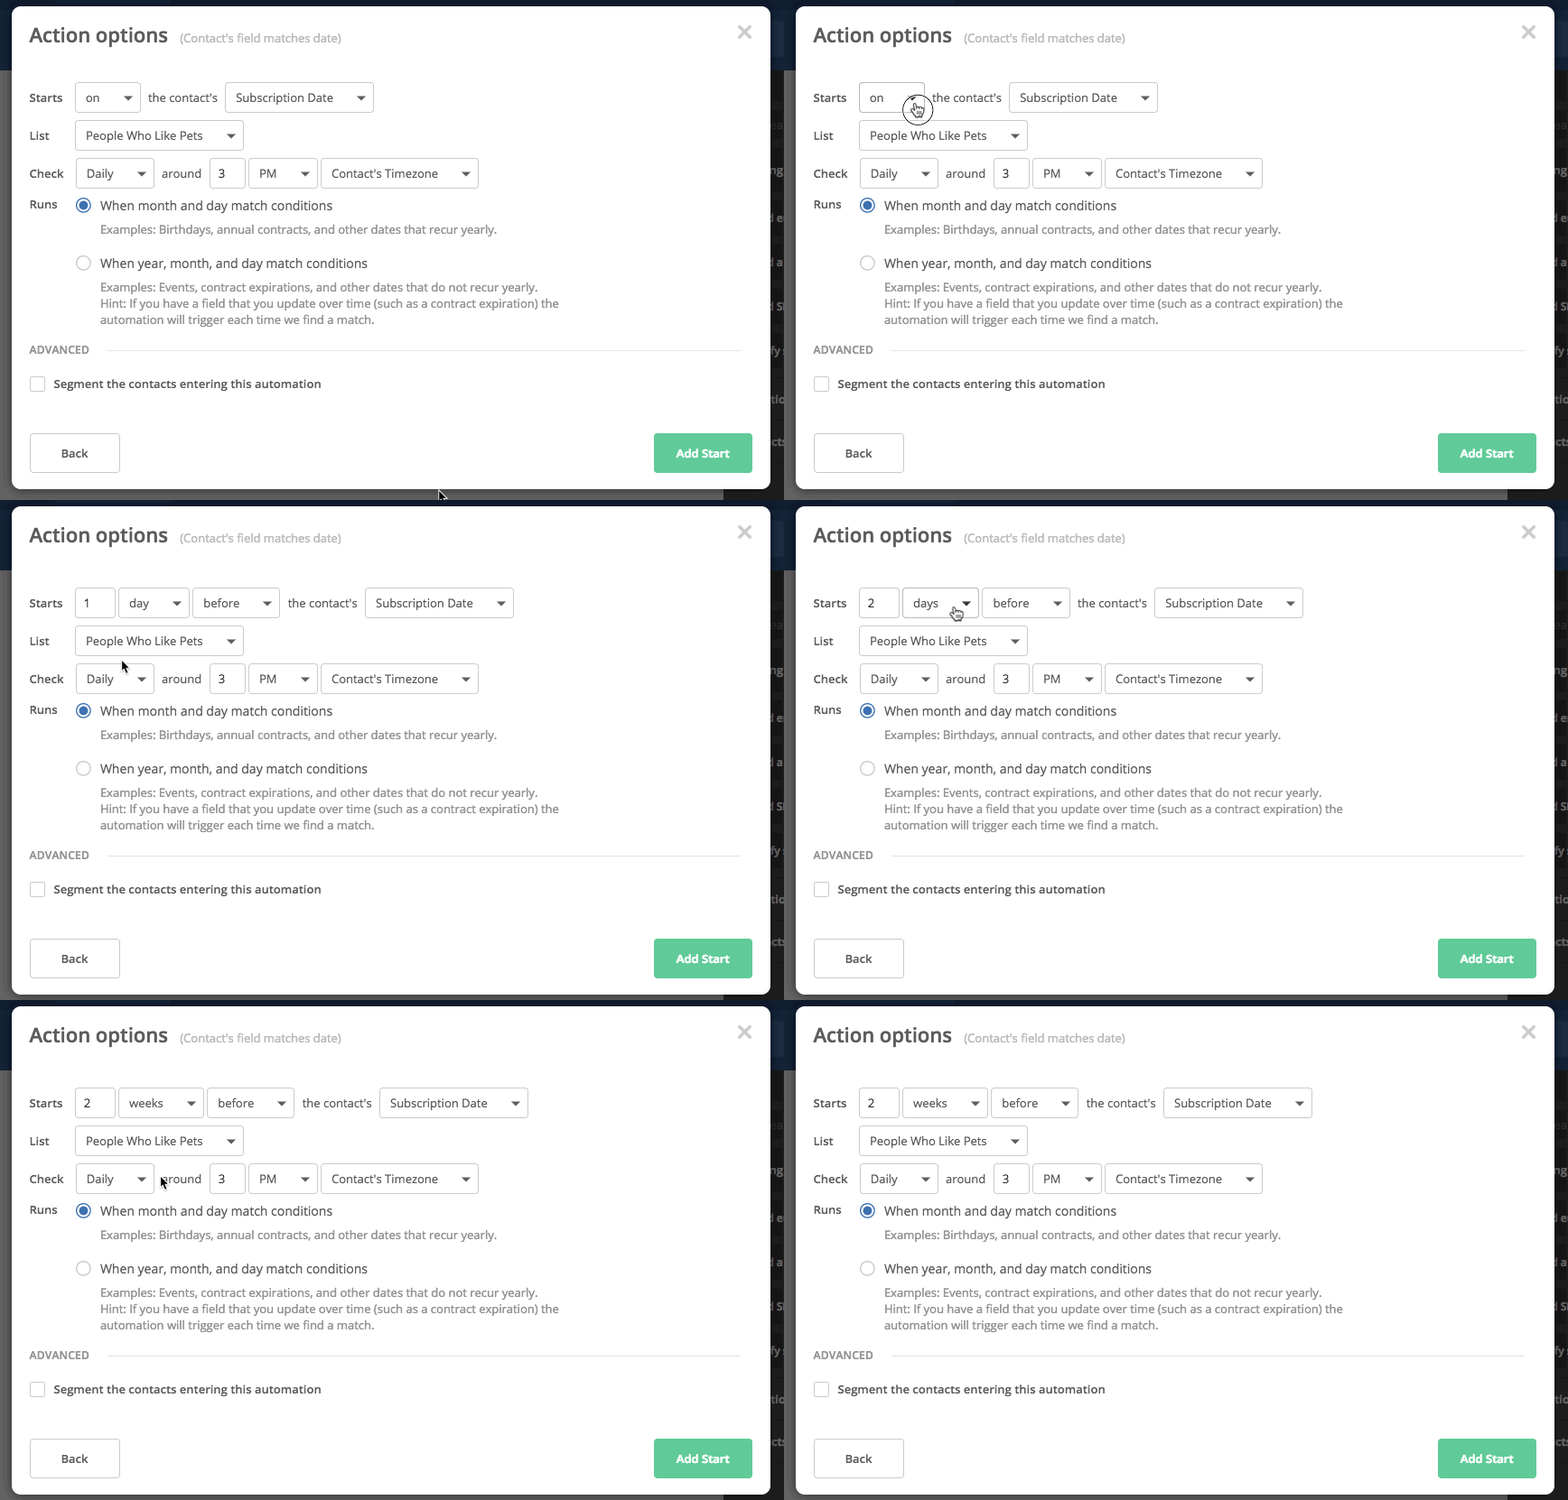
Finally, you can set how often the automation will run. The “When month and day match conditions” option is best for dates that recur yearly, such as birthdays. This configuration will only be executed once a calendar year when the conditions are met.
The “When year, month, and day match conditions” option works best for dates that do not recur yearly. This configuration will allow the trigger to execute multiple times within a calendar year when the conditions are met.
You might use the “date based” trigger to remind your contacts of upcoming appointments or recurring transactions.
For instance, if you have a paid membership program, you might set up an automation that sends an email reminder to contacts about their yearly membership renewal a month before their current membership ends. To do this, when you set your trigger specifications, you would set the “Starts” field to “Before”, and specify 1 month before the contact’s “Renewal date” (this would be a custom field that you set up previously).
Since this is a date that recurs yearly, you would elect to have this automation run “When month and day match conditions.”
RSS based
This trigger will begin an automation when your RSS feed is updated with new content. To set up this trigger, enter the URL of your RSS feed in the field provided. You can elect how frequently ActiveCampaign will check for updates (hourly, or you can set a specific time daily, every weekday or weekend), and specify how many new items must be in your feed before the automation will run.
Finally, you can elect to have all contacts enter the automation, or create a segment of contacts to enter the automation.
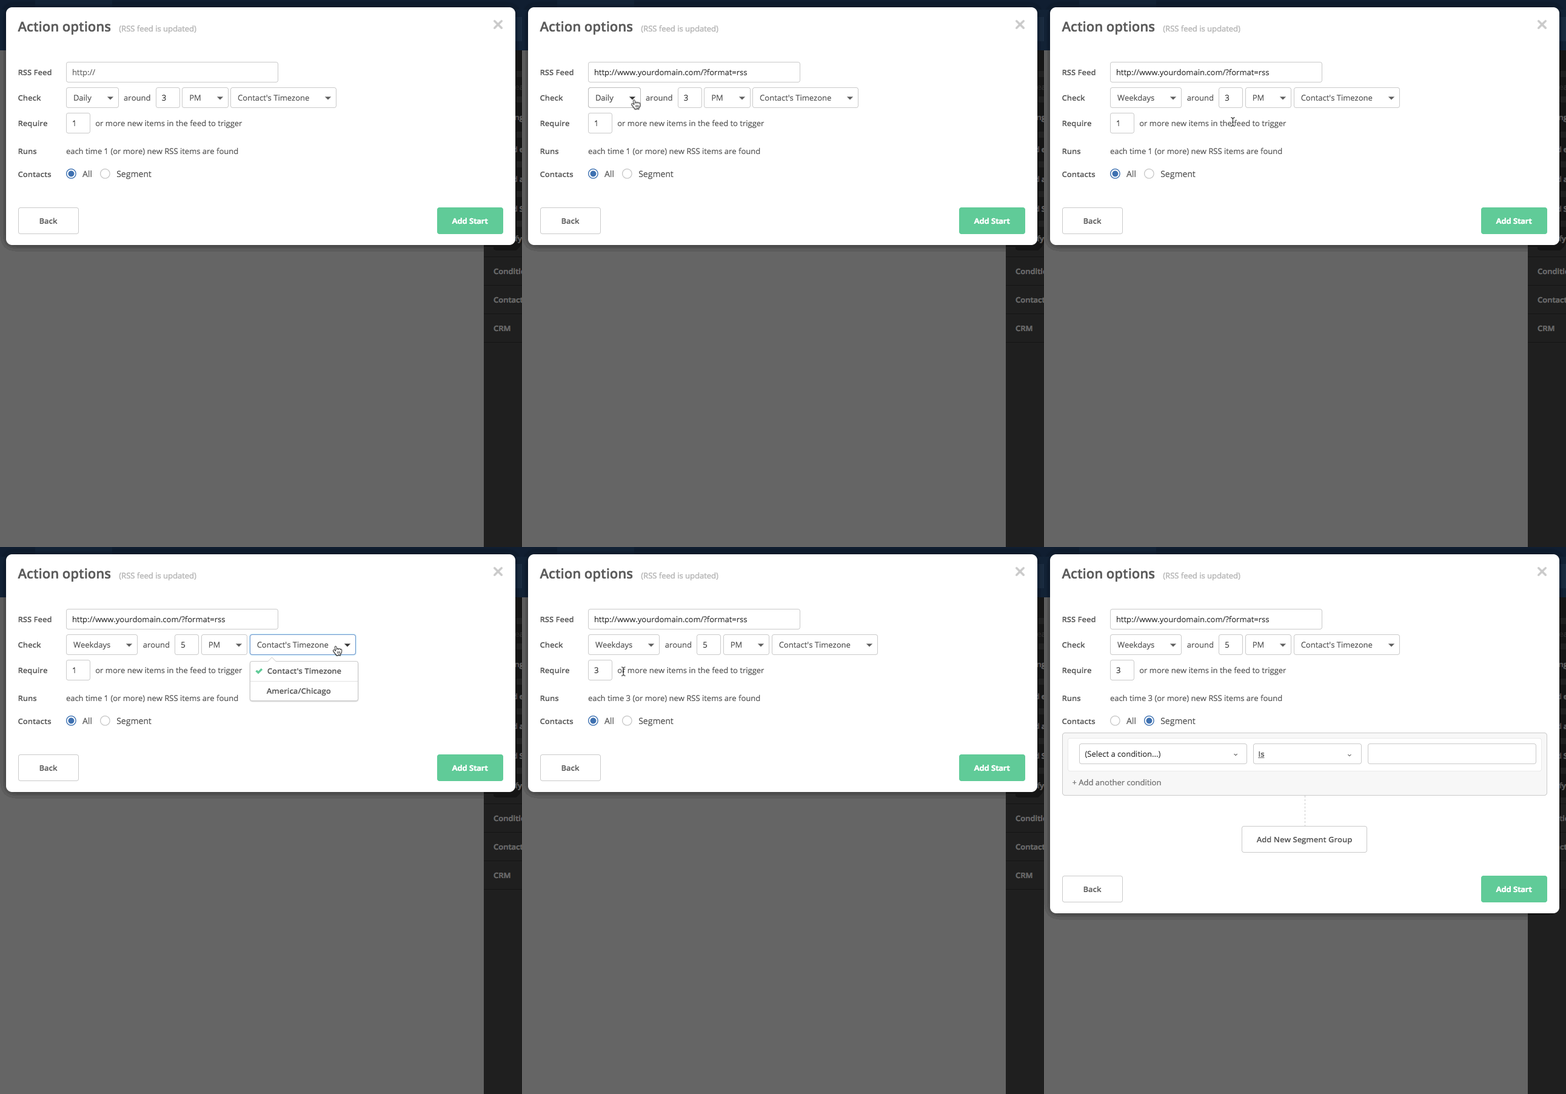
You might use this trigger to send blog or news updates to your subscribers. If you typically have new updates to share every month or less frequently, you may find it helpful to use this trigger to begin an automation that then follows-up with contacts who haven’t engaged with your update email after a specified period of time.
This strategy helps encourage engagement and maintain frequent touch points with contacts when RSS updates are less frequent. As an added bonus, it also allows you to send your email updates without logging in to the ActiveCampaign platform every time.
Dismisses a site message
This trigger begins an automation when a contact dismisses a site message on your website. To set up this trigger, simply select the site message you want to apply and determine whether you want the automation to run “Once” or “Multiple Times.”
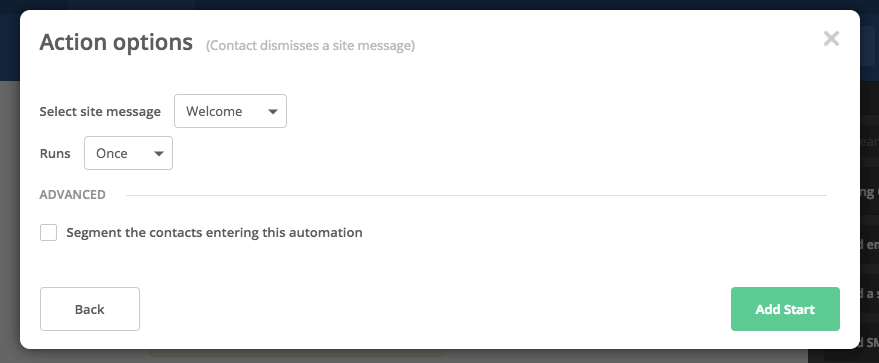
Note: This trigger is available only if you are on a Professional or Enterprise plan because it requires use of the site messages feature in ActiveCampaign.
Site messages are a great way to call attention to specific information on your website, drive traffic, and send personalized messages to contacts that may not engage as frequently with email.
Once contacts are out of their inboxes and on your website, you have a way to introduce them to a new product, or other information you’d like to highlight, in a dynamic way.
Let’s say you have an introductory “Welcome” site message that contacts see when they visit your website for the first time. You might use the “Dismisses a site message” start trigger to begin an automation that displays a short progression of site messages on your website, with each new message being triggered by a contact’s dismissal of the previous message.
You might use this process to walk contacts through navigation on your site, or point them to one of your most popular products/offerings for first-time customers, or share a special, limited-time offer/discount.
Conversion occurs
This trigger begins an automation when a contact triggers a conversion. To set up this trigger, simply select the conversion you want to apply and determine whether you want the automation to run “Once” or “Multiple Times.”
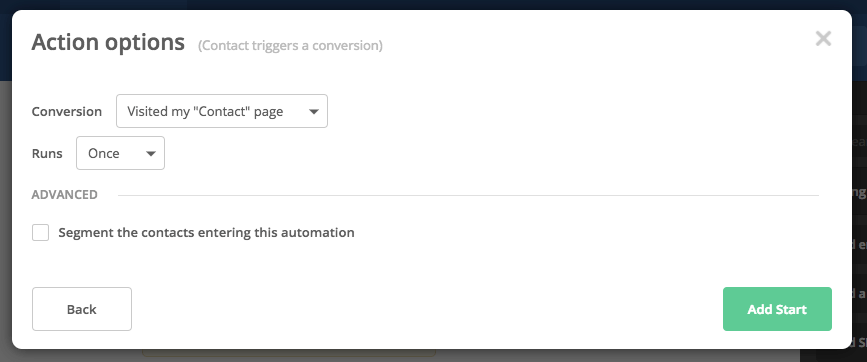
Note: This trigger is available only if you are on a Professional or Enterprise plan because it requires use of the attribution feature in ActiveCampaign, which allows you to define conversion events inside your ActiveCampaign account.
To use this trigger, you will have previously had to define a conversion event. Examples of a conversion event include: a contact visited a key web page, purchased an item from your store, or downloaded a lead magnet.
A great use of the “Conversion occurs” trigger is to enter contacts into specially targeted automations based on the traffic sources they came from. For example, let’s say you created a conversion event for when an anonymous visitor converts to a known contact by downloading your ebook about marketing automation. You could then begin an automation that follows up with more information about that topic and sends an email offering a discounted consultation session.
Makes a purchase
This trigger begins an automation when a contact makes a purchase in your eCommerce store.
Note: This trigger is available only if you are on a Plus, Professional, or Enterprise plan because it requires previous setup of a deep data integration with ActiveCampaign.
When you set up this trigger, you can select which deep data eCommerce integration you’d like to use (if you have more than one integration) and specify a specific store.
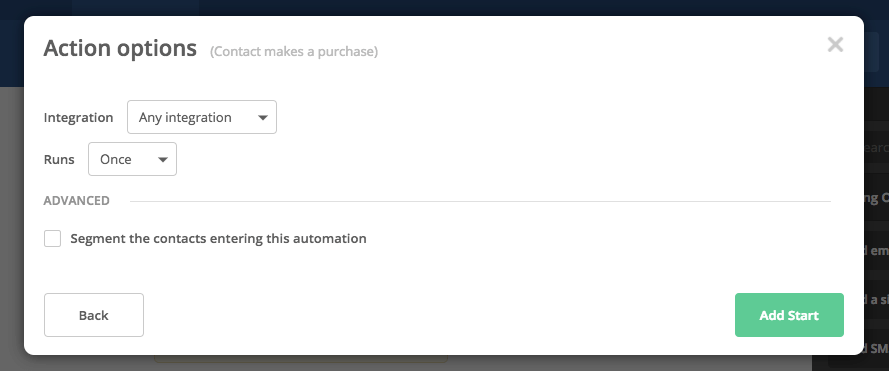
The “Makes a purchase” trigger is an incredibly handy tool for eCommerce businesses. You can use it to begin an automation that sends a post-purchase follow-up sequence with a store discount or a request for product feedback.
You could also use it to tag contacts with purchase information, such as “Purchased Product A” and set up another automation with the “Tag is added” start trigger that begins a cross-selling sequence for customers who purchased that product.
Score changes
This trigger begins an automation when a contact or lead score (a score associated with a deal) changes. You can specify which of the scores you’ve created should begin the automation, as well as whether you want to the automation to be triggered when the score is adjusted above or below a certain threshold you set.
For example, if you elect “Changes to be” “above” 50, the automation will run when the score you selected becomes 51 or greater.
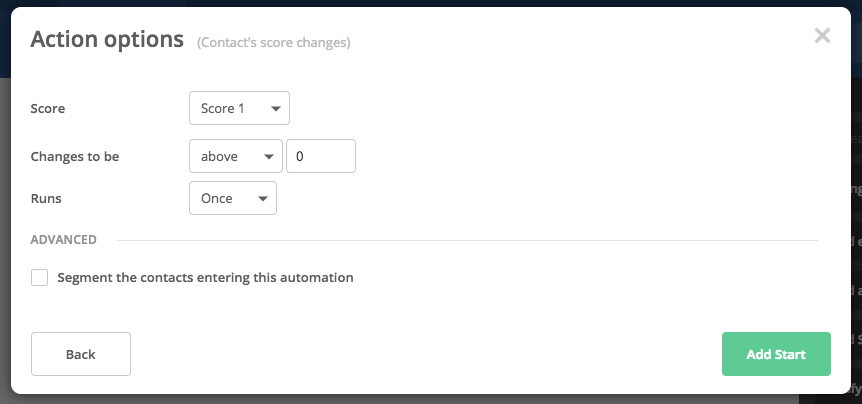
Note: This trigger is available only if you are on a Plus or Enterprise plan because it requires use of the contact and lead scoring features in ActiveCampaign.
You might use this trigger to begin an automation that creates deals as contacts become sales-ready. Another strategy would be to begin an automation that applies an “Engaged”, “Sales Ready,” or “Disengaged” tag to contacts based on their scores.
Enters a pipeline
This trigger begins an automation when a new deal is created and added to a pipeline. Simply select “Any pipeline” or choose the specific pipeline you want to use to begin the automation.
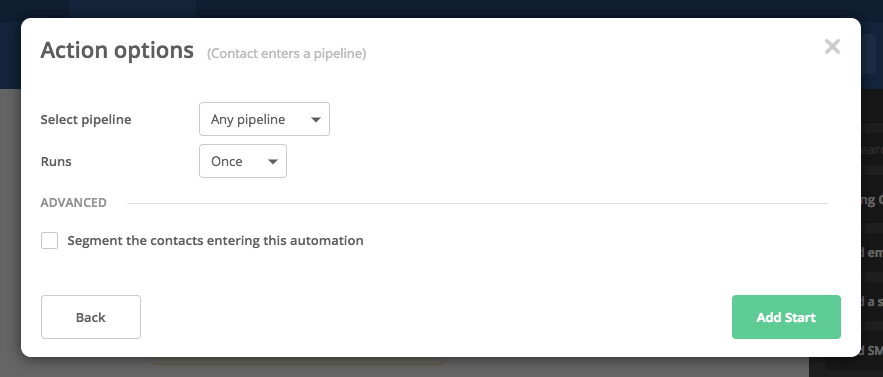
Note: This trigger is available only if you are on a Plus or Enterprise plan because it uses the Deals feature in ActiveCampaign.
This is an especially important start trigger if you’re running multiple pipelines with many open deals, because it can keep your sales processes on track and ensure no deal falls through the cracks, no matter how many there are to manage. Use this start trigger to automate the processes you want to make sure happen after a deal is created.
For example, you might use the “Enters a pipeline” trigger to begin an automation that sends an email inviting the contact associated with the deal to a phone consultation. You might also create a separate automation with this trigger that creates a series of tasks and notifications associated with assigning the new lead to a salesperson.
And if you have multiple pipelines—five, for example—you can use this start trigger to begin five separate automations to manage your sales processes and help advance deals through all of your pipelines.
Deal stage changes
This trigger begins an automation when a deal changes to a different stage. Select the pipeline you want to apply the trigger to, and specify the exact movement between stages you want to target.
You can set this trigger to begin an automation when a contact moves from “Any stage” to “Any stage,” or hone in on a specific movement, such as from “Stage X” to “Stage Z.” You can also set the trigger for when a contact moves from “Stage X” to “Any stage.”
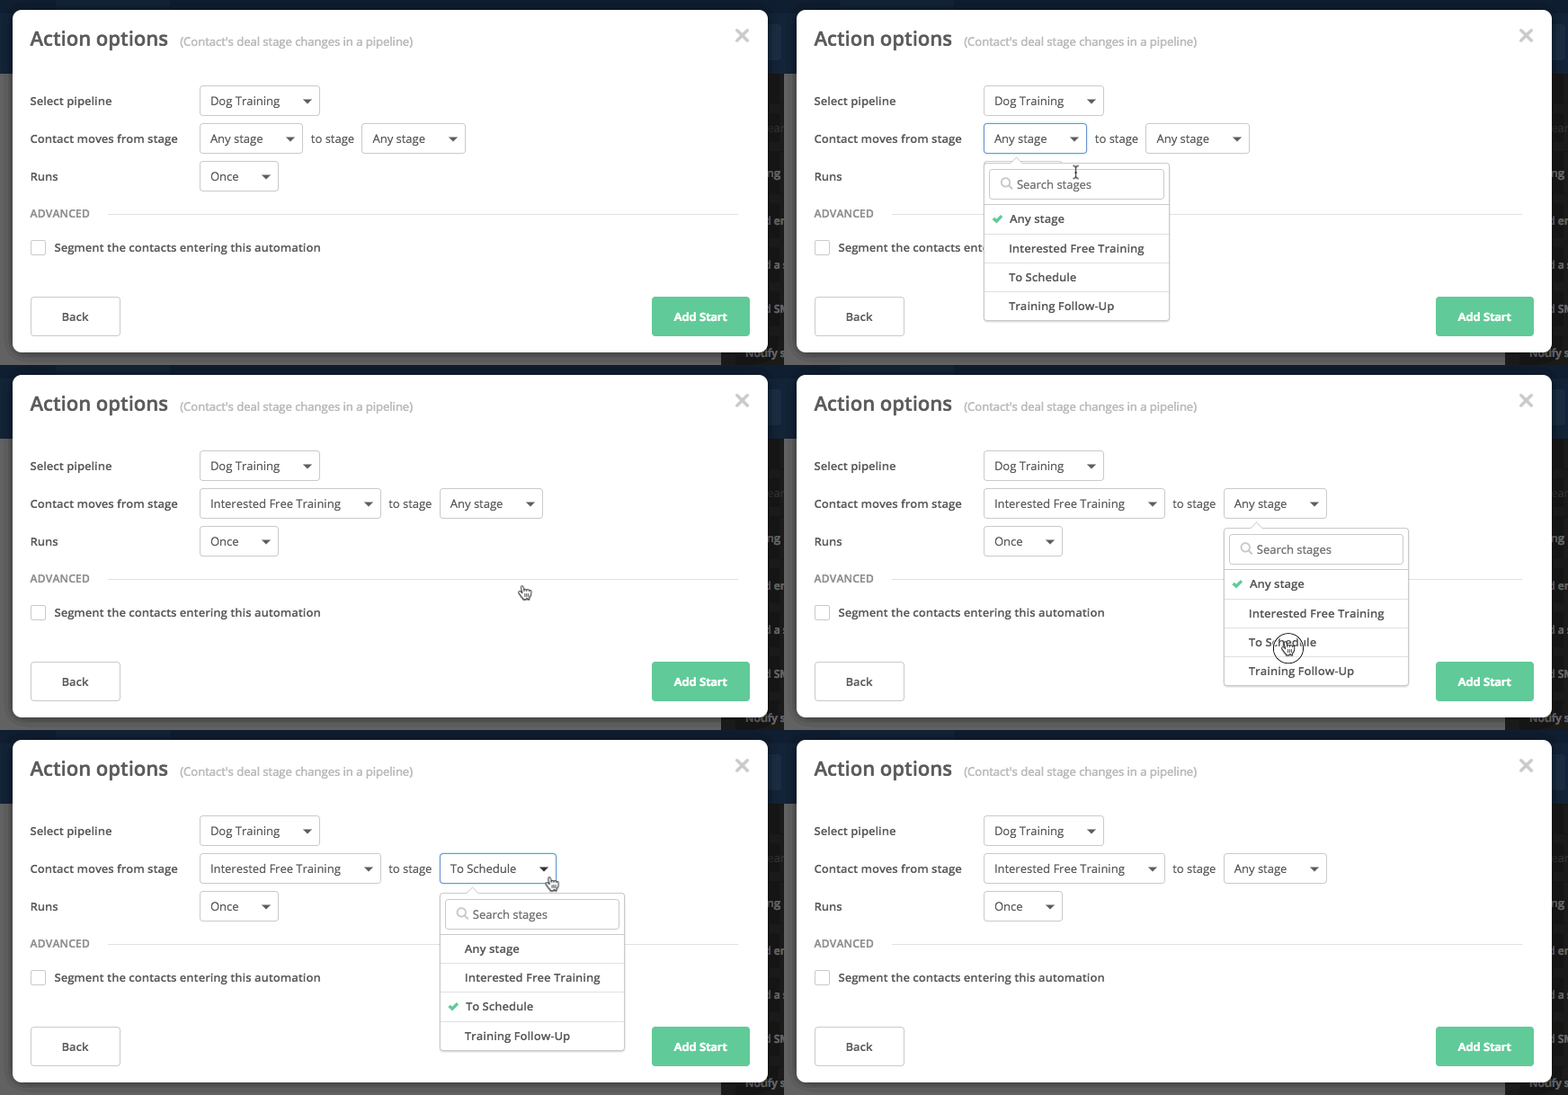
Note: This trigger is available only if you are on a Plus or Enterprise plan because it uses the Deals feature in ActiveCampaign.
The use of this trigger is very similar to the “Enters a pipeline” trigger. You might use it to begin automations that create tasks associated with each stage in a pipeline, or to send specific messages intended to move the deal along to the next stage in the pipeline. When a deal moves to a different stage, you might also want to trigger an automation that removes the contact associated with that deal from a different automation.
Deal status changes
This trigger begins an automation when the status of a deal changes. A deal’s status refers to whether that deal is “open,” “won,” or “lost:”
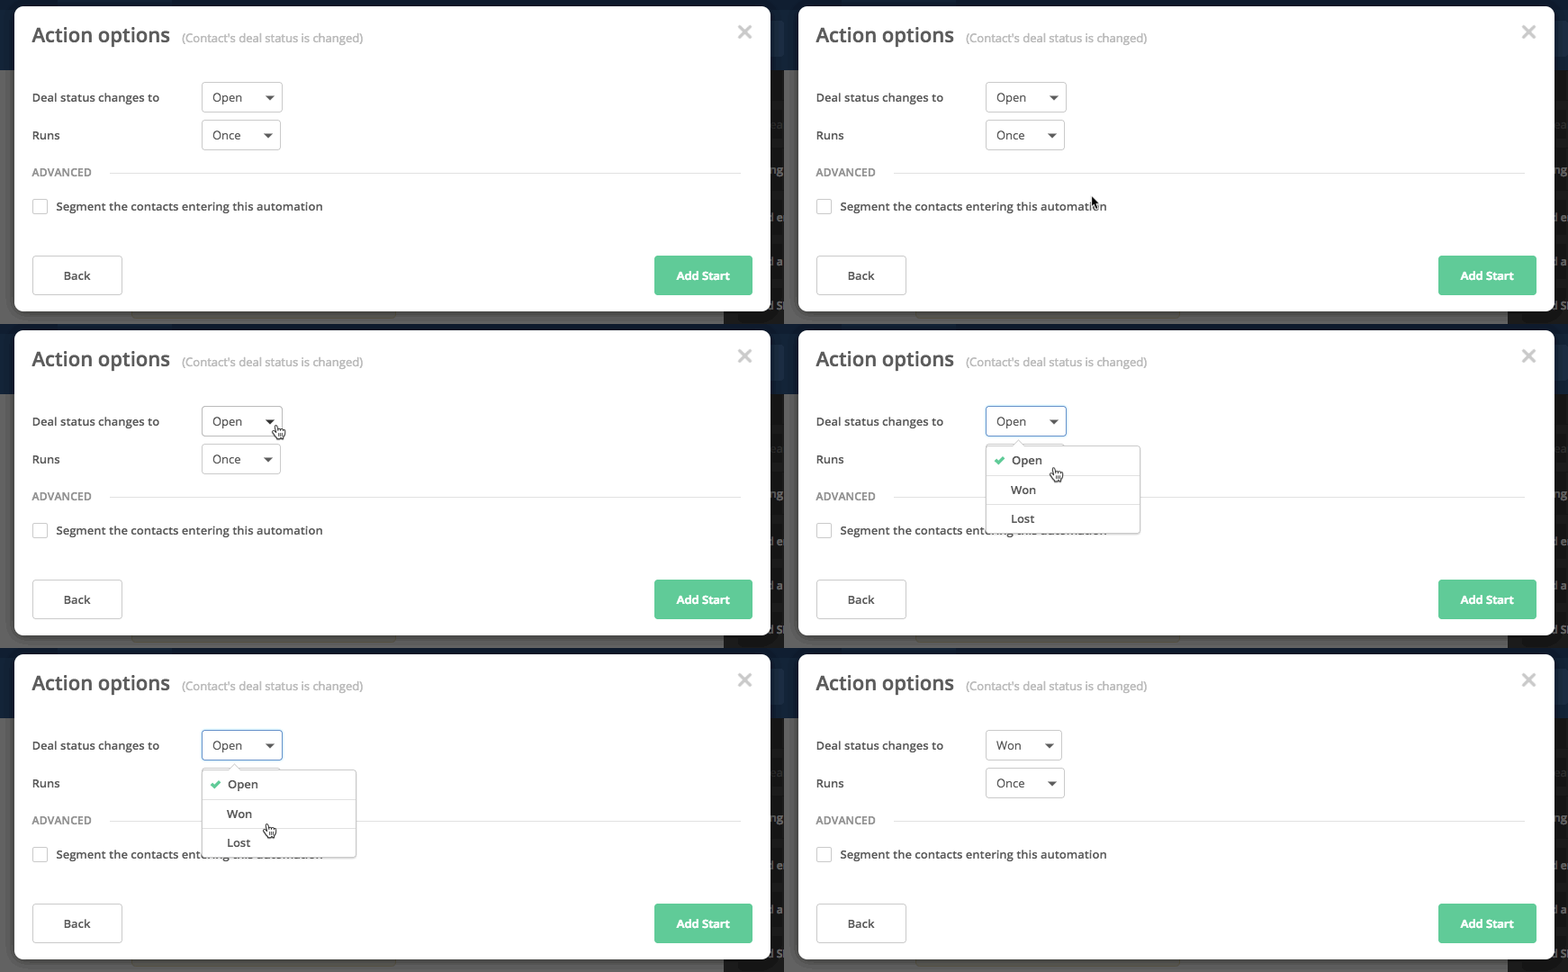
Note: This trigger is available only if you are on a Plus or Enterprise plan because it uses the Deals feature in ActiveCampaign.
This trigger allows you to automate relevant follow-up sequences depending on whether a deal has been successfully won, or lost. For example, if a deal is won, you might use this trigger to begin an automation that creates tasks to set up that contact’s account. If a deal is lost, you might use this trigger to create a different automation that internally notifies a team member, removes a tag or removes that contact from a list.
No Start Trigger
Finally, to provide the greatest flexibility and control possible, you also have the option to use no start trigger at all to begin an automation. If you choose not to use a start trigger, no contacts would enter that automation unless you were to add them manually, or unless they were added by another automation.
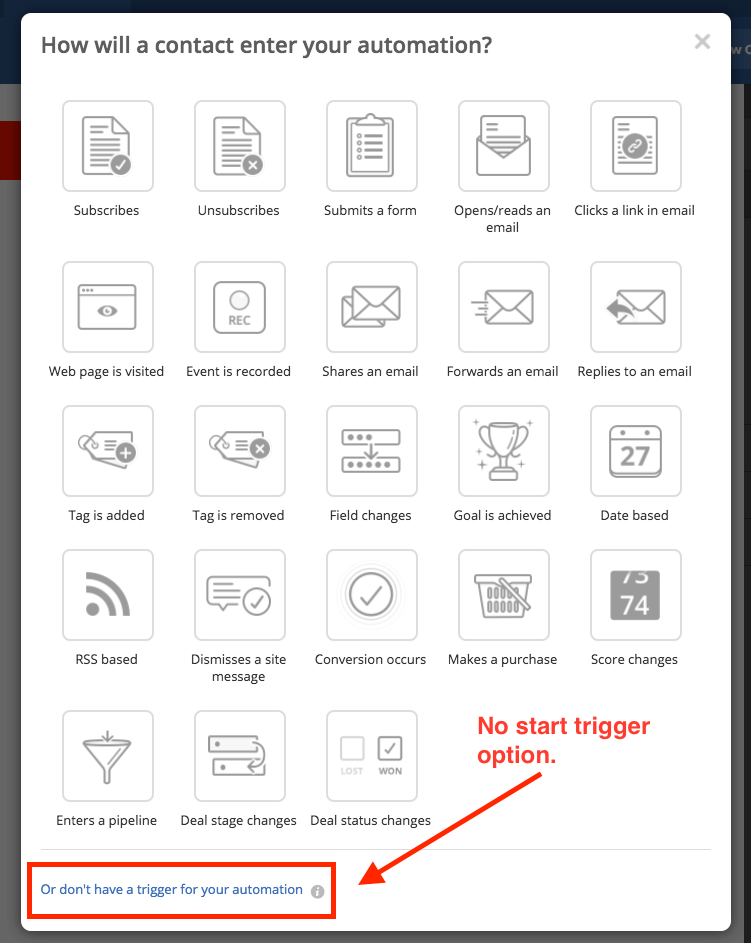
You can also begin an automation with no start trigger just by closing the start trigger modal when you create your automation from scratch.
This is a good option to use if you want to manually add individual contacts, or a small group of specific contacts, to an automation. To quickly add a group of contacts to an automation without a start trigger, you can create a segmented list with the bulk edit feature in contacts.
You can also think of this option as a way to protect the entrance to an automation, since it limits the ways contacts can enter the automation to either manual entry or entry via a specific automation.
For instance, maybe the only time you want contacts to enter Automation B is when they complete Automation A. In this case, you don’t need a start trigger for Automation B because you can simply add the “Start an Automation” action to Automation A to send contacts to Automation B:
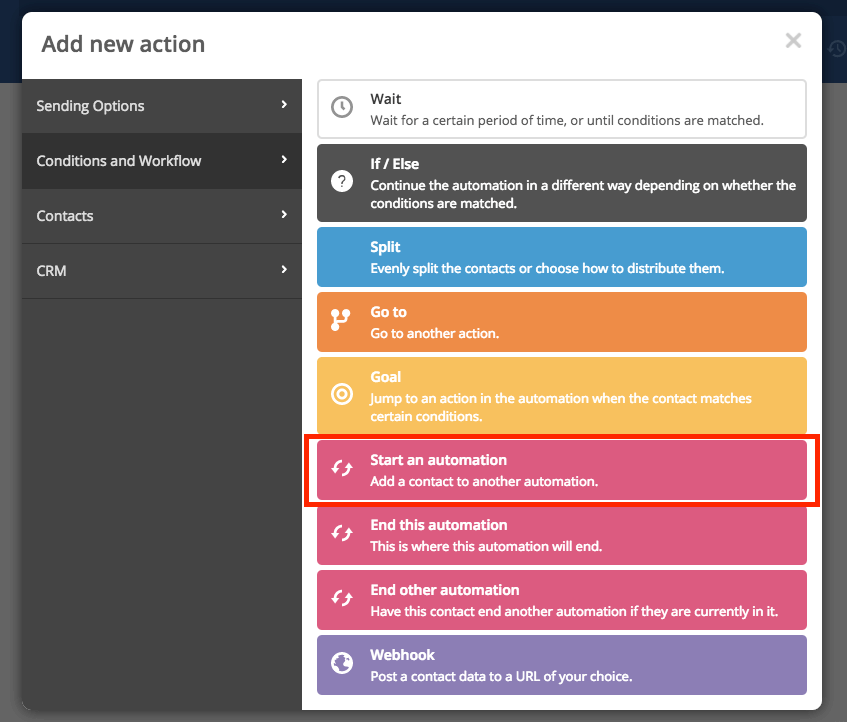
Thus, with no start trigger you have more control and diminish the risk of contacts entering the automation by accident. If you’re ever concerned about that happening, the option to not have a start trigger provides a solid fail-safe.
Summary
At ActiveCampaign, it’s all about seamlessly personalizing the customer journey at every step of the way, from anonymous website visitor, to contact, to lead, to customer, to loyal customer.
With our more than 20 start trigger options, you have ultimate flexibility in shaping that journey through powerful automations that help you scale your marketing and sales processes while growing your business.
Which of these start triggers are your favorite to use? Which are you interested in trying with your next automation? Let us know in the comments below.
