Contacts are at the heart of marketing automation. The more information you can collect and synthesize, the clearer you will become about what types of communications your contacts prefer.
There have been a number of useful updates to the way you manage your contact information in ActiveCampaign. This guide will run through the basics of contact management, and explain some of our newer features, enabling you to have a clean, concise database.
What is a Contact?
A contact in ActiveCampaign is defined by an email address. A contact can (and often does) have additional information, but it cannot exist without an email address.
To add contacts, go to the Contacts tab. On the top row, you’ll have the options to “Export,” “Import” or “+ New Contact.” You can import a list of contacts, individual contacts, or download a list of contacts around your preferred parameters.
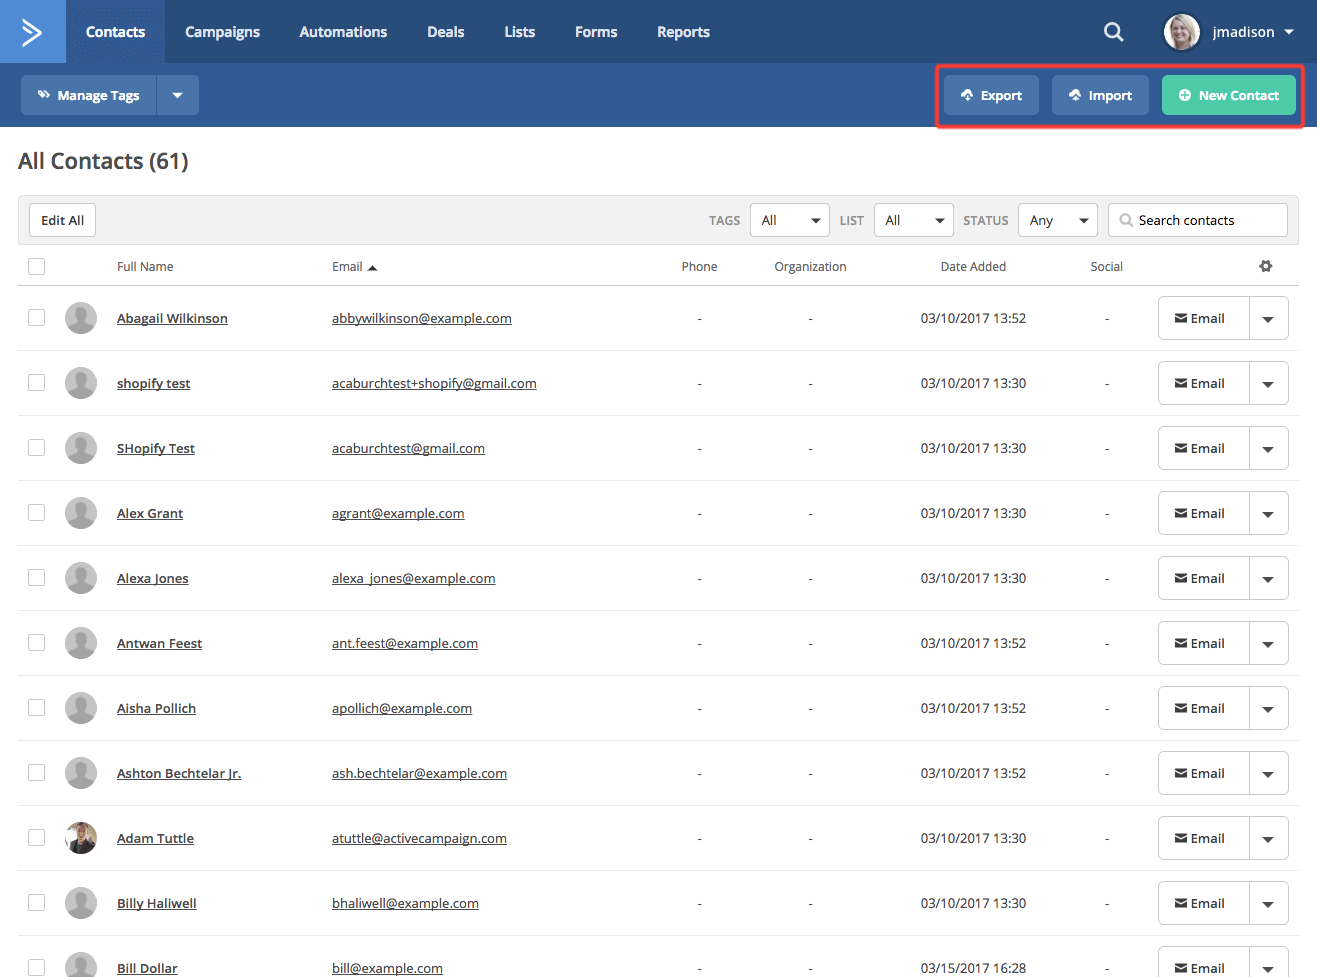
If you select “Import,” you will have the option to import your contacts via a .CSV file, copy & paste, or view. recent imports. Additionally, you can connect to many services where ActiveCampaign will automatically pull in your contact data.

If you just have a contact or two to enter, you can always click the green “+ New Contact” button and quickly type in the information. After you enter their information, you will have the ability to add them to lists, create a deal, add them to specific automations, add tags, or apply advanced list options.

Note: If you don’t enter any information into the search, and click “Export,” your entire list of contacts will be downloaded as a CSV file. If you perform a search and click “Export,” only the contacts in the searched segment will be downloaded.
Single Contact View
After you click into a single contact, there are many editing options within the single contact view. All the information about that contact, including their activity, tags, subscribed lists, as well as any additional information, is available.

You can edit all of these fields, and enter additional information. Any custom fields you’ve created, including form fields, will show up as individual fields in a contact record, allowing you to input form data for that contact.
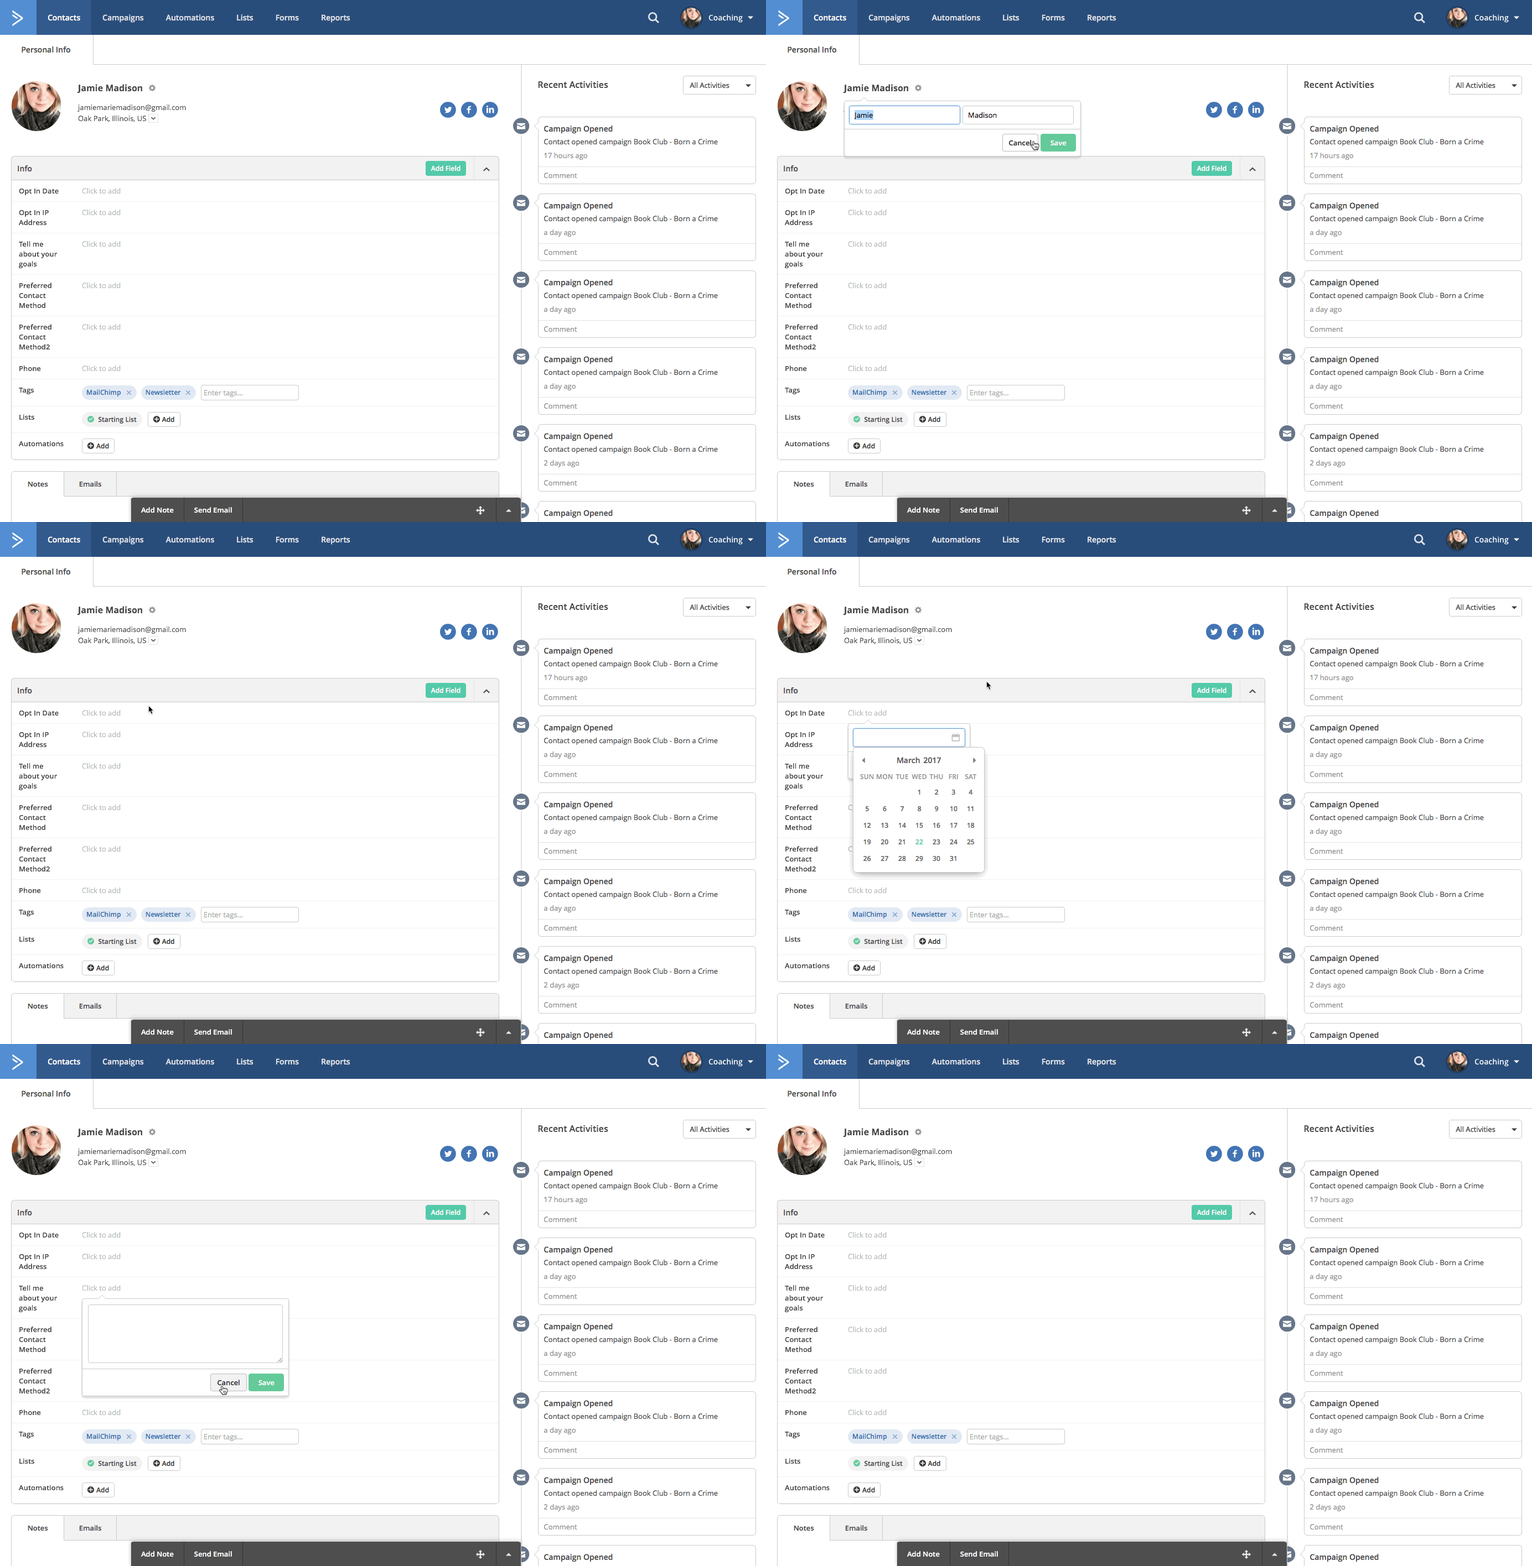
If you would like to add an additional field to contact records, it is possible to do so from within a single contact. When you select the green “Add Field” button on the top of the Info box, you will be presented with a version of the form builder. Adding a field here will add the field across all contacts.

Note: You can manage your added fields in the Forms tab, under Manage Fields.
Additionally, you can subscribe a contact to lists, add new tags, or add them to existing automations.


You can also scan your contact’s recent activity, including emails, campaign activity, notes, site and event tracking, and automations. Recent Activities default to show all contact activity, but you can sort and view the actions you’d like to see by selecting one (or multiple) options in the drop-down menu.

If your contact has connected to you with any of their social media profiles, those profiles will be linked and are accessible by clicking the corresponding logos.

On the bottom of the contact record, you have the ability to add a note or send an email, as well as see any past notes or emails sent.

If you have the Deals CRM (included in all Plus accounts and above), you will also be able to view any deals the contact currently has, or add new deals from within the contact record.

Delete and Merge Contacts
Within the single contact view, you also have the ability to delete or merge contacts. Deleting contacts deletes all of their information, so use this option carefully. You will receive a warning if there are any Deals connected to this contact.

If you select merge, a list of potential contacts you may want to combine will appear. You can also search your contacts in the search box. If you select a contact to merge, it will display any potential conflicting information and will give you the option to select which information you’d like to keep.

After you chose which information you’d like to keep, you will be presented with a warning box, letting you know which contact is being merged and will then be deleted.
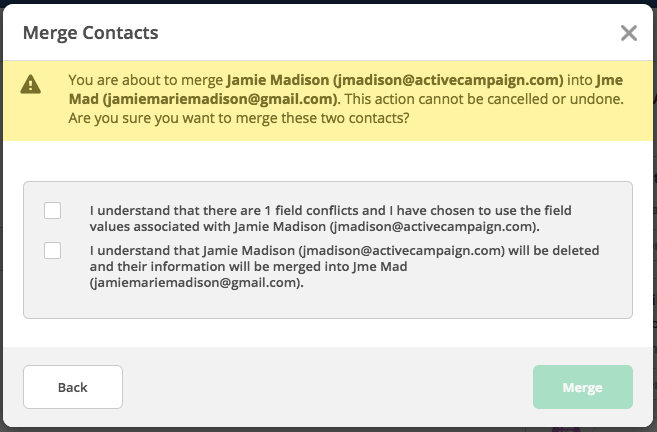
You must check both acknowledgment boxes to confirm and merge the contacts.
How to Update and Search Contacts
Returning to the Contacts tab, you have many options to edit, search, and filter. There is an “Edit All” option on the top left, enabling you to make an update to all contacts, when necessary. Clicking this button will take you to the bulk editor, where you can take several actions.
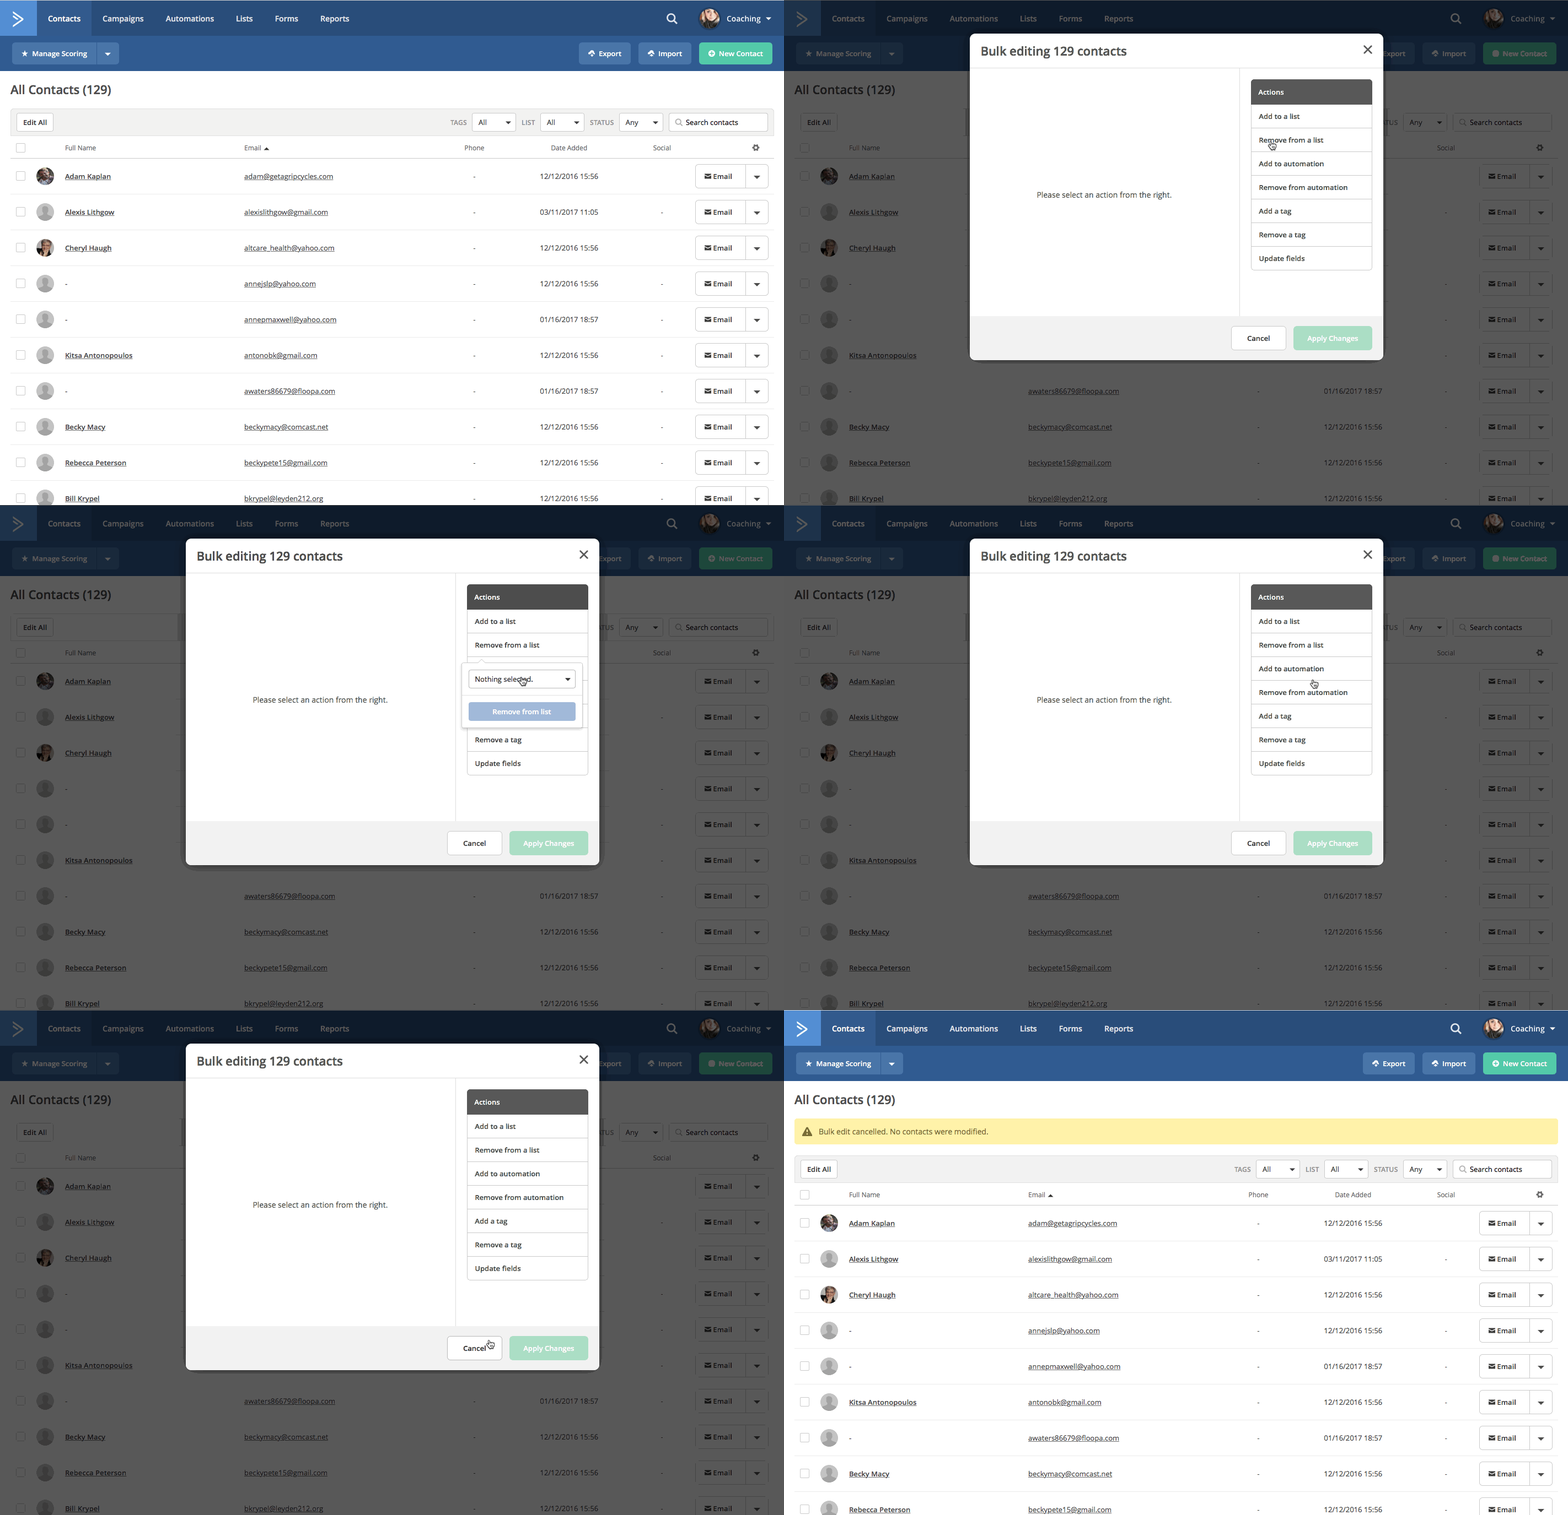
The bulk editor allows you to add or remove all of your contacts from a list, add or remove them from an automation, add or remove tags, and update fields.
You can also perform a bulk delete. If you have contacts you would like to remove from your database for any reason, you can perform a search. After you have your list of contacts, you check the small box in the upper left, and the option to “Delete” will appear.

As always, the system will confirm that you mean to take this action. Deleting contacts in this way will remove them from all lists.
The search bar above your contacts is small but powerful. You’ll find drop-down menus to search by all of your tags, lists, and by contact status. This allows you to narrow down your contacts and explore.

You can select one search criteria from each dropdown to narrow your search. The list will populate as you narrow your search.

You can also quickly and easily search your contacts for a particular person by using the “Search contacts” field in the upper right.

Advanced Contact Search
When you click in the “Search contacts” box, an “Advanced Search” option will appear below. Selecting this button will load our Segment Builder, on the top of the page, allowing you to create a segment group around very specific criteria. You can add multiple conditions to this search as well. This is a powerful function that enables you to create very granular searches.
For example, you may be interested in finding contacts who completed a form sharing their favorite topics on your blog, who also have a customer tag. These contacts, having made a purchase and shared what they’re interested in, will be among your most engaged contacts.

You also have the ability to “Add New Segment Groups” in this search, so if you’d like to add an additional group to your search, you can define that as well.

After you set your conditions, you will have the options to “Save as Segment” or “Save as Search.” This empowers you to create a new segment around your search conditions, or simply save the search criteria you’ve set. Creating segments in your search will allow you to target this segment later, in other portions of the platform.
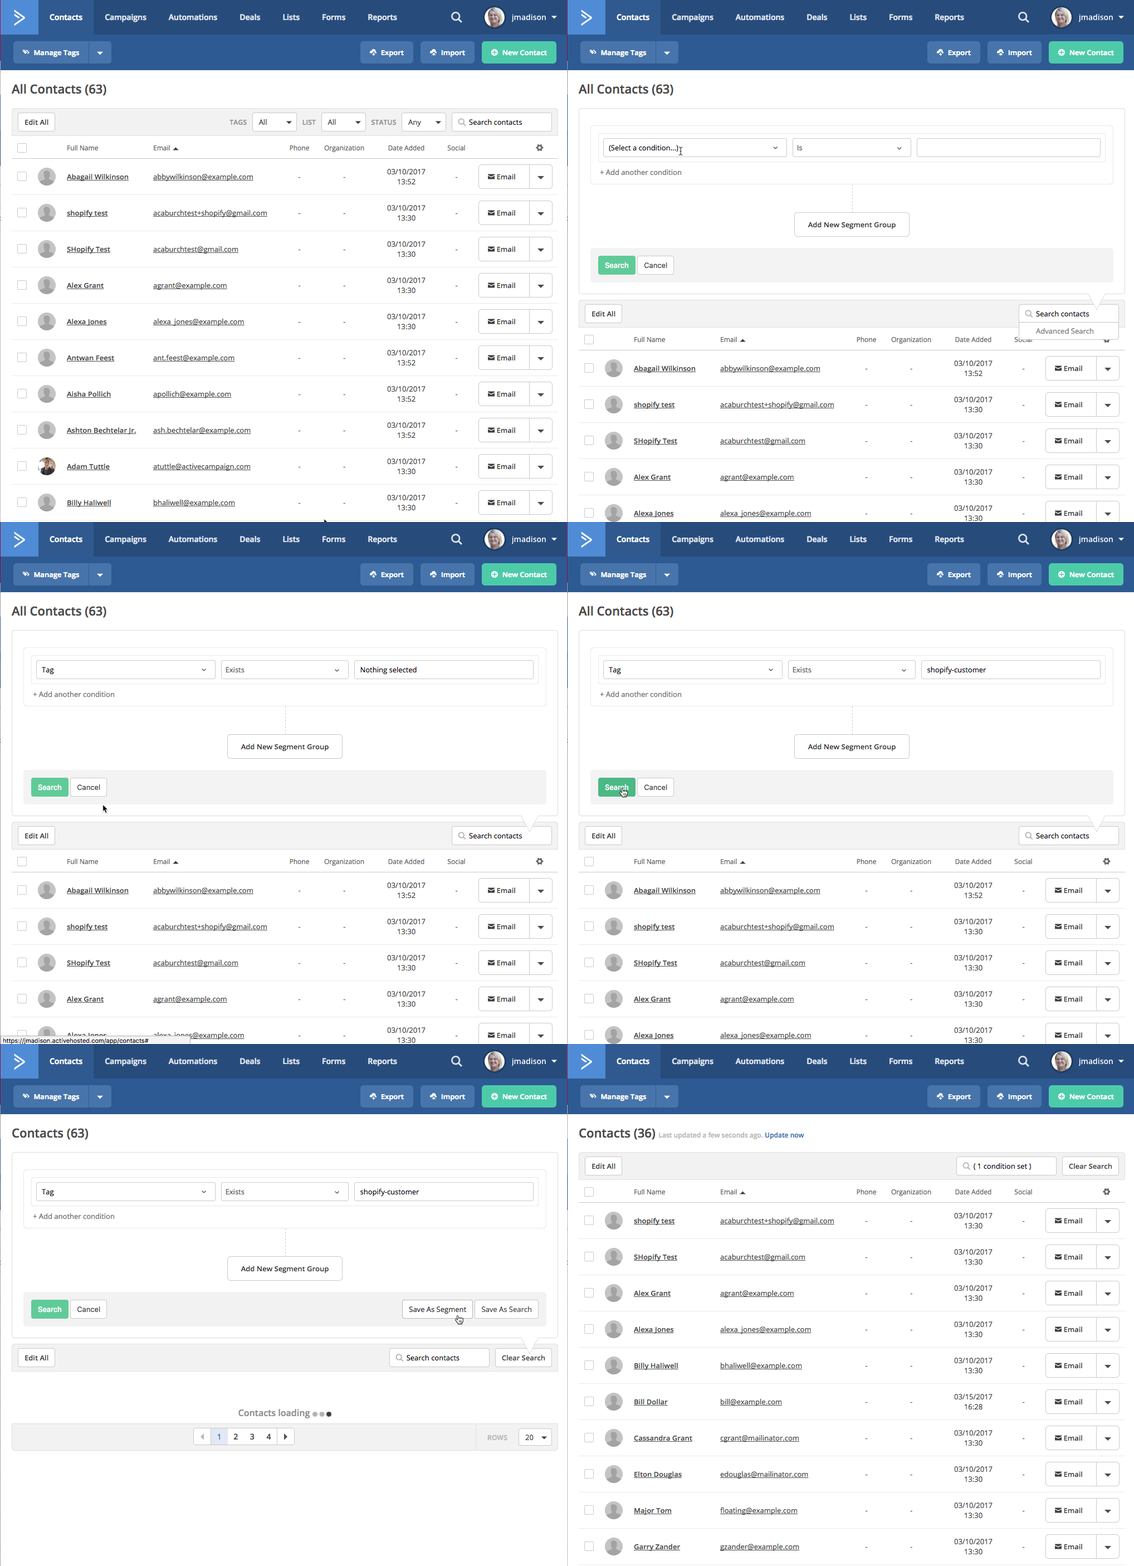
After you’ve submitted a search, all relevant contacts will be displayed, and the search bar will show you the number of conditions you’ve set.

Saved searches and segments automatically update as contacts meet the initial criteria, so there is no need to refresh them once they’re saved. ActiveCampaign will keep them updated for you. You can click on the “Clear Search” button to return to your full list of contacts.
Summary
Knowing how to navigate, update, edit and search your contacts is a vital skill. It will enable you to do contact research and potentially identify trends. The contact page records all of your interactions with your individual contacts.
What types of contact information are you capturing? What kind of searches have proven helpful? Let us know in the comments below.


